Kitchen & Appliances
pasta maker attachment cleanup for a small-kitchen pasta night
A practical small-kitchen pasta-night routine that gives two very different mixer attachments their own cleaning and storage path.
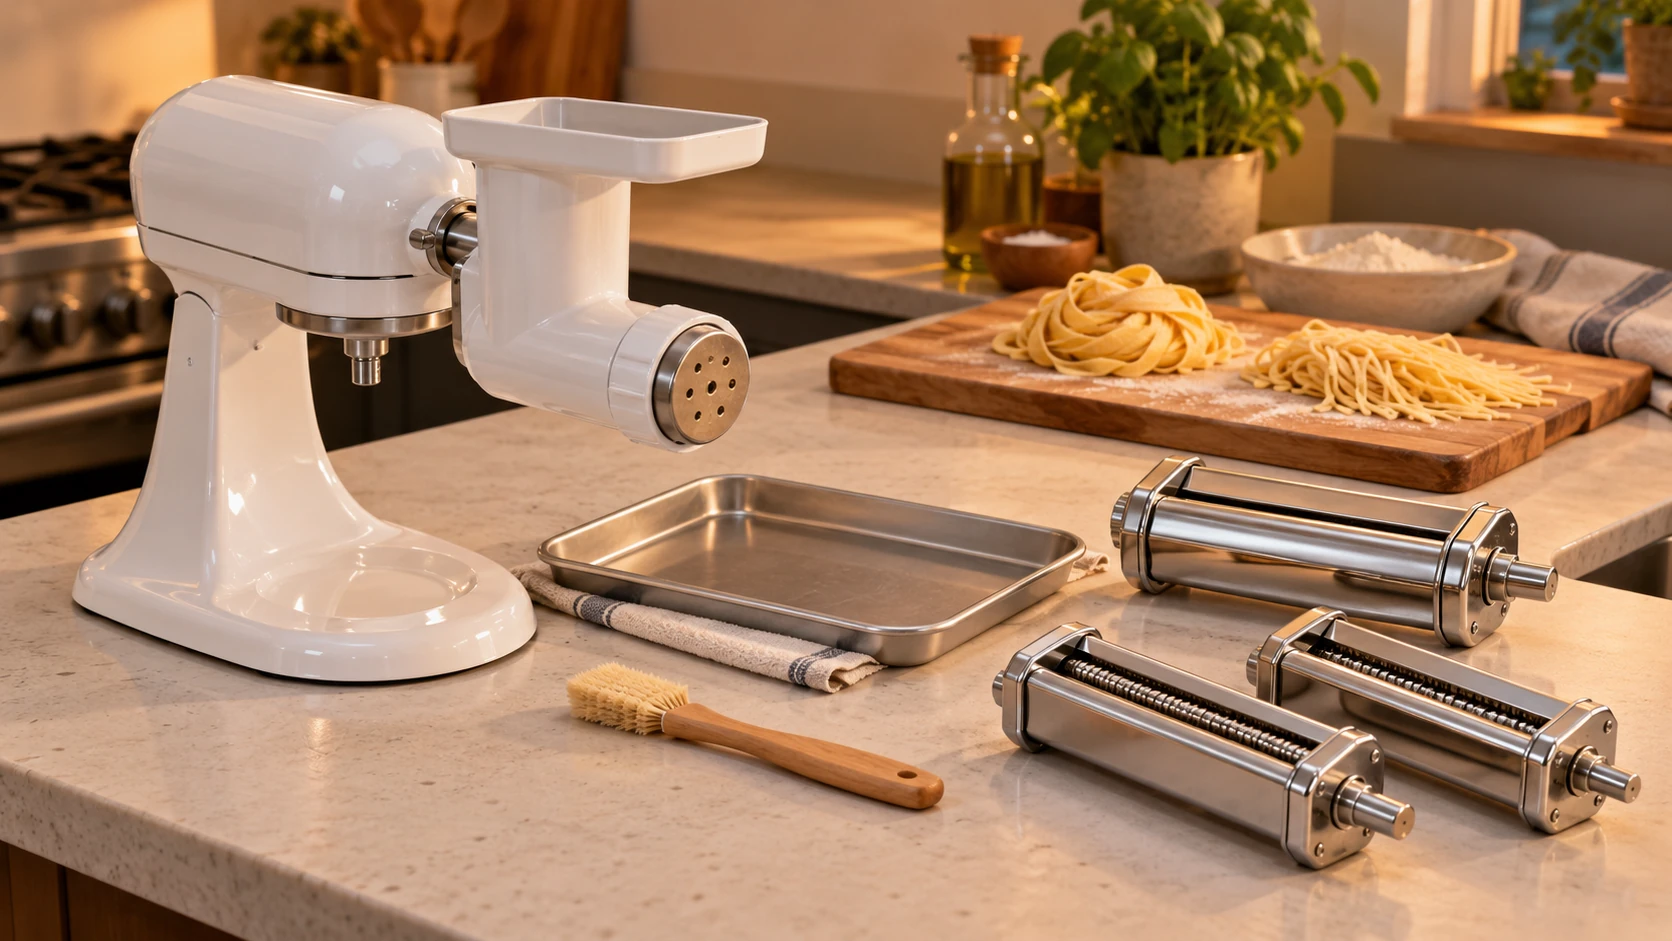
A homemade pasta night is pleasant until the counter fills with dough scraps, attachments, and pieces that still need cleaning. Pasta maker attachment cleanup is easier to manage when each part has a place before the mixer starts. In a small kitchen, a clear tray for used parts can matter as much as another stretch of worktop. Set up the evening so the attachment comes off the mixer, the dough dries or loosens according to its own instructions, and the clean pieces return to one marked storage spot.
Two current listings illustrate different equipment paths. The ZOURIH pasta press attachment is a white hub-driven press with several pictured shape dies and a cleaning brush. Its product title says dishwasher safe, while a gallery panel tells users to keep the power center dry. The three-piece pasta roller and cutter set shows a steel sheet roller plus spaghetti and fettuccine cutters; its gallery explicitly says the roller is not dishwasher safe. Those statements describe the listings, not a universal cleaning method for every piece in a delivered box.
Start with a counter that has room for used parts
Choose a dry area for dough work and a separate tray or board for attachments after use. A clean dish towel can mark the staging area, but keep it away from the mixer's moving hub and from any wet sink edge. Put a small bowl nearby for scraps, and leave a clear path to the sink. This keeps a used attachment from landing on the same space where the next sheet or serving plate belongs. If the kitchen has only one counter, make the tray portable enough to move to a table after shaping. Keep a second clean surface for the meal itself. The point is a deliberate handoff: food leaves the mixer area, used parts take its place, and serving dishes arrive only after that section has been cleared. You can arrange this without buying specialized storage or another appliance.
The press and roller set call for different staging. The press has a main body and pictured outlet pieces that can be laid out in a row as they come off. The three-piece set has separate cylindrical heads, so give each one a stable place where it cannot roll into a plate or off the counter. Keep the cleaning tools and the maker's instructions at the edge of the tray. A photo of the parts before the first use can help you return them to their original group after the meal.
Plan the flow of the evening around the counter space you actually have. You may make dough on one surface, shape it at the mixer, and move finished pasta to a second tray. If you cannot spare that second area, clear the first tray before starting another shape. The goal is to avoid placing fresh pasta beside a brush full of dry flour or a part with dough caught in its opening. Before you begin, look at the route from the mixer to the cooking pot. Move cords, recipe cards and fragile dishes out of that route. Put the serving bowl where it can wait without blocking the attachment tray. A small kitchen can handle a lively meal when each object has a temporary location, even if the locations change once the pasta is cooking.
Keep the pressing and rolling routes distinct
A press moves prepared dough through a chosen outlet. The ZOURIH gallery shows a hopper, a powered end that attaches to a stand mixer, and several removable white shape pieces at the outlet. A roller set flattens a sheet first, then a separate cutter can make strands. The unbranded three-piece gallery shows the sheet roller and two cutters as separate attachments. Those visible arrangements explain why a single cleanup sequence would be awkward: a press outlet can hold dough in small openings, while a roller has long narrow surfaces.
Before choosing a shape for the evening, check the delivered kit rather than relying on a gallery count. Lay out each supplied die or cutter and compare it with the actual maker instructions. The listing pictures show what the seller advertises; they cannot establish that an individual box arrived complete. If a needed component is absent or looks damaged, leave it out of use and ask the seller or maker about that exact item.
The existing stand-mixer pasta attachment compatibility guide covers the separate decision of matching a maker and attachment to the mixer. This article starts once the compatible equipment is on the counter. Do not use a photograph of a red mixer in the roller listing as proof that the mixer is included or that your own model fits. Follow the actual attachment and mixer instructions before fitting or changing any head.
Give dough a sensible exit path
Decide where shaped pasta will go before you switch on the mixer. A clean board, tray, or drying arrangement suited to your recipe keeps the outlet clear. Keep hands and tools out of moving openings, and stop the mixer before changing an attachment or clearing a jam. Use only the pusher or other tool supplied and described for the exact press. The gallery may show a method, but the delivered manual controls operation. Give one person responsibility for the mixer and leave enough space for another person to move the finished pasta. If you are cooking alone, stop the mixer when you need both hands for a tray or pot. Prepare the receiving surface so you are not searching for it with an outlet already full of dough. Keep the evening relaxed by making fewer changes of attachment than the available shapes might tempt you to try.
If dough begins to stick, note where it happens. A sheet may cling to the smooth roller, or cut strands may remain joined after passing a cutter. The pasta dough sticking guide handles that troubleshooting question in detail. Here the practical point is to keep the affected attachment on its own tray after you stop, so the residue is not brushed into fresh dough or mixed with parts from the other head.
A shape change is a good moment to contain the mess. Stop and disconnect the mixer as the maker instructs, then move the used die or cutter to its tray before bringing out the next one. Keep scraps in the nearby bowl. You do not need to solve every dough issue while dinner is underway; a note about which head and stage caused trouble is more useful than hurriedly probing an outlet.
Clean each attachment by its own instructions
Read the care section for the specific delivered part before bringing it to water. The ZOURIH press listing gives mixed signals: its title uses “dishwasher safe,” while a gallery image says “Keep Dry” beside the power center. Treat that as a part-specific question to resolve from the supplied instructions or maker. Do not place the whole press in a dishwasher based on the title alone, and do not immerse a drive end merely because another pictured piece appears removable.
The roller-set gallery is more direct about one restriction: it says “Not Dishwashsafe” beside the steel roller and shows a cleaning brush. Use that statement as a warning against assuming dishwasher cleaning. Check whether the delivered instructions distinguish the roller from the cutters, and follow their method for removing dough. A stiff tool or running water may damage an attachment if the maker does not permit it. The product image cannot replace its cleaning directions.
Arrange the used parts where they can cool and dry as directed, beyond the reach of a child or someone preparing food on the same counter. A brush may lift residue from an allowed opening once the attachment is safely stopped and detached. Avoid poking into a powered hub or reattaching a damp piece for a quick test. If dough remains in a place you cannot access by the documented method, contact the maker rather than dismantling a sealed mechanism.
Clean the tray and work surface separately from the attachment. Move dough scraps to disposal, wipe the area used for shaping, and wash any ordinary food-contact tools by their own instructions. Keep water away from the stand mixer's electrical parts. When the counter is dry, check the attachment parts against the set you laid out before dinner. It is much easier to notice a missing die or brush now than at the next meal. Check the counter lip, sink edge and dough tray before anyone starts clearing the room. Small white press pieces can blend into flour or a pale towel. Put each part back with its own set as soon as its permitted cleaning and drying are finished. A final sweep of the work area also separates ordinary cooking utensils from the dedicated attachment tools.
Store a complete, dry pasta-night kit
Give the press and roller pieces separate storage groups. A labeled container for the press's dies and brush keeps small outlet parts from drifting into a drawer of unrelated utensils. The roller and two cutters can sit together with their instructions, provided the actual storage method does not put weight on a delicate opening. Do not force an attachment into a too-small box merely to save shelf space. Think about how the kit will come back out: the first part you need should be easy to identify without emptying the entire cupboard. Keep the brush where it can dry and where its bristles will not be crushed by a heavy head. A paper note inside the container can record which component needs dry brushing or a maker-approved wash method. That note is a reminder to consult the actual instructions, not a replacement for them.
Before closing a container, confirm each piece is dry by the method its maker specifies. A damp tool tucked against steel or plastic can make the next use unpleasant even if the outside of the box looks tidy. Keep any serial or model information with the instructions so a future replacement-part question has a clear identity. The unbranded roller listing has a seller SKU, but that alone does not establish the exact maker of every component in a delivered set.
For the next pasta night, place the clean tray, scrap bowl, instructions, and chosen attachment on the counter first. That small preparation leaves the rest of the evening for cooking and conversation. Pasta maker attachment cleanup then follows the same route every time: separate used parts, follow their individual care directions, and put the dry kit back together before clearing the counter.