Cooking & Food Prep
Measuring baking ingredients: choose and fill cups and spoons
Match the recipe ingredient and its directions to the measuring action, while keeping product-label, supplied-part and calibration questions separate.
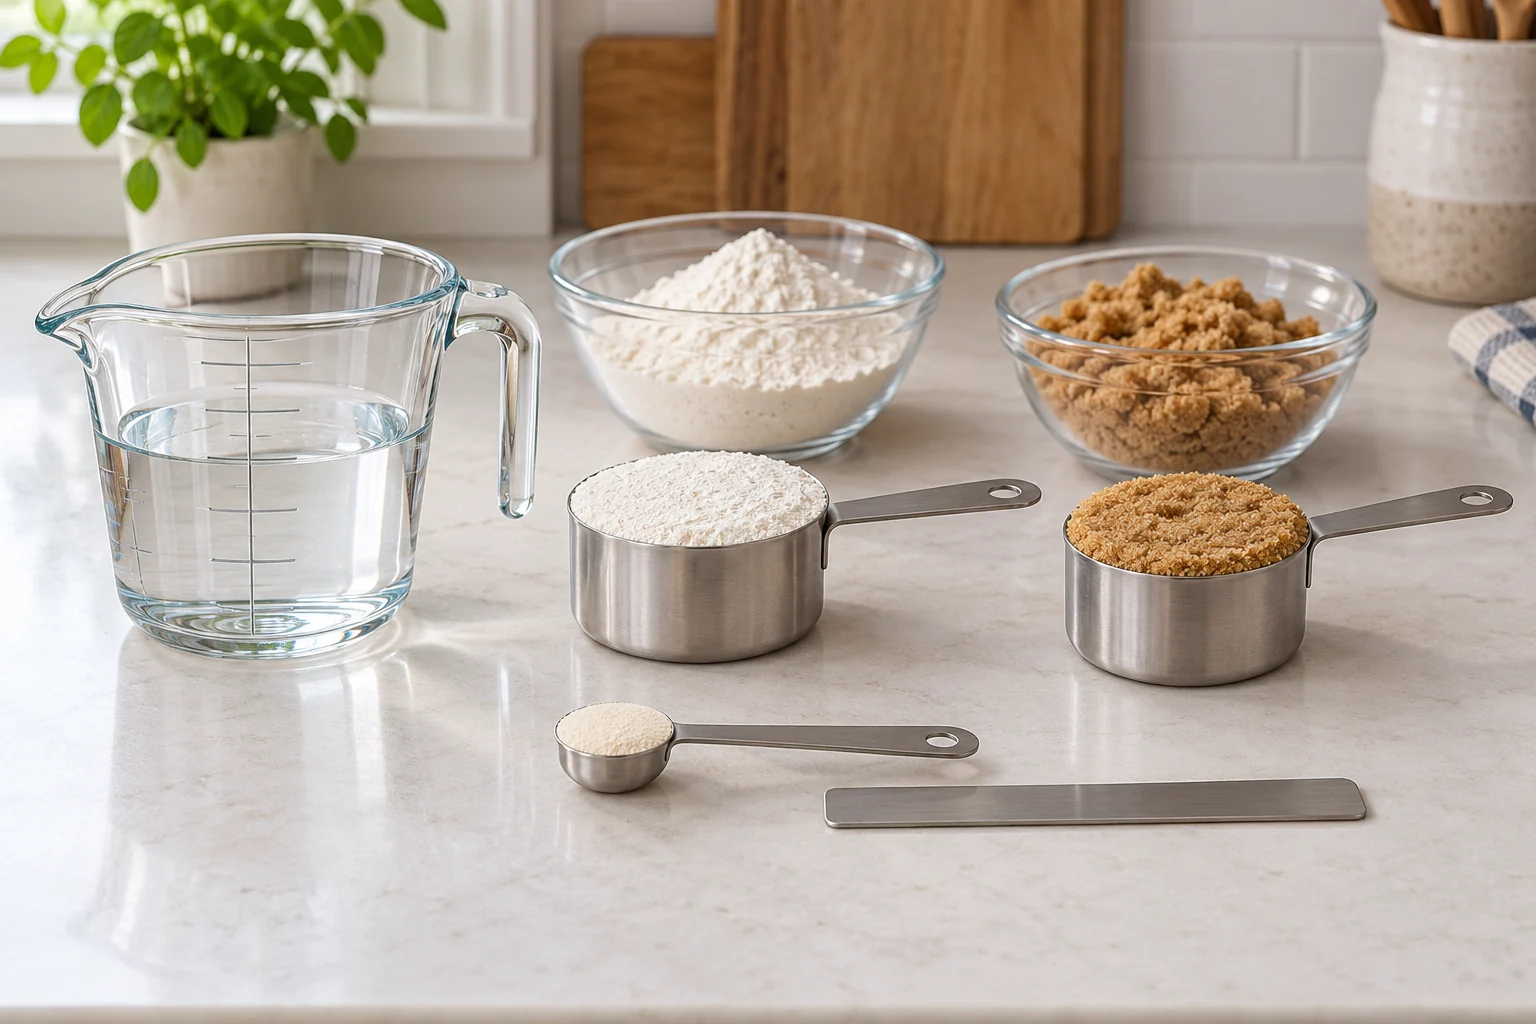
Measuring baking ingredients starts with the instruction beside the ingredient, rather than a habit of filling every tool the same way. Before beginning, identify what the recipe asks you to measure and how it says to prepare that measure. This guide follows several different physical tasks with cups and spoons. It does not change the recipe’s quantities, calculate a new yield or turn one ingredient’s volume into another ingredient’s weight.
Choose one recipe you intend to follow. For each measuring step, look for a stated ingredient, a stated measure and any word that changes the action. If that instruction is incomplete, leave the question open instead of creating a more convenient version. The aim is to choose and carry out the appropriate measuring action, not build a new recipe or a complicated preparation-record system.
Check which clear cup the offer actually describes
The Pyrex Prepware 1-Cup Measuring Cup offer describes a clear cup in a pack of 36, with UPC 752798341482. Its four original gallery images picture a single handled, spouted clear cup with red graduations and a visible pyrex label. Keep the written package quantity beside the pictured form. The photograph of one cup does not establish that the order supplies one household item instead of the stated pack.
The handle, spout and markings are integral features of the pictured cup, rather than evidence of separate supplied accessories. The saved listing and images do not independently authenticate its calibration, material formulation, heat resistance or delivered count. They also do not establish every printed equivalence as correct. If the order unit or the instructions for the exact delivered item determine your purchase, obtain those answers before treating this offer as the measure for your kitchen.
Read the measuring set as several tools, not one photograph
The 20-piece stainless measuring cups and spoons set is cataloged under petgle and described for dry and liquid ingredients. The ten original gallery images show nested metal cups, spoons, a separate flat leveler, two organizing rings and a conversion-reference tag. Several composites also picture transparent jugs, whose supplied status is unresolved. The leveler has a separate scraping role; the rings organize the set and the tag is a bundled reference insert. The written description names eight cups, eleven spoons and one leveler. Pictured extra vessels do not silently amend that inventory or certify the contents of a shipment.
AIKEXIN appears on a pictured cup without establishing a maker relationship to petgle. Conflicting cup-to-milliliter relationships also appear across the artwork. Do not choose one to certify the others, promise that the pictured jugs arrive, or treat catalog dry/liquid wording as a calibrated measurement result. Metal measures are not declared incapable of holding liquids. This guide uses the offer to identify tools and unresolved order conditions, while the measuring methods below retain their own source and recipe limits.
Read a clear liquid measure while it rests on the counter
King Arthur Baking’s dry-versus-liquid measuring-cup guide describes clear liquid measures for self-leveling ingredients such as water, milk and oil. It recommends setting the cup on the counter, reading at eye level and looking at the bottom of the meniscus, the curve at the liquid’s upper surface. Its stated reason for resting the cup is that holding it lets the contents slosh. This is guidance about the approach, not a test of the two selected products.
For a simple clear-water practice, place an appropriate graduated cup on a flat, level surface and find the intended mark. Bring your eye to the liquid’s height instead of lifting the cup. Compare that view with the tempting glance from above, then make the reading from the prescribed position. The comparison illustrates viewing position; it does not prove that any printed scale is calibrated. For an actual recipe ingredient, follow the applicable recipe and tool instructions rather than transferring this water exercise to every possible liquid. If you are still looking downward after repositioning, adjust your viewing position again before deciding that the curved surface meets the intended line.
Use a dry-cup practice for granulated sugar
University of Maryland Extension’s kitchen-skills publication presents an educational exercise for adults or older siblings helping youth. Its dry-measuring practice uses white granulated sugar or cornstarch, rather than recommending flour for practice. The exercise begins with a dry measuring cup on a flat surface. The cup is filled beyond the top, then held over a plate, bag or bowl while a flat straight edge removes the excess until the ingredient is even with the rim.
That procedure shows what the top edge means for this particular dry-cup exercise. The excess above the rim is removed; it is not part of the finished measure. In this practice, compare the overfilled cup with the finished level top so you can recognize the endpoint before transferring the portion. Notice the difference between filling the cup and finishing its top before using the portion. Keep the practice within the publication’s stated ingredient and educational context. It supplies no universal instruction to compress every dry ingredient, no supervision program from this article and no evidence that a selected retail cup holds its advertised amount accurately.
Fluff, spoon and level flour instead of packing it
King Arthur Baking’s separate flour-measuring article explains that how densely flour fills a cup affects a volume measure. For flour measured by volume, its method is to fluff the flour in its bag or container, spoon the loosened flour into the measuring cup until it overflows, and use a straight edge to make the top even with the cup. Keep those actions together rather than borrowing only the final leveling step after compressing the flour. The straight edge follows the cup’s top; a rounded heap above that edge is not the described finished measure.
Imagine a cook who has already pushed flour down to make room for another scoop. Simply sweeping the top afterward would not reproduce the described loose-filling method. Restart that measurement using the recipe’s applicable method instead of calling the two preparations equivalent. This illustration concerns the method, not a prediction about the cook’s finished cake. Use the recipe’s stated weight when it gives one; this cup procedure does not define a universal weight for flour.
Let the recipe determine how brown sugar is packed
Mississippi State University Extension’s HappyHealthy dry-and-solid measuring guidance distinguishes brown sugar by the recipe’s packing language. Spoon it into the measure and press lightly when the recipe specifies lightly packed. For packed or firmly packed brown sugar, the guidance describes pressing more firmly to fill the air spaces, then leveling at the cup’s top. It says the packed sugar should hold the cup’s shape when turned out. These instructions do not make “lightly” and “firmly” interchangeable. Read that packing word before beginning. If the recipe specifies lightly packed, retain that particular instruction; the example of a firm molded portion is not a reason to press harder than the recipe asks.
The same work addresses dense semi-solids such as softened butter, margarine and peanut butter: spoon them into the cup and press to avoid air pockets, continuing until it is full, then level at the top. These are ingredient-specific procedures from one source, not an instruction to compress flour or a substitute for a recipe’s preparation requirements. Neither a smooth-looking top nor a metal cup photograph independently verifies the tool’s capacity.
Identify the spoon and finish the dry measure before adding it
King Arthur Baking’s measuring-spoon article treats small amounts as a separate task. It describes filling the chosen spoon and leveling a dry portion with an appropriate straight edge before putting it into the bowl. Read the actual measure on the spoon you selected; a nearby spoon on the same ring is not the one in your hand. The native set’s organizing rings do not establish that the small measure you need is present, readable or calibrated.
The article also suggests considering dry measurements before wet ones so a wet spoon does not make the next dry ingredient cling. Apply that suggestion only where the recipe’s addition sequence permits it. Do not rearrange a recipe merely to keep one spoon convenient; use an appropriate clean, dry measure when the required order needs one. The useful distinction is the spoon’s stated measure and the action needed before its contents are added. Where the set permits easy separation, the source suggests detaching spoons so the unused ones do not dangle during measuring. Follow the actual organizer’s design rather than forcing an unfamiliar ring.
Keep butter-wrapper markings specific to their maker
Land O’Lakes’ butter FAQ states that its butter-stick wrappers are marked in tablespoons. When using that exact product for a recipe stated in tablespoons, identify the relevant wrapper marks rather than automatically transferring the task to a cup. The wrapper is a product-specific measuring aid in that statement. A different package, an unmarked portion or an ingredient described only as butter does not acquire those markings through this FAQ.
The FAQ’s accompanying stick-and-cup conversion table is not used here. It does not supply a cup-packing method or permission to substitute a different fat. Keep this narrow wrapper example separate from Mississippi’s dense-solid cup guidance: they address different ways an ingredient may be measured under the applicable recipe and product directions.
Leave recipe arithmetic, scale operation and bowl layout with their own guides
The published mixing bowl prep station guide arranges bowls by recipe stage, reach and cleanup. It concerns where prepared portions wait. The present decision is which physical measuring action suits an ingredient instruction, without turning that action into a counter-layout or handoff system.
The published kitchen-scale tare guide explains a displayed zero relative to a bowl and successive ingredients. Use it when the task is understanding a scale reading. Cup and spoon procedures do not establish a scale’s controls, capacity, calibration or a relationship between weight and volume. If the recipe gives a weight target, use its applicable weighing method instead of replacing that instruction with a familiar cup. A scale mode labeled for liquids is not evidence that every ingredient has the same weight for a particular volume. Keep the actual recipe unit visible and leave any proposed alternative unresolved until the recipe or appropriate guidance establishes it.
Finish by matching the action to the instruction
Return to the particular recipe you chose. Can you identify the ingredient instruction you are following, the actual tool you intend to use and the relevant method from the sections above? If two methods still seem possible, resolve that question with the recipe or product instructions. Do not settle it by choosing whichever action gives the tidiest photograph or lets a new purchase feel complete.
A proposed order can remain undecided while you make that assessment with an existing appropriate tool. Compare what you need with the exact offer, including any unanswered quantity or supplied-part question. The goal is a usable answer about the measuring task and the goods you intend to buy. Neither a long accessory list nor a familiar-looking mark has to stand in for an answer that the evidence has not supplied.
Review the exact order before a cryptocurrency payment
If you decide to buy measuring tools through republeq.com, first check the payment methods and instructions offered for that exact order. USDT and other cryptocurrency references in a catalog do not establish a transaction-specific receiving address, supported network or final amount. Begin with the selected product record and basket, and confirm that the order reflects the quantity you actually intend to purchase. A familiar product photograph does not answer an unresolved question about a pack description or a pictured accessory. Ask the merchant to clarify any condition that determines whether you want the item before authorizing payment. If another household member will pay, share the actual order reference and the question you have resolved rather than sending only a screenshot of the cover image. The person making the decision should be able to connect the proposed payment with the goods they intend to receive. Read the transaction’s current instructions and resolve unfamiliar or incomplete information through the merchant’s published process. Do not copy payment details from an unrelated order or assume that a prior purchase establishes the conditions for this one. Keep the order record and payment reference together after authorization so you can identify the transaction if a question arises later. On delivery, compare the item and supplied contents with the order and obtain the applicable instructions before use. A payment record establishes neither calibrated measurement nor a relationship between different labels in a gallery. It also cannot turn an uncertain pictured component into a confirmed supplied item. Those remain questions about the goods and their evidence. You can assess the recipe’s measuring method with existing suitable tools while leaving a new purchase undecided until its material questions are answered.