Outdoors & Mobility
Christmas pathway lights layout guide for a clear holiday welcome
Choose a short festive pathway-light run that preserves access, respects connected spacing and is practical to maintain.
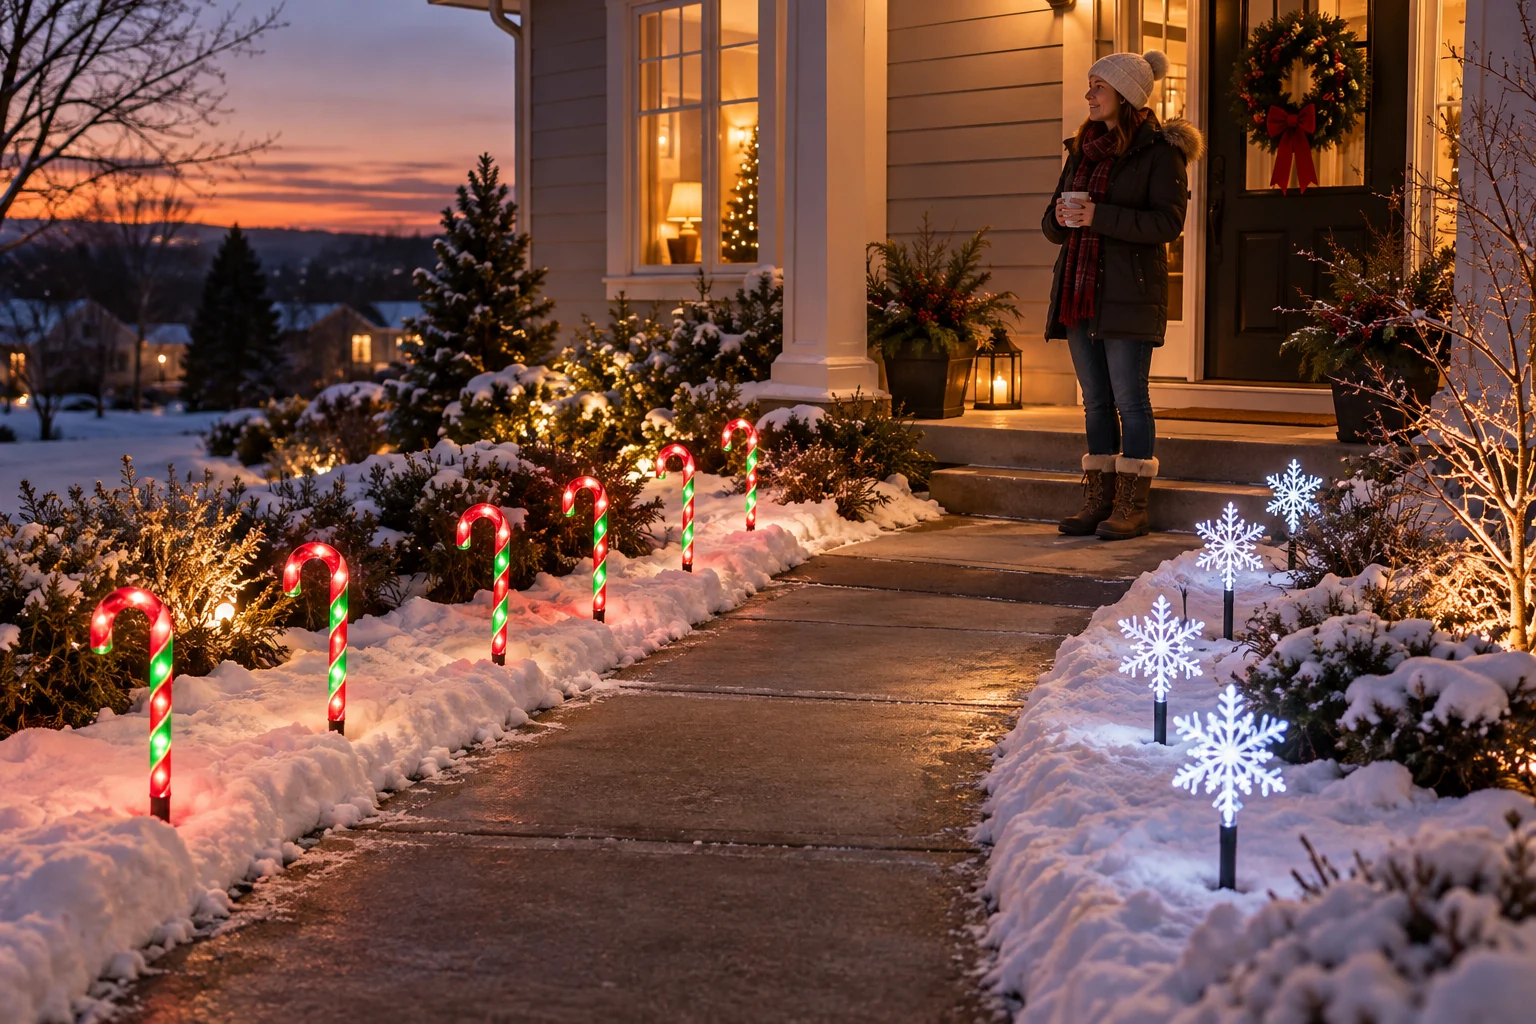
A festive path should still read as a path when the lights are off. Before placing stakes, walk the route from the street or driveway to the door and note the clear space people actually use. This Christmas pathway lights layout guide uses two different seasonal marker styles to plan a modest display around access, outdoor power and winter maintenance. Decorative lights can help identify an edge, but they are not a substitute for the property's normal safe walking illumination.
Decide which single stretch matters most: the turn from a driveway, the approach to a porch, or a short garden walk that visitors can see. A continuous line across every edge is rarely necessary for a small display. Observe steps, uneven paving, snow storage, door swings and places a person might step aside. Keep cords and stakes out of the walking surface, and use current product and outlet instructions for all outdoor electrical decisions.
The ornament storage fit guide treats decorations as physical objects that need measured space after the holiday. The windowsill herb-corner guide starts from reachable room space before selecting a decorative arrangement. This guide applies those ideas outdoors: first protect the usable route, then select a repeatable light rhythm and plan how the stakes will be removed and stored.
Choose an edge and a visual rhythm
Stand at the usual arrival point and look toward the front door. Mark where a visitor should turn and where the path narrows. Place a tentative row along one side with ordinary nonpowered markers before installing anything. A one-sided row can define the route while leaving the other side available for passing, sweeping or snow removal. If you want lights on both sides, check the actual path width and keep the center visibly open.
The candy cane pathway-light listing describes eight red-and-green markers with a total of 48 LEDs. Its native copy presents them for driveways, garden paths, porches and patios and calls the plastic tubes weather resistant. That does not establish a safe cord route or a specific electrical rating for every yard. Treat the set as a repeated color accent and confirm the exact power system and outdoor instructions before placing it.
The snowflake pathway-light listing describes ten cool-white markers, each 20.3 inches tall including its stake. It says the lights are spaced 39 inches apart and joined by a globe-light string. That linked spacing makes the set behave differently from individual markers: the strand's length and route should shape the layout, rather than forcing the cord across a walkway to meet a decorative sketch.
Choose a dominant style for each short section. Candy canes create repeated red-and-green vertical cues; snowflakes create a cooler white line with visible connections between markers. Combining them can work when one marks the approach and the other frames a porch garden, but alternating every marker may make the edge visually busy. Lay out the full set unpowered in daylight and judge the view from the entry as well as the street.
Measure the route before counting stakes
Measure the usable edge, not just the sidewalk's centerline. Note bends, shrubs, existing landscape edging and places where snow is usually shoveled. An eight-marker package does not tell you how far an unspecified connected set will span; inspect its actual cord and spacing information. The snowflake listing gives a 39-inch interval, but count the gaps between markers rather than multiplying ten by the interval without checking where the first and last lights sit.
A simple paper sketch helps. Draw the door, outlet, clear walkway and any steps. Mark the intended start and end points for each light run. Write the measured distance on the sketch and leave space for plugs, connectors or a controller as required by the exact product. Do not stretch a connected strand taut to reach a decorative endpoint. If the run is too short, reduce the decorated section instead of placing a cord where people walk.
Check the stake location in daylight. Soil, grass, frozen ground, gravel and pavement do not accept the same support. The snowflake listing says to attach its stakes and press them into soil or grass without tools; it does not authorize driving those stakes into concrete or a buried utility area. A candy-cane product photo shows a snowy yard, but a photo is not an installation manual. Follow the supplied assembly instructions and stop if a stake or cable must be forced.
Keep decorations out of a door's swing and away from handrails, mail access and normal deliveries. A stake can look low from the street while still catching a bag or shovel near the porch. Walk the route after the mock layout, carrying what visitors commonly carry. If a marker obstructs the path, move it farther into a permitted planting area or decorate a different edge. Visible light should not cost a usable entrance.
Plan outdoor power without crossing the path
Identify a suitable outdoor power source using the light maker's instructions and the property's electrical setup. Check the actual labels for outdoor use, connector compatibility and allowed extension arrangements. Do not assume that weather-resistant decorative tubing makes its plug or controller safe in standing water. Keep connections off the walking surface and away from drainage spots. If the available outlet cannot support a safe route, choose a shorter display or another location.
The snowflake listing describes a low-voltage system controlled through its plug, eight lighting modes and a timer that runs six hours on and eighteen hours off. Those features do not remove the need for a suitable outdoor connection. Place the controller where its maker permits access and protection, not beneath snow or a wet mat. The native copy's overheating and waterproof claims are seller descriptions; rely on the exact product markings and instructions for electrical limits.
Do not splice sets or assume two holiday products can share a connector because both use LEDs. Their voltage, polarity and controller designs may differ. Use each supplied power arrangement as directed. Keep a record of which adapter belongs to which strand for takedown and next year. A loose, damaged or warm-to-touch connector needs the manufacturer's guidance or replacement, not a cosmetic wrap that hides the condition.
Arrange cords before turning the lights on. A cable that is easy to see in daylight can disappear under leaves, snow or darkness. Look from the sidewalk and from the direction of snow removal. If a cord crosses a route people must use, change the display plan. This article does not provide electrical installation instructions; a qualified person should assess any outlet, wiring or fixture problem beyond the permitted plug-in setup.
Use modes and color to support the route
Preview the lights at dusk from a normal visitor's distance. A steady setting can make the edge easier to interpret than a fast chasing pattern near a step. The snowflake listing offers eight modes; choose one that suits your location and local expectations. A timer can help keep the display predictable, but check when it starts after a power interruption. The light row remains decoration, so preserve the porch or path lighting that normally supports safe movement.
The candy-cane gallery shows a dense, colorful holiday scene with other house lights. Your yard may be smaller, darker or shaped differently. Do not copy the photograph's stake density without measurement. The snowflake gallery shows controller instructions embedded in a promotional image; use the actual delivered instructions to confirm button behavior. Images help identify visual style, while the product's current manual controls setup and electrical use.
Consider how the display looks to someone arriving from a car and someone already walking beside it. Red-and-green candy canes may read as a vivid border from farther away; cool-white snowflakes can define a quieter section near the porch. If you mix them, leave a visual pause at a turn or planting bed so each style has a clear role. A small deliberate run usually looks more coherent than several interrupted runs.
Before buying or assembling a second set, decide which run will remain complete if one package is unavailable. A short uninterrupted line by the porch may work better than a longer line that stops abruptly at a turn. This is especially useful with the linked snowflake strand: its stated marker spacing and connector positions limit where a neat boundary can begin and end. Candy canes offer a different visual unit, but the listing does not establish that every marker is independently movable on its cable. Inspect the delivered arrangement rather than assuming that freedom.
If children or pets use the yard, assess the display from their reach and travel patterns as well as an adult's view. Keep decorations away from play areas and common shortcuts. A stake that looks stable in a product photo can be pulled sideways by a running child or a pet leash. This is a placement judgment, not a claim about the strength of either listed product. Follow the makers' warnings about supervision, small parts and electrical access.
Make a simple maintenance note for the season: inspect after wind, check that the controller remains accessible, and confirm that the normal path lights still work. If the display is on a timer, make sure it does not switch off the only lighting people rely on to reach the door. Consider neighbors and road users when choosing brightness or flashing modes. The best mode is one that suits the location without distracting from steps, turns or vehicle movement.
Check winter access and the end of the season
Winter changes the edge after the first layout. Leaves can pile around a stake, snow can hide a low cable, and a shovel can catch a strand that was clear in autumn. Reinspect after weather and after routine yard work. Move or remove any decoration that creates an obstruction. The product descriptions say the markers are intended for outdoor use, but that does not promise each will remain upright in every storm or soil condition.
At takedown, switch off and disconnect the set according to its instructions, then remove stakes without pulling on the cable. Let wet components dry as the maker directs before storage. Keep each set's adapter, controller and instructions together. The ornament-storage guide can help with box dimensions and shelf fit, while these connected light sets also need loose cable loops that do not strain plugs or bulbs. Record any damaged part instead of packing it as ready for next year.
Make one final daylight walk before the display goes live: the entrance is open, stakes stand outside the traffic line, cords follow a permitted route and the power arrangement matches the exact product. Then make a dusk check for glare and visual continuity. If any of those checks fails, shorten or relocate the decorative run. This Christmas pathway lights layout guide aims for a clear holiday welcome that fits the actual yard and leaves its normal use intact.