Furniture & Home Organization
Cabinet knob screw compatibility: check one real drawer first
Measure a single-hole front and verify the delivered knob, screw thread and reach in one gentle sample assembly.
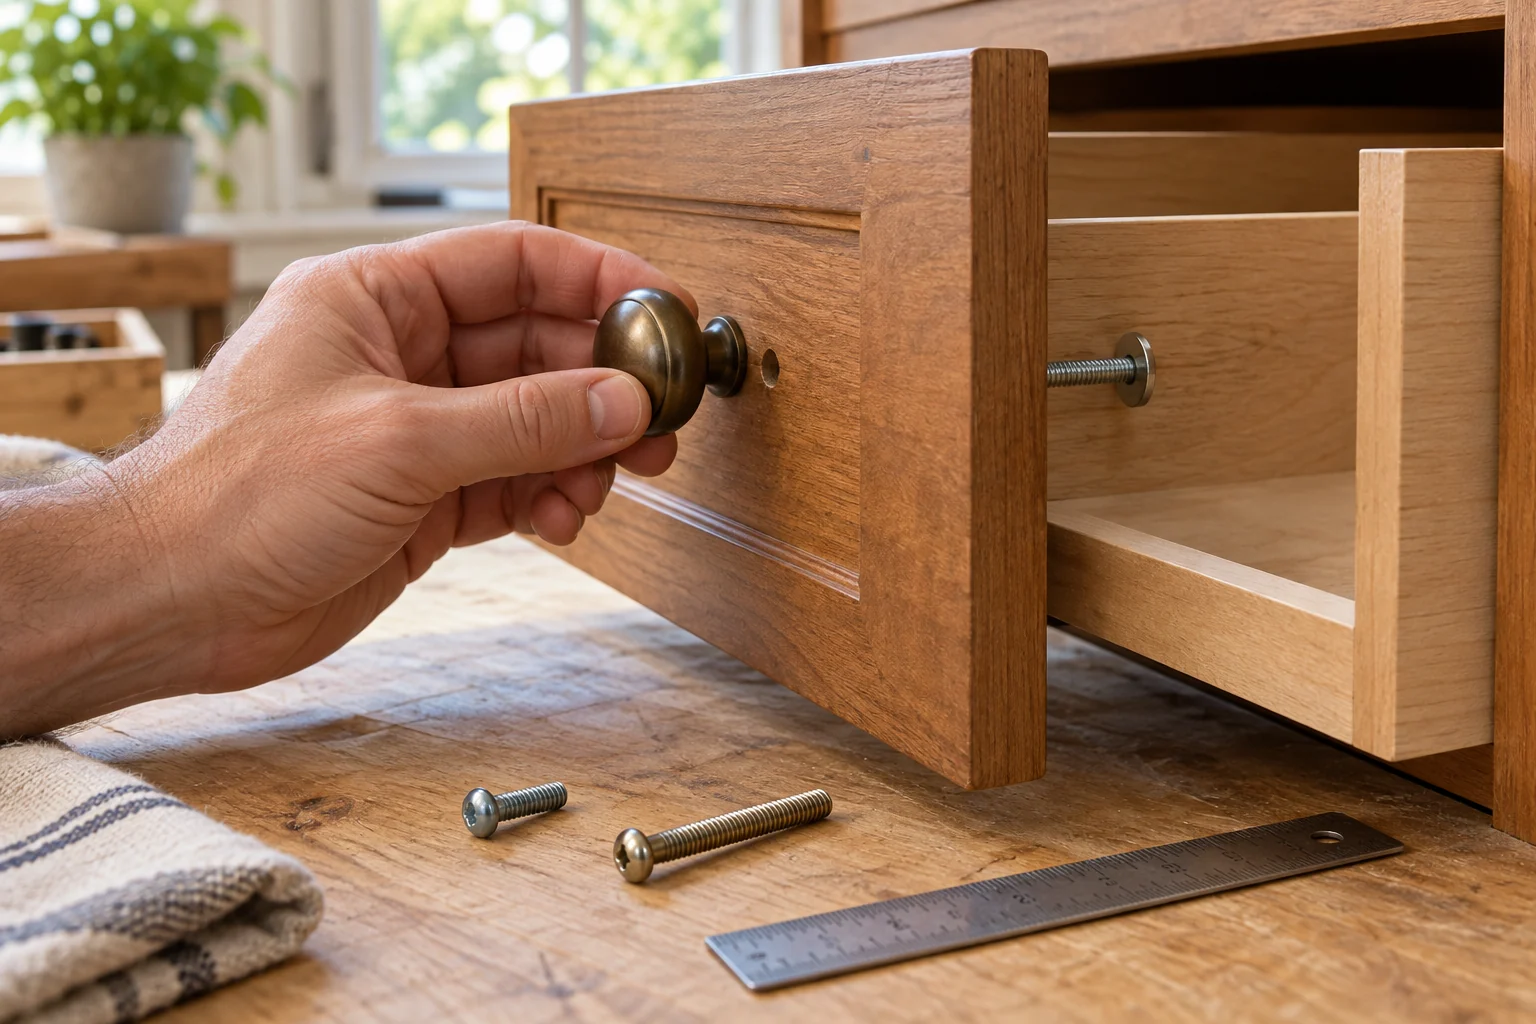
A cabinet knob can look right on the front of a drawer while its mounting screw fails to reach the socket, bottoms out before the knob is tight, or damages the thread. Cabinet knob screw compatibility is a three-part match: the actual door or drawer-front thickness, the knob's threaded opening, and the fastener's usable length and thread. A pack photograph cannot settle all three. Measure one real location, identify the delivered knob and screw, and test the connection gently before ordering enough hardware for every opening.
Start with the existing opening, not the pack count
Choose one representative door or drawer that you can access from both sides. Note whether it has a single hole for a knob or two holes for a pull. The public guide on cabinet-pull center-to-center spacing owns the two-hole case. A single-hole knob does not become a two-hole pull because the handle in a product image looks long. This article stays with a single-hole cabinet knob and the screw that passes from inside the front into its threaded base.
Measure the thickness of the actual door or drawer front at the hole. A recessed panel can be thinner than the surrounding frame; a decorative overlay can make a drawer front thicker than it first appears. If you can remove the old knob without damage, keep its screw with it and measure the screw separately. Do not assume the old screw fits the new knob merely because both are sold as cabinet hardware. Its thread may differ, or its length may suit a different base depth.
Write down which side the screw enters from and whether the inside surface has a countersink, washer, or thick backing piece. The fastener's head must seat correctly on that inside surface while the other end engages the knob without bottoming out. If the front is uneven or layered, measure the stack the screw actually crosses. A label such as “standard cabinet door” is not a measurement, and a photograph of a flat door does not describe a deep drawer front.
Read current listings as clues, not fit certificates
The current bronze round knob listing identifies a 12-piece style in its headline, and its image shows knobs beside screws. The public description does not establish the exact screw thread, length, or how many screws the delivered variant contains. Ask for the selected variant's package contents and dimensions before treating the image as a complete hardware specification. The number of pictured screws is not a compatibility guarantee for your drawer thickness.
The current T-bar cabinet hardware listing has inconsistent title, URL and description details about pack count and finish. Its text mentions a deep screw thread but does not establish a measured fastener for your exact front. A buyer should confirm the chosen variant, real knob and screw specifications, and included hardware directly. Do not silently turn a promotional phrase such as “easy installation” into proof that a supplied screw has the right thread or reach.
These two native pages also illustrate why finish is not the first compatibility check. Bronze round hardware and a long T-bar shape make different visual statements, but both still need a verified mechanical connection. The public guide on cabinet-knob pack count owns how many complete pieces a measured project requires. Here the question is whether one knob and screw actually fit one existing front. Only after that test does a pack quantity become useful.
Match the thread without forcing it
Identify the threaded socket in the delivered knob and the candidate screw. Manufacturer documentation, package labeling, or a reliable measurement should supply the thread specification. Do not guess a diameter and pitch from the screw head or from a website category. A screw with a different thread may catch for a turn or two and then damage the insert. If the specification is absent, ask the seller or hardware supplier to confirm it for the exact variant before installing a full set.
A gentle hand-start test can reveal obvious mismatch without using the drawer as a clamp. With the knob supported, align the screw straight into its socket and turn it with fingers only if the maker permits that normal assembly. It should engage smoothly. Resistance, wobble, crooked entry, or sudden binding means stop. Do not use a drill to “pull” a mismatched screw into the knob. Back it out carefully and verify the thread rather than calling a forced connection secure.
If the old screw is the only piece known to pass through the cabinet, its length can help you understand the existing front, but it does not certify thread match with a new knob. Conversely, a supplied screw that threads into the new knob may still be too short or too long for the existing door. Keep those as separate checks. Mark the old and supplied screws so they do not get mixed during a sample test, and preserve the manufacturer's packaging until the job is complete.
Check usable reach through the front
Fastener length should be evaluated from the place where its head will actually seat to the threaded socket in the knob. The door or drawer thickness consumes much of that reach. A deep knob base, washer, or countersink can change the amount available for engagement. The goal is neither “as long as possible” nor “just long enough to catch.” Use the knob maker's specified engagement range when provided. If it is not provided, get the correct specification from the supplier or a qualified hardware professional rather than inventing a safe minimum.
A screw that is too short may take only a few turns and leave the knob loose. A screw that is too long may bottom out inside the knob before its base contacts the cabinet face. The result can feel tight at the tool while the knob still spins or stands off the surface. Do not solve this by over-tightening; the insert or cabinet face can be damaged. Confirm whether the screw has bottomed out by comparing the parts and following the maker's assembly guidance.
Some packages include more than one screw length for different front thicknesses. That is helpful only if the package contents and specifications are confirmed for the actual variant. A photograph that shows a row of screws may depict a staged set rather than what arrives in the box. When several drawer fronts have different thicknesses, measure each distinct construction, not every front by appearance alone. Group identical measured fronts and record the screw selected for each group.
Make one non-destructive sample assembly
Before buying or installing a whole run, select one accessible front. Protect the finish, remove the old knob using its intended method, and keep its hardware labeled. Check that the existing hole is sound and reasonably positioned. If it is enlarged, splintered, or misaligned, that is a cabinet-repair question, not a reason to tighten a new screw harder. Do not enlarge a hole just to make an uncertain fastener pass through it.
Place the new knob on the front and bring the correctly specified screw from inside, following the maker's directions. Hand-start the connection. Check that the knob base sits against the front without a gap and that the screw head seats on the inside surface as intended. Tighten only to the maker's guidance; overtightening can strip a threaded insert, crush a finish, or distort a thin panel. A compatible assembly should hold through ordinary gentle use without spinning, rocking, or pulling the door face.
Open and close the drawer normally. Confirm that the screw head does not interfere with the box, a liner, or stored contents. Look from the front and side for a square, seated base. If the T-bar style projects farther than the old knob, check ordinary clearance with neighboring doors and appliances. Those clearance checks do not change the screw thread, but they may rule out a visually appealing knob before a bulk purchase.
Know which mismatch you have
If the screw will not start smoothly in the knob while both pieces are free, verify thread specification. If it starts freely but cannot reach through the front, length or front thickness is the first question. If it threads in but the knob remains loose when the head is seated, check whether the screw bottoms out or the base cannot meet the cabinet face. If the fastener feels sound but the hole is damaged, address the cabinet material. Each observation leads to a different next action; an extra washer or more torque should not be the default response to every loose knob.
Do not assume a screw can be safely cut shorter or replaced with any hardware-store bolt of similar diameter. Its thread, head shape, corrosion properties, engagement and knob design still matter. Use a maker-approved replacement or a verified equivalent specified for the actual assembly. If the package does not state a compatible screw, a supplier can help identify one using the knob and measured front. Bring the actual parts or clear measurements rather than asking for “cabinet knob screws” in the abstract.
Keep a note of any exception. A thick drawer front may require a different approved length from the doors. A glass-front cabinet might have a special bushing or washer. A thin metal panel may need a different seating arrangement. These details are not evident from a catalog image. When the construction is unfamiliar, a qualified cabinet installer can evaluate it without turning one sample failure into a damaged row of fronts.
Only then decide how many to order
After the sample fits, count the openings that share its measured construction and hardware role. Separate single-hole knobs from two-hole pulls, and separate thick fronts from thin ones if they need different screws. Use the pack-count guide for the ordering arithmetic, then verify that each selected package actually includes the needed knobs and approved screws. A large bundle with uncertain hardware can cost more time than a smaller, documented sample.
Save the product variant, knob specification, screw specification, front measurements, and a photo of the successful sample installation. That record helps if one pack differs from another or the same hardware is needed later. Keep spare screws in labeled bags; mixing lengths and threads can recreate the compatibility problem during a future repair. If a knob loosens after normal use, inspect the actual connection before adding adhesive or tightening blindly.
Cabinet knob screw compatibility is established at the assembly, not in the listing title. Confirm the existing hole and front thickness, the delivered knob's socket thread, and the screw's head and usable length. Test one representative front gently, stop at any binding or bottoming, and order for measured groups only after the sample sits securely. That modest first fit check can prevent stripped inserts, damaged finishes, and a drawer full of unusable hardware.