Furniture & Home Organization
Cabinet door still crooked after adjustment: check hinge cup and overlay
Diagnose a crooked cabinet door, distinguish adjustment from a damaged mount, and measure hinge geometry before replacement.
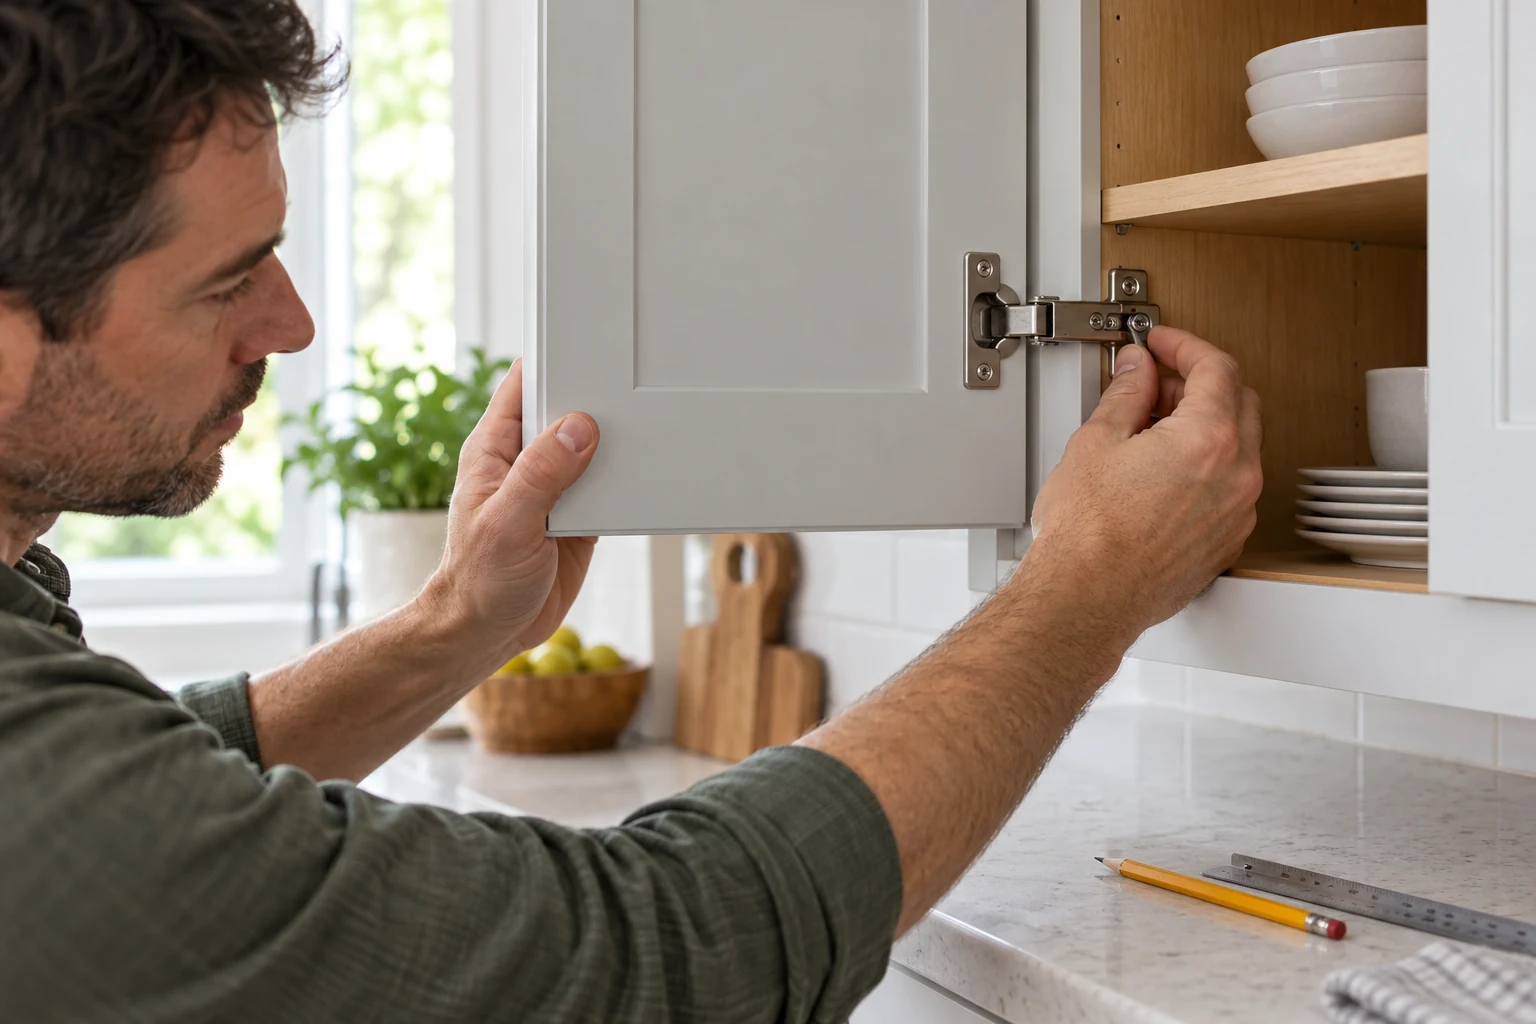
Cabinet door still crooked after adjustment does not automatically mean every hinge needs replacing. A loose mounting screw, a shifted plate, a damaged door edge, and an incompatible replacement hinge can make similar gaps appear at the front. Work with the cabinet empty enough to support the door comfortably. Check the existing hinge and mounting surface before ordering a pack or drilling a new cup hole. The aim is to decide whether a small adjustment is possible, an existing part can be refastened, or a measured replacement is needed.
Describe the misalignment before touching a screw
Close the door gently and look at its gap on all sides. Is one corner lower, does the door overlap its neighbor, or does it stand proud of the cabinet face? Open it slowly and watch whether it shifts at one particular hinge. A door that drops when opened may have loose mounting screws or a damaged support point. A door that sits evenly while open but rubs at the closing edge may need an adjustment within the hinge's intended range. Photograph the closed gap and the hinge from inside the cabinet; those pictures help you see whether a change improves the same problem.
Check the cabinet body too. A face frame that has pulled away, a loose shelf pushing the door, or a cabinet out of square will not be repaired by changing hinge geometry. Look for split wood, stripped holes, cracked hinge cups, and bent arms. Do not keep turning a screw that spins without tightening. Preserve the removed screw and note which hole it came from. If the cabinet material is crumbling or the door is heavy enough that you cannot support it, stop and arrange a suitable repair rather than installing hardware into a weak surface.
Remove nearby objects that make the door hard to handle. Support the door while checking screws so a loosened hinge does not suddenly put all its weight on the other hinge. Work one adjustment at a time and test the result with a gentle close. If you turn several screws at once, you lose the evidence of what changed the gap. A small pencil mark or photo of the starting screw position can help you return to the before-state if the door moves in the wrong direction.
Check the hinge type and overlay
Look at how the existing hinge attaches. A concealed cup hinge has a round recess bored into the door and a mounting plate or arm fixed to the cabinet. Many versions look similar from the front while using different cup depths, hole spacings, overlays, and plates. A product listing that says “soft close” does not establish that it matches your current drilling. Identify whether the cabinet has a face frame and measure the door's overlap of that frame when closed. That is the relevant overlay dimension for the two example hinge families here.
Measure the actual door and hinge, not the cabinet opening alone. With the door supported, record the cup diameter, cup depth if it can be measured safely, the spacing between the existing fixing holes, and the distance from the cup to the door edge. Record the cabinet-side plate shape and screw positions. If the old hinge has a part number, search its manufacturer's documentation. A half-inch overlay label is only one item in the compatibility record. A replacement can share that overlay and still miss the old door holes.
The Hotbar 24-pack of soft-close cabinet hinges is described for a half-inch overlay, with a 35 mm cup diameter, about 12 mm cup depth, and fixing-hole spacing around 48 mm. Its listing says the hinge permits adjustment and includes installation materials. The title and detailed description disagree about the precise opening angle, so that angle should be confirmed against the delivered item or manufacturer instructions before it matters to a door's clearance. The gallery shows a concealed cup hinge and a bore tool; it does not prove that every existing cabinet has the same hole pattern.
The SKYSONIC 30-piece half-inch-overlay hinge set is described for face-frame cabinets with a 35 mm cup, about 11.6 mm cup depth, and roughly 45 mm fixing-hole spacing. Its first gallery shows a concealed hinge and screws. The seller's dimensions differ from the Hotbar listing even though both mention a half-inch overlay. That difference is the reason to measure the old hinge's holes before choosing either set. Do not assume a larger pack is a direct replacement simply because its visible arm looks familiar.
Try a bounded adjustment only when the mount is sound
If all screws grip firmly, the cup is seated, and the door edge is intact, consult the existing hinge's instructions to identify its adjustment screws. Some concealed hinges allow side-to-side, depth, and vertical adjustment. Make a small change in the direction you intend, then close the door gently and compare with the original photo. Keep the supporting hand on the door. If the gap improves, continue within the specified range; if it worsens, return to the recorded setting. Do not use a powered driver to chase a small alignment change in a fragile cabinet.
If the mounting plate moves when you press the door, adjustment alone is unlikely to last. Check whether the screw is loose or the hole is stripped. An ordinary loose screw may be refastened if the wood and plate are sound, but a stripped hole needs a repair suited to the material and load. Do not simply install a longer screw without checking what lies behind the cabinet wall. Plumbing, wiring, a thin side panel, or a neighboring appliance can make an apparently simple change inappropriate.
After each change, open and close the door through its usual range. Watch the neighboring door, drawer, wall, and handle. A door can look aligned while closed but bind against another surface when open. If the hinge resists or the door twists, stop and recheck support and hardware identity. Soft-closing action should be assessed only after the mechanical fit is sound; a damper cannot repair a loose mount or wrong overlay.
Pay attention to the sequence of symptoms. If the gap changes only after the door carries extra weight from hanging items, remove those items and assess the hinge under ordinary use. If the door has swollen after a leak or high humidity, a hinge adjustment may hide the rubbing temporarily while the underlying cabinet condition remains. Record those observations alongside the measurements. They help distinguish a hardware fault from movement in the door or cabinet body, and they keep a replacement decision tied to evidence rather than a single crooked-door photograph.
Decide when replacement is actually needed
Replace an individual damaged hinge only when you can identify a compatible part and the door and cabinet material can hold it. A bent arm, broken spring, seized joint, or failed soft-close component may justify replacement. A cracked door cup or torn mounting area is a separate repair problem; new hinges with the same screws may fail in the same weak holes. If several hinges are worn, record each location and quantity before buying a bulk set. Do not remove every hinge from a door at once unless it is fully supported and the installation instructions call for that sequence.
Before ordering, compare the old hardware with the exact current product listing and, if possible, a physical sample. Check overlay, cup dimensions, fixing-hole spacing, plate shape, screw type, and opening clearance. The cabinet hardware sample-order guide covers the separate cost decision about testing a sample before a larger order. That matters here because buying 24 or 30 hinges does not solve a mismatched drilling pattern. A single compatible part can be more useful than an unused box.
Account for the number of hinges per door and the cabinets that share the same geometry. Two doors in the same kitchen may have different overlays at the end of a cabinet run or beside a corner. Do not assume the hinge on one door represents the entire room. Label each removed hinge and its position if more than one door is involved. Keep any existing screws and plates until the replacement has been proven to fit and function; they are part of the before-state you may need to compare.
Install only against a measured match
Follow the selected hinge manufacturer's drilling and mounting instructions. If the existing cup and hole pattern match, a measured replacement may fit those positions. If they do not match, do not enlarge holes or drill a new cup by eye. A mislocated cup can weaken the door edge and leave little room for correction. A jig and the right bit may be necessary for new drilling, but the article does not certify an unmeasured door as suitable for redrilling. A cabinet professional can assess a valuable or thin door before material is removed.
Support the door while fastening the new hinge. Start screws carefully so they do not cross-thread or strip the substrate. Seat the cup and plate without forcing them flush against an uneven surface. If the hinge rocks, remove it and investigate the fit. Do not use the closing motion to pull a poorly seated hinge into place. Once the door is hanging, make only the adjustments described for that actual hinge, testing the gap and swing after each one.
The handle is a separate part of the door's operation. A protruding or loose handle can cause a collision that looks like a hinge problem from a distance. The cabinet handle replacement-fit guide owns that hardware decision. Here, verify handle clearance as part of the closing test while keeping the repair scope on the hinge and its mount.
Confirm the repaired door works under normal use
Open and close the door several times with normal hand pressure. It should clear its neighbor and frame, stay supported throughout the swing, and sit at the intended gap when closed. Check that the plate has not shifted and the screws remain snug. If the door sags again quickly, the underlying mount, door structure, or hinge match remains unresolved. Stop tightening or adjusting in circles; preserve your measurements and photos for a more suitable repair.
For a successful repair, save the hinge model, measured overlay, cup and hole dimensions, and one photo of the installed position. That small record helps the next replacement without assuming every cabinet uses the same part. If a bulk pack was purchased, store spare hinges dry with the identifying dimensions rather than a generic label such as “kitchen hardware.” The useful outcome is a door that closes cleanly on a sound mount, with its compatibility established by the actual cabinet instead of the pack title.