Home & Living
Ukrainian Easter egg kit station: prepare parts before decorating
Set up a Ukrainian pysanky egg-decorating session by checking the exact kit contents, instruction sequence, participant roles and work area before opening materials.
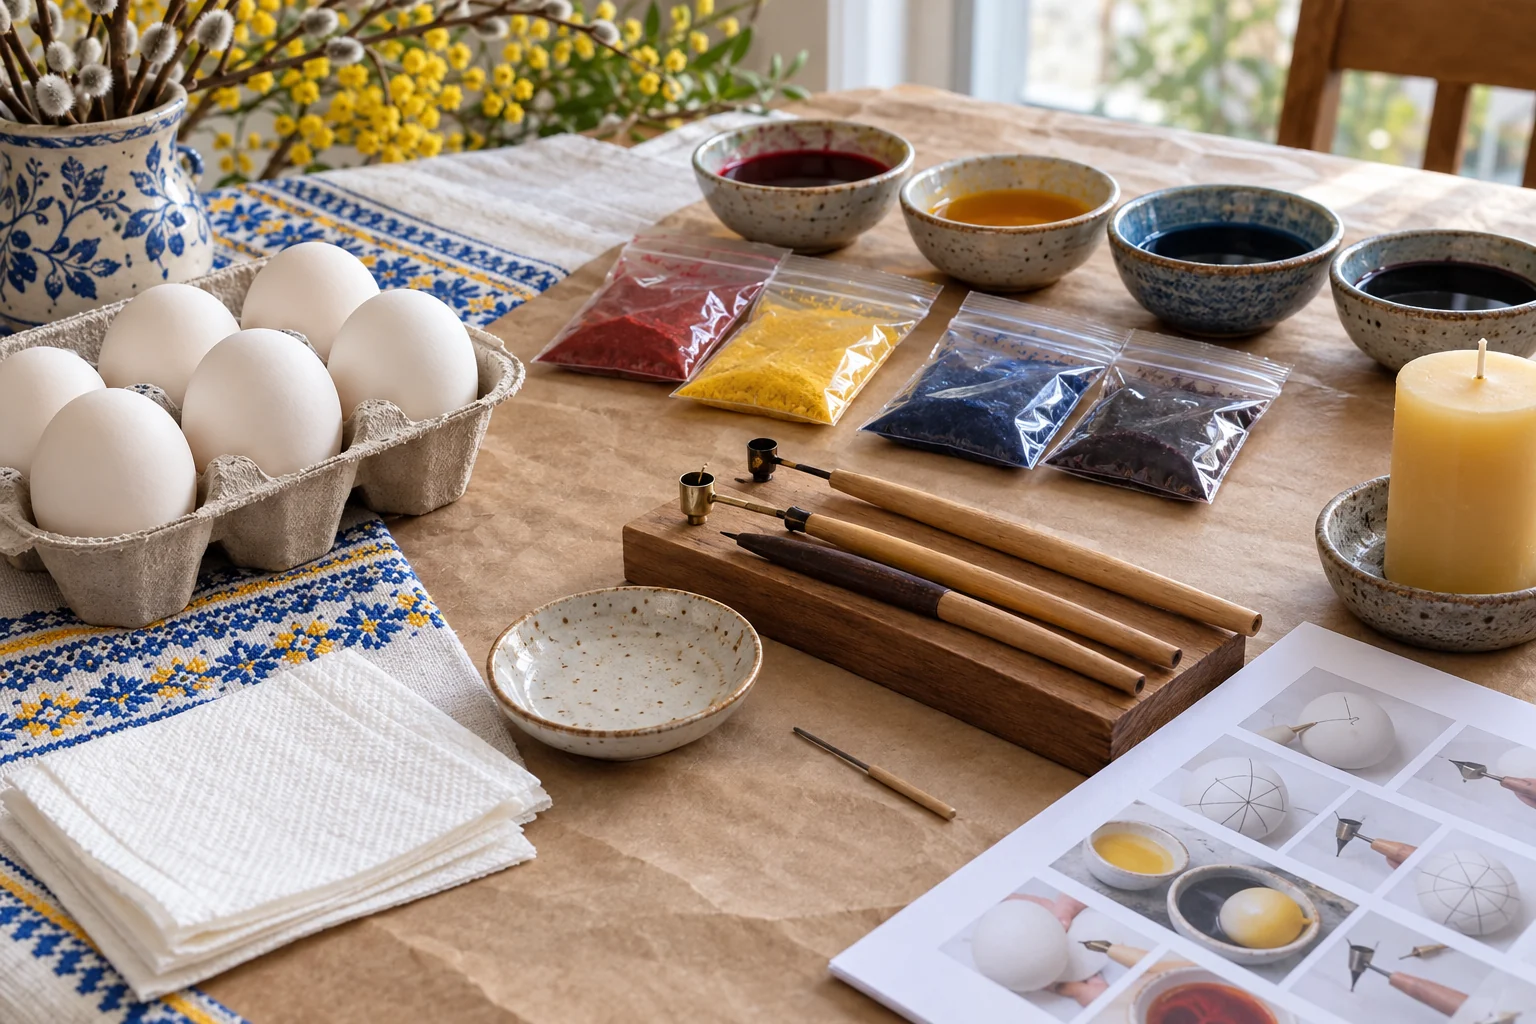
A Ukrainian Easter egg kit station works better when the first activity is a component check, not a hurried opening of every packet. Pysanky use a wax-resist decorating method with its own materials and instructions. A seasonal gathering may include people who want to decorate, observe, help organize supplies, or simply share the table. Before anyone begins, identify which kit you actually have, what it contains, what the maker requires beyond the box, and whether the work area can support the kit's directions. That preparation is the decision this guide helps you make.
This is a station-planning article, not a substitute for a pysanky lesson or the supplied safety instructions. The featured listings describe decorating kits and some included tools. Their marketing copy does not prove that every participant can use every component or that every surface, egg, candle, dye, or handling step is suitable. Use the exact instructions supplied with your kit and follow applicable household precautions. If a heat or flame step cannot be managed in the space, defer that step or choose a different activity rather than improvising a technique from a product photo.
Open the kit as an inventory, not as a project
Put the sealed kit on a cleared table and find the maker's component list. Count what is actually inside before opening dyes or handling wax. Lay the pieces in small groups: instructions, design references, tools, coloring materials, holders or stands, cleaning items, and any heat-related components. Keep wrappers and the box until you have compared the contents with the list. A missing wire or tool may matter later even when the larger pieces look complete. If a part is absent or unclear, keep the kit together while you contact the seller or consult the maker's instructions.
Two kits with similar names can be arranged differently. The Super Color Ukrainian egg-decorating kit and the BestPysanky egg-decorating kit are separate native products with distinct product IDs. Their listings describe wax-resist kits, but the exact included pieces and directions must be checked for the unit in hand. The second listing specifies four kistka pens, twelve dyes, beeswax, stands, wires, candles and instructions or templates. Those listed quantities do not establish how many people can work safely at once or how quickly a group can complete an egg.
Do not combine the contents of two product pages into an imaginary “standard kit.” Read the list on the purchased package. If a term is unfamiliar, leave that item in its group and consult the maker's explanation before use. A tool may look like a pen or a holder while serving a different role in the wax-resist process. Avoid substituting another household item based only on a similar appearance. A component checklist makes the station less confusing and keeps each maker's directions attached to the correct set of parts.
Record what you still need to supply separately from what came in the box. Many crafting activities involve a protected tabletop, something to keep the work stable, cleanup materials, and a way to leave a workpiece undisturbed. The product page alone does not prove those things are included. Write “confirmed in kit,” “already at home,” or “still unknown” beside each requirement named by the instructions. The unknown column is a pause point, not a reason to guess. Finish the list before inviting someone to start a time-sensitive step.
Give the table separate zones
Plan a clean area for instructions and unopened components, an active work area sized for the people who will participate, and a separate place for completed or paused pieces. Keep drinks, food, loose wrapping, and unrelated supplies away from the work surface. The goal is to prevent a page of instructions from being covered by packets or a partially worked egg from being moved simply because someone needs table space. A small clear table with fewer simultaneous users can be easier to manage than a crowded large table.
Use a protective surface suited to the materials named in the instructions. Do not infer that a cheerful holiday tablecloth can safely take heat, wax, or colorant. Put any component that calls for a flame, heated tool, or special handling in a separate controlled position under the responsible adult's direction. The cover photo for this article shows an unlit candle set aside; it is a planning image, not a demonstration of a working setup. If the maker specifies ventilation, protective equipment, or cleanup steps, use those directions rather than a generic craft-table assumption.
Keep the component list visible while you arrange zones. It is easy to put a wire, stand or tiny tool into a general supplies cup and then mistake it for a missing part. Give each type a shallow tray or clearly separate place. You can use an empty box lid for items that have not yet been checked. Do not pour all small pieces into one container to make the station look neat. The point is to be able to find the right piece at the moment the instructions call for it.
Leave a path for someone to step away without crossing an active work area. A craft afternoon need not require every guest to commit to a full project. The open-door craft afternoon guide treats optional participation as a separate hosting decision. Here that idea becomes a table rule: observers can see the activity without reaching across tools, and a person who pauses can set their work in the designated waiting area. This keeps the station organized without pressuring a guest to use a component they have not learned to handle.
Match participant roles to the actual instructions
Before the group arrives, decide who will read the maker's directions aloud, who will manage heat-related steps if any, who will keep small tools together, and who will handle cleanup. These are roles for this particular session, not certifications or promises about who can perform a technique. A child or beginner may enjoy choosing colors or watching a demonstration, but that does not make every tool in a kit age-appropriate. Follow the product's specific age and supervision instructions and the household's own safety limits.
Ask whether the plan is one person working through the entire process while others observe, several people taking turns, or a larger set of parallel stations. Do not divide a kit's component count by the number of guests and call the result capacity. One list may contain multiple dyes but only a few working tools; a listed candle is not evidence that several independent workspaces are safe. If you want parallel work, inspect the actual instructions and count the components each station needs. If that cannot be confirmed, begin with one controlled station rather than an improvised row of them.
The group tie-dye kit quantity guide owns a different craft and its own kit-sizing decision. Its useful boundary here is that head count and package count are not automatically the same number. A pysanky station must be planned from the contents and method of the actual egg-decorating kit. Do not import dye ratios, timing, protective steps, or capacity claims from a fabric-dye project. The materials and workpieces are different even when both activities use color.
Keep design references with the instructions instead of treating them as mandatory outcomes. Ukrainian pysanky carry a cultural tradition with varied designs and meanings. A beginner's session can be respectful by learning the terms and following the maker's material guidance without claiming to reproduce a particular traditional symbol accurately from a quick picture. If the group wants a historical or symbolic lesson, choose a qualified source for that separate learning goal. This article's practical purpose is to help the materials and people meet at an organized table.
Run a no-material rehearsal
Walk through the sequence using the instruction sheet while dyes remain closed and any heat source remains unlit. Point to the place each stage would happen and the item the instructions would require. Check whether people can read the directions, reach the needed tools without crowding, and set aside a workpiece without bumping another. This rehearsal does not teach the technique or guarantee a result. It reveals a missing part, missing work surface, or unrealistic schedule before materials are in use.
If the instructions mention a preparation or drying interval, put it on the plan as an unknown until you confirm its actual length. Do not promise that everyone can finish a decorated egg in a short holiday visit. People may work at different speeds, and a careful process should not be compressed to match a party timetable. Offer a clear stopping point and a way to keep a person's materials identified if the session ends before the work is complete. That is a hosting decision, not a claim about the chemistry or safety of a particular kit.
Make one small checklist for the day: contents verified, instructions available, work surface protected, heat-related role assigned if applicable, cleanup plan ready, and a place for paused work. Keep it to facts you can check. A decorative scene on the box is not proof that every supply pictured comes inside. Likewise, a product title's piece count may describe individual components, not complete workstations. Count the pieces by function. If your purchased kit differs from the listing, rely on the physical package and seller's current support rather than forcing the station to match an old page.
Close the station before storing the kit
Leave cleanup and storage time in the schedule. Follow the kit's directions for unused materials and tools; do not put a still-hot item into a closed box or assume leftover colorant can be kept without instructions. Keep any remaining packets labeled and separated from food or ordinary stationery. If the maker's storage directions are missing, seek them before saving materials for next spring. A tidy box with uncertain contents is not a reliable future kit inventory.
After the session, compare the checklist with what was actually used. Which pieces stayed unopened? Which were hard to find? Did the table have enough space for the chosen number of participants? Write a short note and keep it with the kit. That note is more useful for the next holiday than a memory of the finished display alone. It tells you whether the existing kit can support another session or whether a specific replacement component needs attention. Do not turn one missing piece into an automatic decision to buy an entirely new kit.
Pack the instructions, component list, and any verified storage directions together. Keep the identity of each kit intact if your household owns more than one; do not merge similar tools and then forget which maker's directions apply. The seasonal preparation goal is modest: know what is present, know who is responsible for the controlled steps, and know where the work can pause safely. With those answers, the group can begin the actual decorating method under the appropriate kit instructions instead of discovering a preventable gap midway through the afternoon.