Tools & DIY
How to replace torn window screen mesh without guessing frame fit
A measured, frame-first tutorial for replacing fiberglass mesh in a removable spline-held window screen.
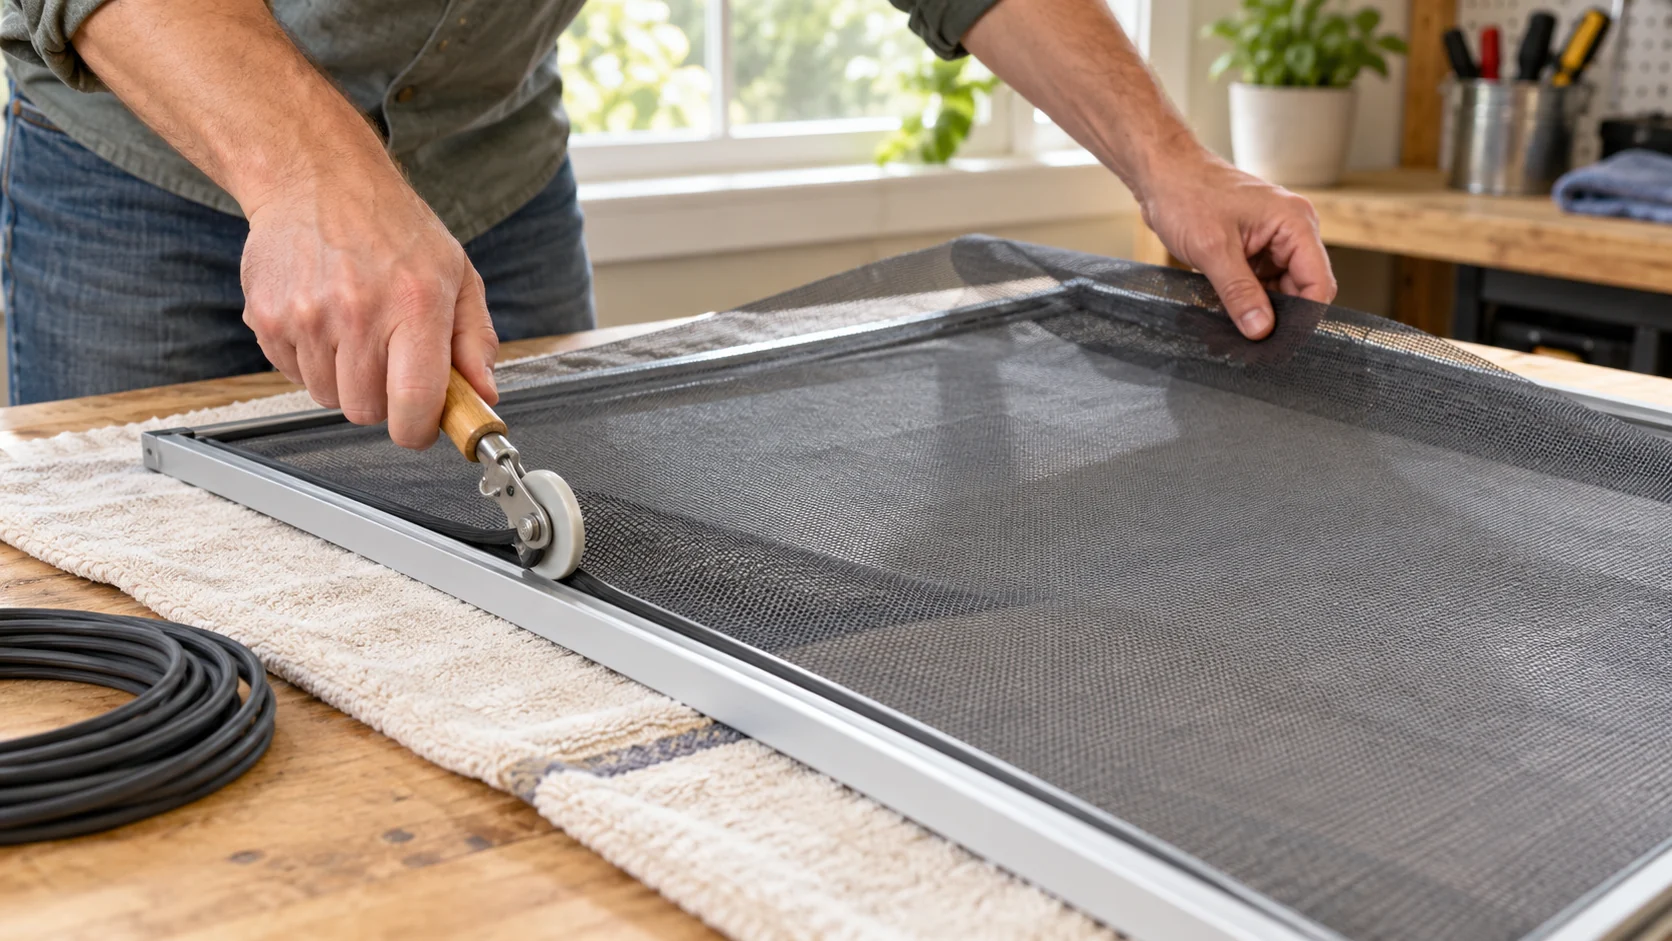
A torn window screen is easiest to replace when the frame is still square and its spline channel still holds. Before buying mesh, take the screen out, lay it flat, and check the frame corners. If a corner separates or the channel is crushed, new fabric alone will leave the same weak assembly. This guide covers a sound, removable frame that uses spline to retain fiberglass mesh. A fixed screen, magnetic panel, or proprietary frame may need a different method.
Check the frame before measuring mesh
Label the frame's top and room-facing side before removal. That saves some guesswork when it goes back into the window. Work on a clean table large enough to support all four sides; a frame hanging over the edge can bend while you press in spline. If the screen has sharp metal corners, wear gloves and keep the work away from children and pets.
Look at each corner and gently check for movement. Then inspect the narrow groove that holds the rubber or vinyl spline. A damaged groove may release a newly installed screen. Also note any tabs, springs, or clips that hold the assembly in the window. They are separate from the mesh and should not be forced while removing the frame.
Take a photo of the old screen and measure the exposed mesh opening, the outside frame dimensions, and the width of the spline channel. Keep the old spline if it comes out intact so you can compare its profile with a replacement. The diameter that fits one frame is not guaranteed to fit another. A spline that is too thin can slip; one that is too thick can distort the frame or refuse to seat.
If the frame is loose in the window opening, solve that separately before re-screening. Note whether a spring or clip is missing, whether paint has narrowed the track, and whether the frame itself is twisted. The mesh cannot straighten the frame. On a large frame, ask another person to help lift and support it so the corners do not carry the entire weight during removal. Keep any small retention parts in a labeled cup; their placement matters when you reinstall the screen.
Wash dirt from a reusable frame with a mild method appropriate to its finish, then let the groove dry. Dust in the channel can make it hard to see whether the new spline is fully seated. Check for sharp burrs or exposed fasteners that could cut the mesh as soon as the window moves. If the channel has deep damage, stop rather than hiding it under new material.
Choose a roll that can cover the opening
Measure the short side of the frame before choosing roll width. Leave several inches of handling margin on every edge rather than cutting mesh exactly to the opening. That surplus gives you something to hold while rolling spline and can be trimmed after the mesh is secured. For several windows, sketch their dimensions and cutting orientation first; the longest total length is less useful if the roll is too narrow for one frame.
The hgudesign 48-inch by 50-foot cuttable fiberglass screen roll is described as an 18-by-16 weave for windows, doors, and porch screening. The native product image shows a roll of dark mesh, consistent with that role. The DOCAZOO 36-inch by 50-foot fiberglass screen roll is another cuttable mesh option, also described as an 18-by-16 weave. Its page identifies a 36-inch width. These are alternatives for frames within their usable roll widths; neither listing establishes the spline size or the exact fit of your frame.
Do not assume the larger roll is the better purchase. A narrow frame may use either width, while a frame wider than the 36-inch material needs another size or cutting plan. Measure the opening and allow working margin before deciding. The product pages describe mesh material and use, but they do not tell you whether a particular window has an intact frame, what spline it takes, or how much tension that frame can tolerate.
For several screens, write down each frame's opening and roll-width requirement before cutting anything. A 36-inch roll is only useful when the frame and handling allowance fit within that width; the nominal roll width is not the same as the finished screen opening. The 48-inch option may cover a wider frame, yet it can also leave more offcut on narrow windows. Lay the proposed cut rectangle on paper or mark the roll backing if supplied, leaving enough length for every screen and a small allowance for a crooked first cut.
Match the screen material to the job as well as the dimensions. Fiberglass mesh can flex during installation, but it does not repair a bent metal rail. The two linked rolls are described as dark fiberglass screening. If the old screen had a special pet-resistant, solar, or privacy function, these listings alone do not establish an equivalent performance level. Identify the old material and the intended use before substituting a standard roll. Where a building, rental, or safety rule controls the screen, follow that requirement first.
Remove the old spline and mesh
Set the frame face down in the same orientation you documented. Find one end of the spline, usually near a corner. Lift it carefully with a small blunt tool, then pull it out along the groove. If it breaks into short pieces, work around the frame without gouging the channel. A stubborn section may be brittle or trapped under old paint; forcing a pointed tool toward the frame can leave a cut that prevents good retention later.
Once the spline is out, lift off the old mesh and clear loose dirt from the channel. Do not enlarge the channel to make a mismatched spline fit. If the old mesh was held by a different system, stop and identify it before proceeding. The technique below depends on a continuous groove and spline, not adhesive or hook-and-loop edging.
Lay the new mesh over the frame with the weave roughly aligned to its edges. Cut a rough rectangle with enough extra material to handle all four sides. Keep the sheet flat, but avoid stretching it as though it were fabric on a drum. Excess tension can pull the frame out of square and make reinstallation difficult.
Before committing to the full perimeter, test a short length of the chosen spline in an undamaged part of the groove with a scrap of the new mesh. It should press in without splitting the channel and stay seated when you release the tool. Remove that test section carefully and begin the permanent run. This trial is especially useful when the old spline has stretched, hardened, or lost its round shape; its worn diameter may be a poor buying reference.
Keep the roller nearly upright and let its wheel track the groove. Rolling at an angle can drag the weave sideways and leave a diagonal ripple. Pause every foot or so to look across the sheet and at the frame edges. If a wrinkle begins, correct it nearby while the surplus mesh is still available. Pulling harder on the far edge later may transfer the wrinkle or bow the frame instead of flattening the panel.
Roll in the spline with even tension
Start on one straight side, a little away from the corner. Press the spline into the groove with a screen rolling tool appropriate to the channel. Work steadily along that side, keeping the mesh flat with your free hand. The tool should seat the spline without slicing the mesh. If the spline jumps out behind you, stop and check its size and the channel condition instead of pressing harder.
Move to the opposite side and take up slack gradually. Then work the remaining two sides. Check the frame diagonals or set it against a known square surface as you go. A small amount of give in the mesh is normal; a bowed frame or rippled sheet signals that the tension is uneven. You can lift and reseat a short section before trimming, but repeated force on a fragile old frame can make the problem worse.
At each corner, guide the spline around the turn without piling it up. Some frames need a clean joint where the spline ends meet. Follow the frame or spline maker's instructions if they specify a corner method. When all sides are secure, use a sharp blade to trim the extra mesh on the outside of the spline, keeping the blade pointed away from the finished screen and your hand. Leave no loose strands that could snag during installation.
Trim only after all four sides hold. If you cut the surplus early and a side releases, there may be too little material to grip for another attempt. Keep the blade outside the seated spline, use a stable cutting surface, and make one controlled pass at a time. A small nick inside the retained line can spread into a visible tear when the mesh is under tension. Set the blade down before lifting or turning the frame.
Test the screen in its window
Put the frame back using the orientation marks and its original tabs or clips. It should sit in the opening without twisting or needing heavy pressure. Open and close the window slowly to check clearance. If the frame no longer fits, remove it and inspect for bowing, a displaced corner, or overfilled spline groove. Do not force a stiff frame into the track.
Look across the mesh from a few angles. It should lie reasonably even, with no open edge in the groove. Gently test that the spline stays seated, especially near the corners. A screen is an insect barrier, not a fall guard or child restraint; never rely on it to support a person or pet at an open window.
If air still enters around the window while the screen looks sound, that is a different gap. The weatherstripping frame-fit guide covers adhesive and sealing problems, while the door draft-stopper guide deals with a separate doorway gap. Replacing screen mesh will not seal either opening.
Keep a small record for the next repair
Write down the frame's outside dimensions, chosen mesh roll width, and spline profile or package size. Save a photo of the channel and one of the finished screen. Those details are more useful next time than the window's approximate room location. If the frame failed the first inspection, put the mesh purchase on hold until you can identify a compatible frame or repair method; a new roll cannot correct a loose corner or damaged groove.