Tools & DIY
When a push-to-open cabinet latch will not engage
Observe latch and strike contact, door alignment and spring action before adjusting or replacing push-to-open cabinet hardware.
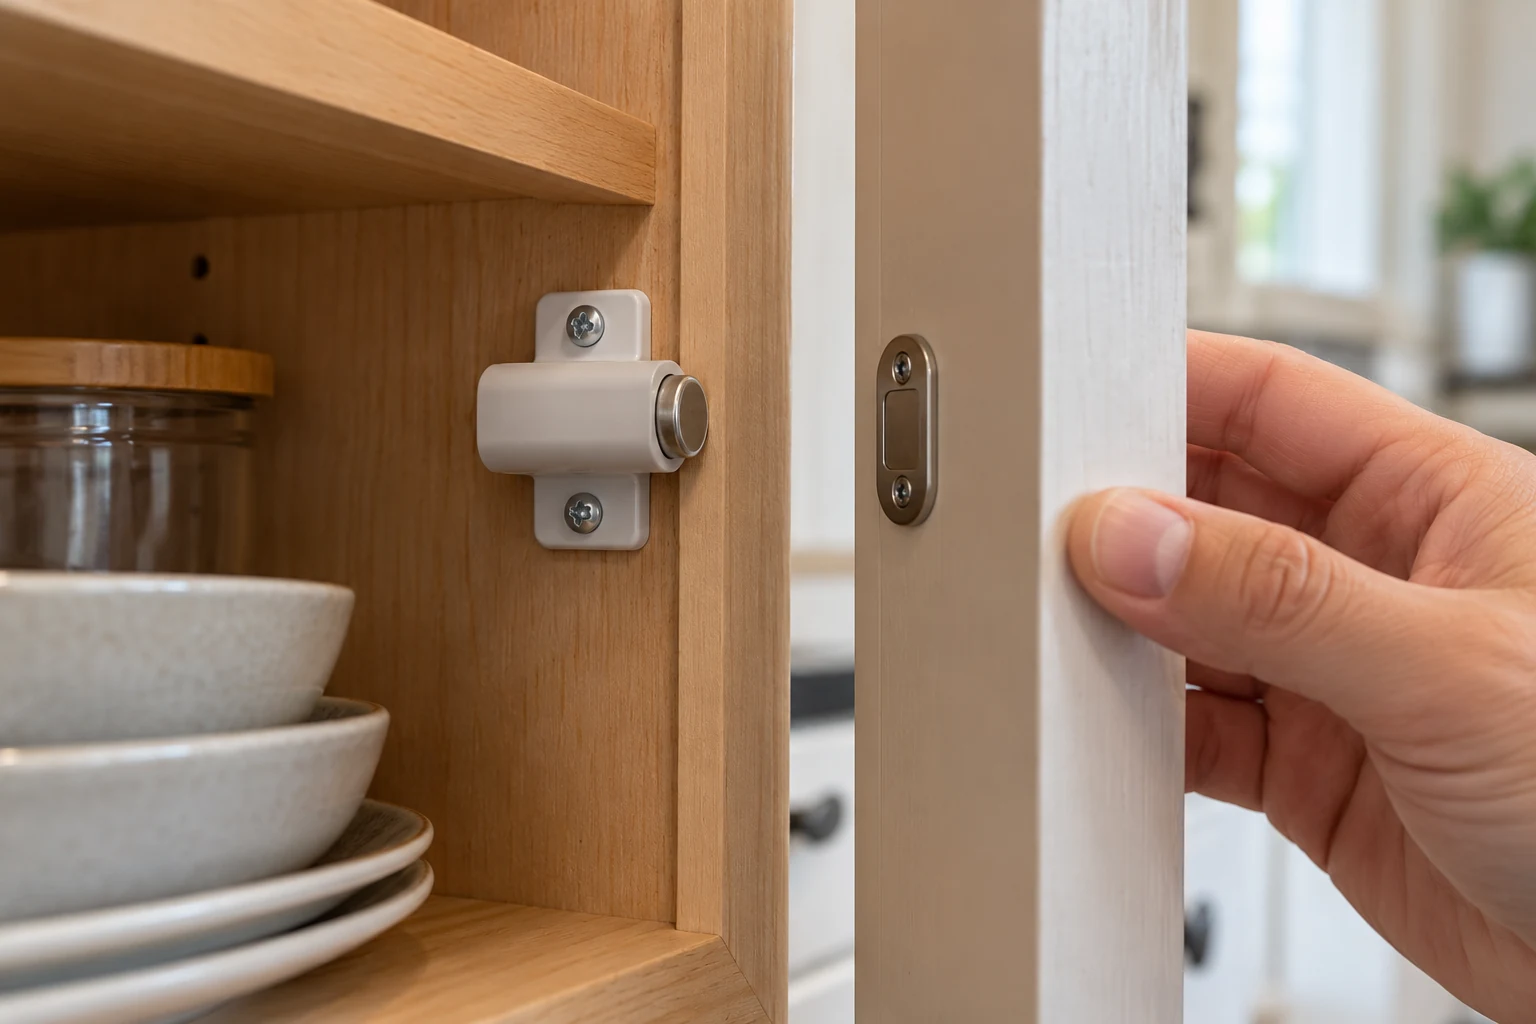
When a push-to-open cabinet latch will not engage, resist the urge to push harder. The symptom can come from several different places: the door may not reach the latch, the strike plate may miss it, the spring action may not reset, or the installed parts may not be the pair you think they are. A short observation while the cabinet is open is more useful than replacing hardware on the first guess.
Two current Republeq pages illustrate the parts without proving a repair. An eight-piece push-latch set describes a spring plunger, magnetic catch, base and iron plate, with screws listed as included. The Sugatsune magnetic touch-latch pack describes a spring-loaded release, a strike plate and a medium throw, while saying mounting screws are not included. These are two different products. Neither page identifies the model already on your cabinet, and neither provides a universal adjustment procedure for every door.
First observe how the push-to-open cabinet latch fails
Open the door and look at the latch body and the matching plate or contact point on the door. Take a photograph before moving anything. Then close the door slowly with normal hand pressure and watch the final inch. Does the plate reach the latch? Does it touch off-center? Does the plunger move but fail to stay in position? Does the door stop against another surface first? Each observation suggests a different question to check. Avoid putting fingers between the door and cabinet while testing the closing path.
Repeat the observation once with the cabinet empty enough to see the hardware. Do not remove shelves, hinges or mounted parts just to make a photograph if the cabinet's instructions or the installation make that unsafe. A flashlight can help reveal the position of the plate. Mark a suspected contact point with a removable note on the cabinet exterior rather than drawing on a finished surface. The purpose is to locate the mismatch, not to create a new one.
Notice whether the problem occurs on every closing or only when the door is moved a particular way. If a gentle close sometimes engages but a normal close does not, record that pattern. If the door hangs differently when loaded shelves are in place, record that too. These observations can distinguish a repeatable alignment issue from an intermittent mechanism issue. They do not themselves certify which component is defective.
Identify the exact installed mechanism before buying parts
Look for a maker name, model or part number on the latch body, packaging or installation records. Take a clear picture of the latch, its mounting base and the plate on the door. Compare the assembly with the exact manufacturer's instructions. A generic “push latch” search can return magnetic, spring-only, surface-mounted and concealed versions. Similar silhouettes do not prove that a replacement plate, spring or screw pattern will interchange.
The eight-piece offer's image shows white latch bodies and separate metal plates. Its description explains a mounting sequence for its own base and plate. The Sugatsune image shows a black latch body with visible mounting holes and screws, while its page says a strike plate is included and screws are not. The image does not show every claimed package component. Confirm contents for the exact SKU rather than using a stock image as an inventory. If the installed hardware differs from both examples, follow its own documentation instead.
Measure only what the actual instructions ask you to measure: the available mounting space, door clearance, plate position and any specified throw or gap. The Sugatsune page gives a medium 9/16-inch throw for that model; it does not make 9/16 inch the correct dimension for every cabinet. An advertised magnetic pull rating on a different seller page is not a substitute for checking the fit of your door and hardware. Keep model-specific figures attached to their source.
Separate door alignment from latch action
Before adjusting a latch, look at the door itself. Does it sit squarely in the opening? Are the reveal and gap similar at the top and bottom? Is the door rubbing on a neighboring door, face frame or shelf? A crooked door can move the strike away from an otherwise functioning latch. If the door has visible hinge or overlay issues, the cabinet-door hinge and overlay guide treats that separate geometry problem. Solve the door-position question before using the latch to compensate for it.
Now check whether the strike plate approaches the latch face cleanly. You can look from the side with the door nearly closed, without forcing contact. If the plate lands high or low, record that. If it reaches the latch but the spring does not behave as its instructions describe, record that instead. Do not immediately loosen every screw. Changing several parts at once makes it harder to know which move mattered and can leave the door worse aligned.
A visible gap can be misleading. The door may have a designed clearance, a warped panel or a different obstruction elsewhere. The door-draft-stopper guide
Check the noninvasive possibilities first
With the door open, look for loose packaging, a displaced object, built-up residue or a shelf item that prevents normal travel. Remove only ordinary loose obstructions you can safely reach. Do not scrape a spring housing or flood a latch with cleaner. If a plate is visibly bent, a screw is missing or the base is detached, photograph the before-state and consult the exact replacement instructions. A damaged part needs an identity-bound repair, not a generic tightening guess.
If the mechanism is accessible and its instructions allow a hand test, operate it gently once while the door is open and clear of the frame. Observe whether it moves through its normal positions and resets. Stop if it binds or if the required motion is unclear. The advertised “push to open” behavior tells you what the installed unit should do in use, but it does not tell you which surface is safe to press during inspection. The manufacturer’s directions control the test.
Check whether the latch and strike are a matched pair. A cabinet that has had a door, hinge or front replaced may retain one old component. The plate can look ordinary while its shape, thickness or attachment differs from the new latch's specification. Record the part identities you can find. Do not assume a stronger magnet or a larger multipack will fix a mismatched interface. The problem is about contact and action, not simply the number of replacement pieces available.
Make one documented change only after the cause is clear
If the exact hardware instructions provide an adjustment range and your observation shows a matching alignment issue, follow that procedure. Note the original position first, then change one specified setting and test the door gently. If the problem remains, restore the before-state rather than adding another untracked change. This is especially important where mounting holes, a base or a strike plate set the relationship between parts. A move that lets the door catch once may still leave it rubbing or over-compressed.
The eight-piece product description says to locate the base through oval holes and then fix its position with round holes. That is a seller-stated installation sequence for that set, not a command to redrill an existing cabinet. The Sugatsune page says screws are not included for its pack; selecting suitable mounting hardware requires the actual door and cabinet material and the maker's instructions. Do not borrow screws or drilling positions from the other product page.
If the mechanism itself is damaged or will not reset according to its model instructions, replacement may be the appropriate path. Match the exact mounting style, dimensions, strike, screw requirements and door use before ordering. A visually similar latch may have a different throw or base height. Photograph the old hardware and keep the part number with the cabinet record. Preserve the old pieces until the new assembly has been installed and tested as the instructions require.
Avoid treating a package claim as a repair result
One seller page makes broad force and heavy-door claims for its push latch. This guide does not verify those ratings or apply them to your cabinet. A stronger-sounding specification cannot tell you whether the strike meets the latch on a particular door. The other page gives a precise throw and magnetic pull figure for its own model, but those values are not a diagnosis either. Use the numbers only when the installation guide identifies them as relevant to your measured setup.
Buying a pack can also create a false sense that the problem is covered. If only one door is failing, first learn whether its existing mechanism or alignment is responsible. If several doors fail in the same way, look for a common installation pattern, but do not assume every door has the identical hardware or geometry. Compare their part labels and positions. A multipack may be convenient after a confirmed compatible repair, not before the cause is understood.
Do not use an unrelated household magnet to “test” a spring latch as a substitute for the correct strike. It may attach at an unrepresentative position or leave marks on a finish. Likewise, repeated hard slamming can damage the door or mechanism without identifying the fault. Gentle observation and model-specific instructions are slower by a few minutes and often save a much larger mistaken repair.
Know when to stop and ask for the right help
Stop if the door is heavy, glass-fronted, visibly loose at a hinge or part of built-in cabinetry you cannot safely support. Stop if screws spin without holding, a mounting surface is cracked, or the latch's safe test motion is not clear. The next useful action is to identify the exact hardware and have the cabinet maker, installer or qualified repairer assess it. A problem-solving article cannot see the condition of your door or certify a structural repair from a product page.
If you rent or share the cabinet, check who is authorized to alter it before drilling or replacing parts. A photograph and short symptom note are useful even when someone else will perform the work: “Plate misses above latch by a visible margin,” or “Latch resets with door open but not when door reaches frame.” Those notes point to a concrete observation without claiming a cause you have not verified.
After any authorized adjustment or replacement, test the door through several normal open-and-close cycles. Check that it remains aligned, releases with the intended push and does not rub a nearby surface. Record the model and what changed. If the symptom returns, that record helps distinguish a recurring geometry problem from a single failed latch. Do not declare a permanent fix from one successful close.
The useful outcome is a narrowed cause
A push-to-open cabinet latch that will not engage does not automatically need a new magnet, a stronger spring or a harder push. It needs a clear answer about contact, movement and the exact installed parts. Observe the door path, identify the latch and plate, separate hinge geometry from mechanism behavior, then follow the relevant instructions for one change at a time. If the evidence remains uncertain, leave the cabinet intact and hand the specific observation to the person who can inspect it.