Home & Living
Pantry wire shelving setup: fit bins and keep the reach clear
Measure the items and the room, set shelf spacing around retrieval, and follow the delivered rack instructions for assembly and load.
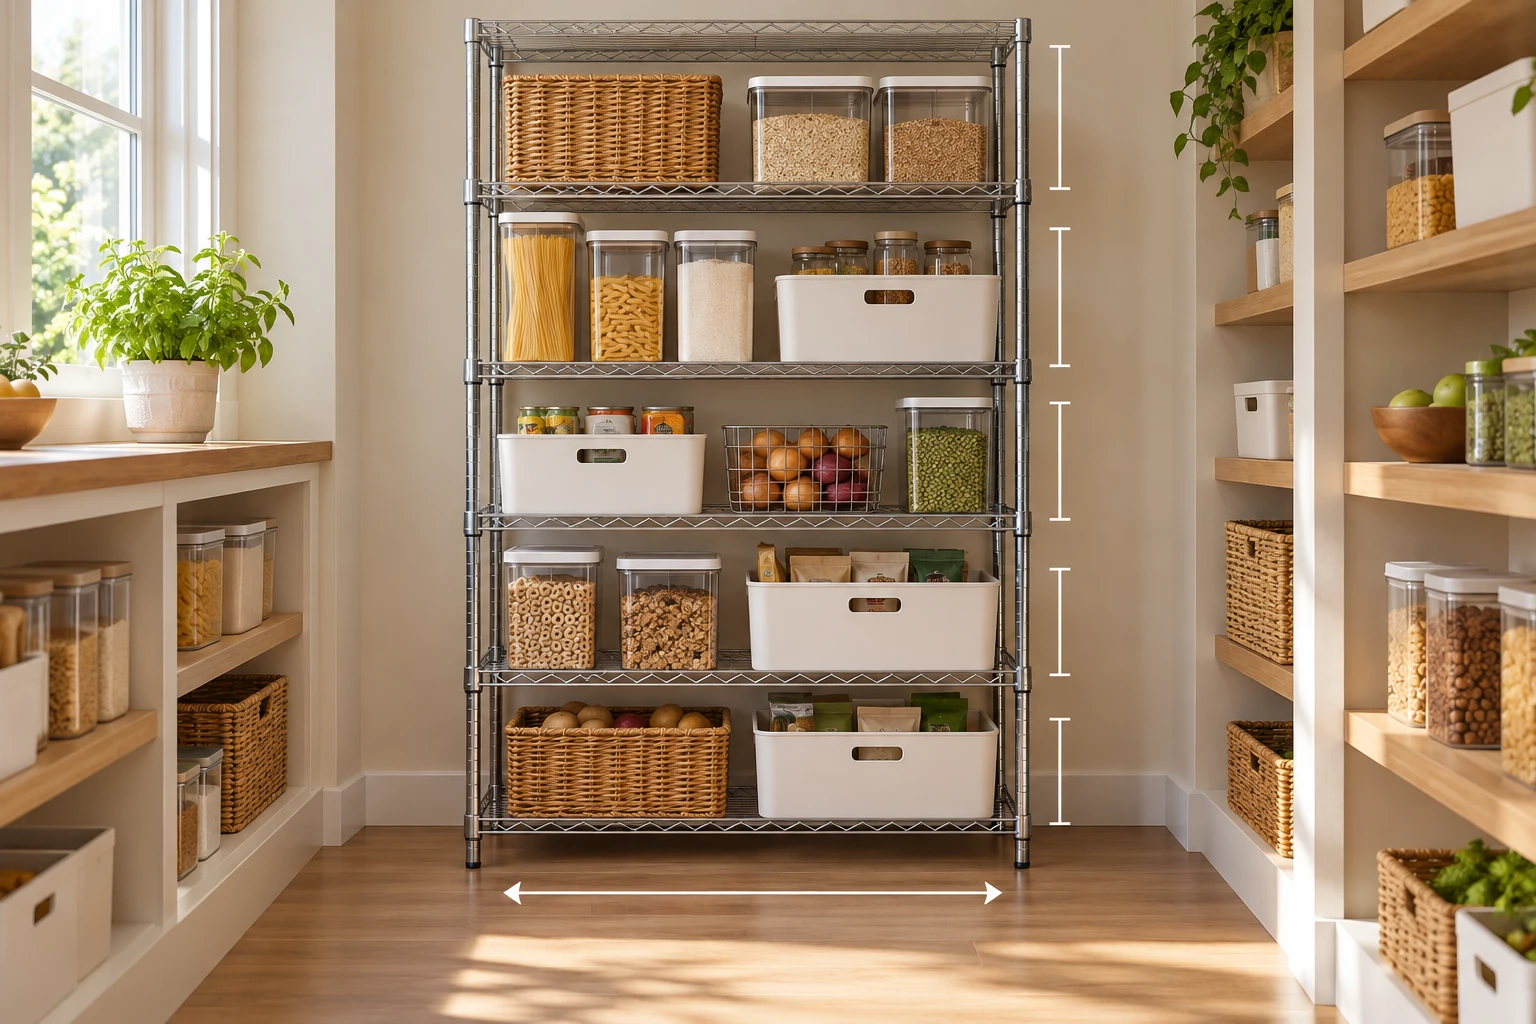
A wire shelving unit is easier to use when its shelf heights follow the containers and packages you actually reach for. A stack of bins can look orderly in a photo while the lowest one is hard to pull out or the highest one hides the item needed every day. This guide walks through a pantry wire shelving setup using measured objects, an open floor area, and the exact assembly instructions for the unit you buy. It stays with layout and access; a seller's load number is not proof that a particular assembled shelf or floor can carry an item.
Two product pages illustrate the physical choices. The Kepeak five-tier chrome wire shelving listing shows a narrow stationary rack. The ZLP Manufacturing five-tier black wire shelving listing shows a wider stationary rack in several staged rooms. The visible photographs establish five shelves and different footprints; they do not establish a safe loading plan for your home or prove that pictured bins, appliances, hooks, or food are included.
Make an inventory of the objects, not a list of shelves
Gather the items that would live on the proposed rack and sort them by how often they are used. Keep a separate group for bulky packages, tall bottles, small loose items, and bins. Measure each group's tallest object, widest container, and depth from front to back. Include handles, lids, and the room needed to pull a bin forward. A container that technically fits between two shelf edges can still be annoying to remove if there is no hand space above it.
Record the biggest item you expect to store as a real object, not just a category such as “pantry goods.” A 12-inch box, a tall canister, and a wide handled basket present different clearance needs. Set the item on the floor and measure its footprint and access movement. If a bin must tilt to get past a front bar, add that movement to the height allowance. Do this before choosing shelf positions, because a later adjustment may require clearing and partially disassembling the rack.
Do not assign every item to a shelf immediately. Start with the daily group and ask what can be lifted from a comfortable standing position. Put less-used items in the second group, and reserve the least convenient reach zones for light, infrequent objects under the maker's instructions. A floor-to-ceiling loading plan may look efficient on paper but demand repeated reaching or bending. The useful measure is how easily the household can retrieve and return each container without disturbing its neighbors.
Measure the location around the rack
Measure the available width and depth at the actual placement spot, including baseboards, outlets, door swings, appliance doors, and the route through the room. A rack that fits the wall span might still block a cabinet or a person carrying groceries. Mark its footprint with removable tape or paper. Walk the usual route with the marking in place. If two people use the passage, test that ordinary use rather than judging the empty room from one viewpoint.
Check floor condition and the maker's placement requirements. Uneven flooring can affect a tall unit, while a wall, doorway, or heating source may impose other constraints. Follow the delivered instructions for leveling, any required restraint, assembly and clearances. Do not assume that a stationary unit becomes mobile by sliding it across the floor, and do not add wheels or hardware from a different product unless the maker permits it for that model. The two pictured units are stationary in their reviewed galleries.
Look above and behind the proposed rack before buying. A high shelf can interfere with a switch, vent, window treatment, or sprinkler. A deep bin can hide an outlet even if the empty rack does not. Make a paper side view with the tallest item at the highest proposed level. This is a quick way to see whether the shelf layout will work in the room rather than only within the rack's nominal dimensions.
Set shelf spacing around the deepest and tallest bins
Lay the measured items in rows on the floor and give each row a likely shelf. Place a tall item beside the shorter group you hope to keep with it. The tallest object sets the minimum clearance for that row, but access requires additional hand space. Leave enough room to grasp a handle or lift a lid without dragging the object across an upper wire shelf. That extra clearance varies by container, so test it with the actual bin rather than a universal number.
For a wire shelf, a small object may sit across gaps or tip when its base is narrow. Use only shelf liners or trays permitted by the maker and appropriate to the stored item. Do not assume that a staged photograph proves a liner comes with the rack. If you plan to use bins, check their base width against the shelf's usable support area. The edge and post positions can reduce usable width compared with a headline outside dimension.
Recheck the uppermost and lowest rows with the rack's assembled height. A shelf near the floor may be hard to clean under or to pull from; a shelf above shoulder height may be awkward for frequent items. Adjust positions within the unit's specified increments and assembly method. If the intended mix only works by placing a heavy or awkward item high up, reconsider the location or the item assignment before loading the unit.
Build the layout in stages
Follow the exact delivered assembly instructions and inspect all supplied parts before loading. Keep posts, clips, shelves and any feet or restraints associated with that product. A gallery can show a general assembly style but cannot replace the maker's sequence or identify every supplied piece. Assemble on the specified surface, check that each shelf is level as directed, and resolve any missing or damaged component before use. A shelf that appears to rest in place is not automatically seated as the maker intended.
Start loading with a small test group. Put the frequently used containers at a comfortable height and walk through one normal retrieval. Can a bin come out without shifting another? Can the lid open where it sits, if that is part of your routine? Does a second person's route remain clear? Move shelf positions under the maker's procedure while the unit is unloaded if these checks fail. It is easier to adjust an empty rack than one packed from top to bottom.
Then add the occasional items and check the whole route again. The goal is not to fill every open inch. Leave some open space for a hand to grasp a package and for the item to return to its place. If several similar containers are stacked, choose a sequence that does not require lifting a tower to reach the one at the bottom. The published stacked wire basket access guide focuses on retrieval from a different, nested-basket format; this rack guide concerns shelf spacing and the room around freestanding units.
Keep load claims separate from the access plan
Both product pages use strength language, and the ZLP gallery includes illustrated weight numbers. Treat those as seller claims until the exact delivered instructions identify the conditions and limits for the assembled model. Confirm whether any limit applies per shelf, to the complete unit, or only under a particular setup. A number in an image does not establish what your floor can support, how a concentrated object rests on wires, or whether an improvised wheel or liner changes the setup.
Place objects according to the maker's load and stability directions. Keep the heaviest approved items where the directions specify; do not infer that a low shelf automatically makes any object safe. For a tall rack, follow any required restraint or tip-prevention instructions and account for people or pets who may touch the unit. If the load, floor, or attachment requirement is uncertain, resolve it before filling the rack. This article can organize a layout but cannot certify a load path from an online photograph.
Do not use the staged appliances, plants, food bins, or garage tools as a capacity test. Marketing scenes demonstrate possible contexts and sometimes mix props from several sources. The exact physical rack, included hardware, delivered instructions, and actual installation conditions govern your own use. In the same way, the color or apparent thickness of wire in one photo is not a substitute for a verified specification.
Label only after positions work
A label can help people return items to a consistent place, but first make sure the item fits and can be reached. Use a temporary card while testing the shelf arrangement. After several normal retrievals, write a short label for a stable group rather than a long inventory list that changes each week. Keep a label where it will not catch on a bin being pulled out. The published shelf label holder setup guide covers fitting signs to a wire edge; this guide ends at deciding which shelf positions deserve a label.
Run the setup for a few days before adding permanent organizers. Notice which objects migrate to the front and which are ignored. If a bin is always left on the counter, its assigned shelf may be too high, too low, or too crowded. If a box blocks a neighboring item, move the grouping or create more clearance. These observations are more reliable than a styled empty-rack photograph for deciding whether a shelf position is useful.
Keep the measurements with the product record: outside rack footprint, usable shelf area, tallest bin, chosen shelf intervals, and the maker's loading and restraint instructions. If you replace the unit later, these notes show what the next one must accommodate. They also keep a future shopper from assuming that a five-tier label alone describes the access pattern. The final layout should let people take out and return ordinary items while preserving the exact product's assembly and loading conditions.
A simple cardboard template can help before the rack arrives. Cut one piece to the listed shelf footprint and place your largest bin on it. Mark where the posts and front edge are expected to sit, then slide the bin off as you would in normal use. The template cannot verify the delivered shelf's exact usable dimensions, so check those after assembly, but it can reveal an obviously oversized bin before you commit to a shelf plan. Repeat the trial with the tallest item and a temporary upper boundary to see how much hand clearance the bin needs.
If the pantry location is narrow, check the full movement of the object as well as its resting footprint. A handled basket may need to rotate as it comes out. A hinged lid may open into the shelf above. The person retrieving it may need a step back that the doorway does not allow. Those are ordinary access measurements, separate from load ratings. A good first layout leaves room for that motion, then uses the adjustable positions permitted by the exact unit to refine the spacing after a normal week of use.