Sewing & Crafts
How to make a paper cone for a simple still life
Make one freehand paper cone and choose a photograph that shows how its overlap was joined.
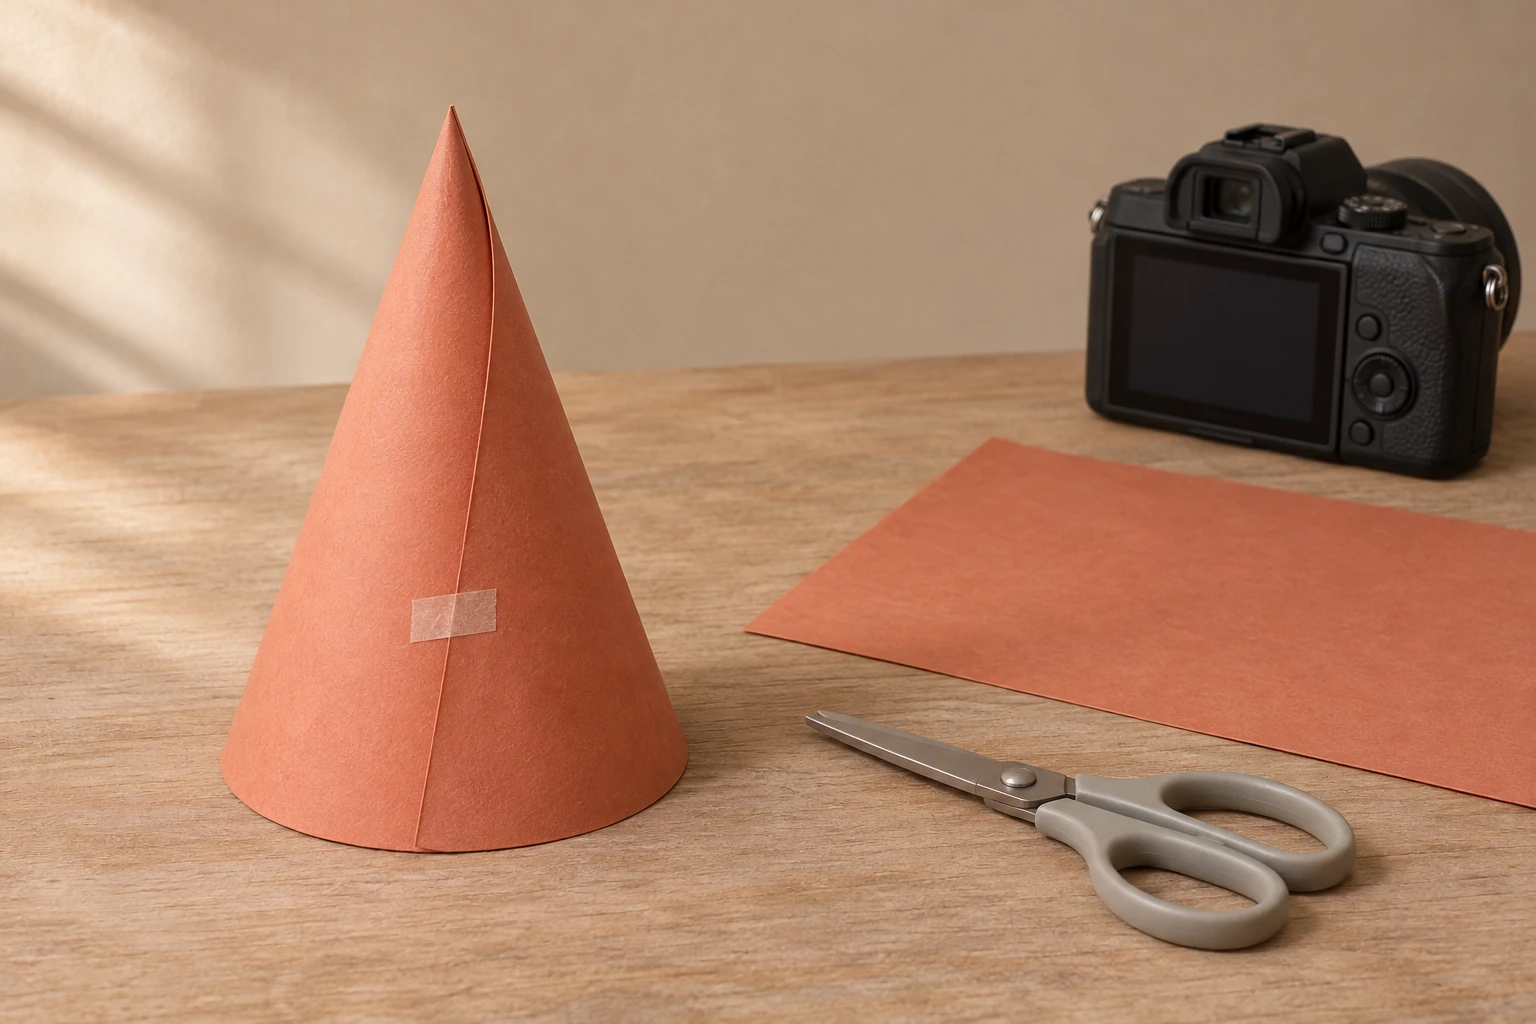
To make a paper cone for a simple still life, give the photograph one useful job: show where the paper was joined. You can enjoy the object’s outline while also choosing an image that communicates its construction. This activity combines a short documented making method with your own decisions about the picture you want to keep.
The cone instructions below come from the V&A’s complete written method. The photograph is a separate creative task, without a camera-setting recipe or a promised result. Neither retail paper example has been made into a cone or photographed for a performance test here. Use suitable supplies already available to you where you can identify their applicable handling information.
Choose what the photograph should communicate
A picture can show a pleasing pointed outline while leaving the attachment unclear. For this activity, choose the connection as the detail you want another viewer to notice. That is a purpose for your image, not a rule that every photograph of a paper object needs to explain how it was made. Another picture can have a different aim.
Keep the project to one paper prop and one chosen image. You do not need a decorated room, a costume or a collection of finished pieces. Decide which object you are working with and keep its relationship to the intended picture clear. If somebody else is helping, explain that the join is the detail you want to communicate, rather than asking them to guess what you consider important.
Leave geometry teaching outside this making session. The activity provides no net, sector drawing, required angle, area or volume calculation. You are constructing a modest paper prop and considering its image. A drawing of an ideal cone would be a different output from the object in your hand, just as a conceptual cover image is different from a photograph you make yourself.
Read the paper accounts within their limits
The WEUVEB cardstock account describes printed sheets. Its sole original image is a set of color swatches, rather than a counted stack or a thickness demonstration. The image does not establish a cone-making result. Keep that limited illustration separate from any claim about the actual paper you use.
The assorted construction-paper account describes colored sheets. Its sole original shows a layered stack with a folded crane as a presentation element. That crane is not a supplied finished cone or a demonstrated method for this project. No pack fulfillment, printing compatibility, material or rolling performance is authenticated here.
Choose your actual sheet without assigning an anonymous scrap to one of those offers because the colors resemble each other. If a material or fastener question matters, obtain the applicable information before proceeding. The product references can remain possible supplies, while the activity stays with a sheet you can appropriately handle. An unclear supply does not need to become a purchase merely to continue the session.
Use the complete written cone method
The V&A’s written paper-shape activity uses paper, scissors and tape or a stapler for these constructions. Follow the applicable directions for your actual supplies.
For its cone, roll a sheet at an angle to give it a point at one end. Fix it in place with tape or a stapler, then cut off excess paper. Keep that complete sequence with this project; no printed template is prescribed.
Pause if your actual supplies or handling situation do not let you follow the method appropriately. This guide adds no alternative adhesive, scoring pattern, extra cuts or fastening recipe. It also does not turn the paper object into a food container, protective cover or wearable item. Keep the intended result as an empty paper prop for your chosen picture.
Keep the real object separate from its image
After making your own piece, describe the part you mean by the join. Point to the actual connection on that object before relying on a photograph to explain it. If the connection remains unresolved, retain that condition rather than calling it finished because one view happens to look tidy. A picture can be useful while a real construction question still needs an answer.
Give the object a place in the proposed still life that you can manage under the supplies’ instructions. Leave unrelated objects out of the immediate arrangement while deciding how this one should appear. There is no requirement to add lettering, a seasonal motif or another handmade component. For this picture, you are interested in whether the existing paper connection can be identified.
Use your actual camera or phone under its own instructions. This article supplies no focus, exposure, lighting, mounting or electrical procedure. An inactive camera in the conceptual cover establishes no equipment requirement. You can work with the image-making arrangement you already understand, or leave that stage open while obtaining the information needed for your equipment.
Choose a view by the join visible in your own image
Look at the image you actually obtained before describing what it communicates. Can you identify the same connection you pointed to on the paper object? If you cannot, keep that as an observation about this picture. It does not establish that the paper has no join, that the construction failed or that a different retail sheet would solve the photographic question.
Consider another view only if it answers that specific question. Your aim is to make the connection recognizable in the picture, rather than collect a large set of nearly identical images. Use the result you can inspect. Do not label a view “clear” simply because you remember where the attachment was when the object stood in front of you.
If another person is available, show the image and ask which part they understand as the paper join. Their answer belongs to this exchange. It is not a measured study of every viewer or a universal judgment about image quality. If the answer points somewhere else, you have a concrete communication question to revisit instead of an unexplained verdict that the whole photograph is bad.
Follow one explicitly invented picture choice
Imagine that Mira has made her own paper prop and wants a photograph for a page about that making session. In the first invented picture, the outline interests her, but she cannot identify the connection she meant to show. She keeps that picture as one possible appearance. She does not use it as proof that the attachment is absent from the actual object.
In a second imagined view, Mira can point to the join and explain why that is the detail she chose. She selects this picture for the making page, while leaving the first as another creative possibility. No shoot or fabrication was performed to establish these fictional outcomes. The example distinguishes an image chosen to communicate an attachment from an image chosen for a different appearance.
Keep other paper projects and picture decisions distinct
The paper fan tutorial follows alternating folds and a secured pinched base while leaving the opposite paper portion free. Those construction steps do not become part of the rolled cone. A shared paper starting point does not establish one common attachment arrangement or a test of the selected stock.
The holiday paper vase-sleeve tutorial makes a loose pleated band and checks its relationship to a dry vessel. This cone photograph has no vessel-fit or seasonal-layer task. Keep its paper method and intended picture separate instead of transferring the band’s prototype and clearance questions into the cone.
A photograph made for a project can be useful without becoming a complete construction record. State what you intend it to show and what remains outside that picture. If someone later needs the full making instructions, give them the actual written method rather than expecting one chosen view to replace it. The method and your personal photograph serve different parts of the explanation.
If you share the picture with another maker, identify it as your own object and view when that is true. Do not attach a retail model or material claim you never established. A conceptual illustration can also be useful, but keep it identified as an illustration. It should not silently replace a photograph of the object whose actual connection you are discussing.
A picture of an unfinished piece can still be useful when that is the stage you want to explain. Identify it as work in progress instead of presenting it as the final attachment. Keep the image associated with the actual object and occasion it records. Changing a caption should not silently change the result the picture is being used to describe.
Keep an optional order separate from the photograph
If you decide to consider paper or another item on republeq.com, review the exact current offer and checkout for that order. A preference for cryptocurrency does not establish that new supplies are needed or that a particular payment method is available. If you prefer USDT, first confirm that the actual transaction offers it. Obtain the applicable asset, network, amount and receiving destination from the responsible service for that specific order. Do not copy instructions from another purchase, a product image or an unrelated message. Check the seller, selected item, variant, supplied package, delivery details, displayed total and terms. Leave any unclear field unresolved while you seek clarification. Review an applicable fee or conversion term from the current transaction instead of inserting an estimate. Keep the real order reference and the instructions that were confirmed. If an acknowledgement arrives, retain what it actually confirms instead of treating it as proof that a paper will suit the proposed project. If payment status becomes uncertain, reconcile that status before considering another transfer; uncertainty does not establish that nothing happened. This article supplies no wallet address, transfer guarantee or recovery procedure. A completed payment cannot identify an unlabelled sheet or establish a photographed construction result. You can leave an order unplaced while a relevant product question is answered. If somebody orders on your behalf, provide the exact selected reference and any remaining limitation, so an unresolved supply assumption is not carried silently into the transaction. Retain the confirmed transaction information with the actual order, and keep a later product enquiry attached to the item that was selected.
Keep the selected cone prop photograph with a short description of its purpose. Name the visible paper join you wanted it to communicate, without claiming that the image proves strength, durability or the stock’s identity. The actual written reference remains available for someone who wants the construction method rather than a view of your result.
You can finish with one modest object and one image chosen for a particular reason. If the image does not yet communicate the connection, leave that question open. The useful outcome is a truthful relationship between the paper object, the method you followed and the photograph you decided to keep.
Make the paper join identifiable in the photograph.