How-To Guides & Tutorials
Make leaf rubbings with crayons: compare three fallen leaves
Make leaf rubbings with crayons using the Acadia activity: cover permitted fallen leaves, rub lightly, and compare your own marks before arranging a page.
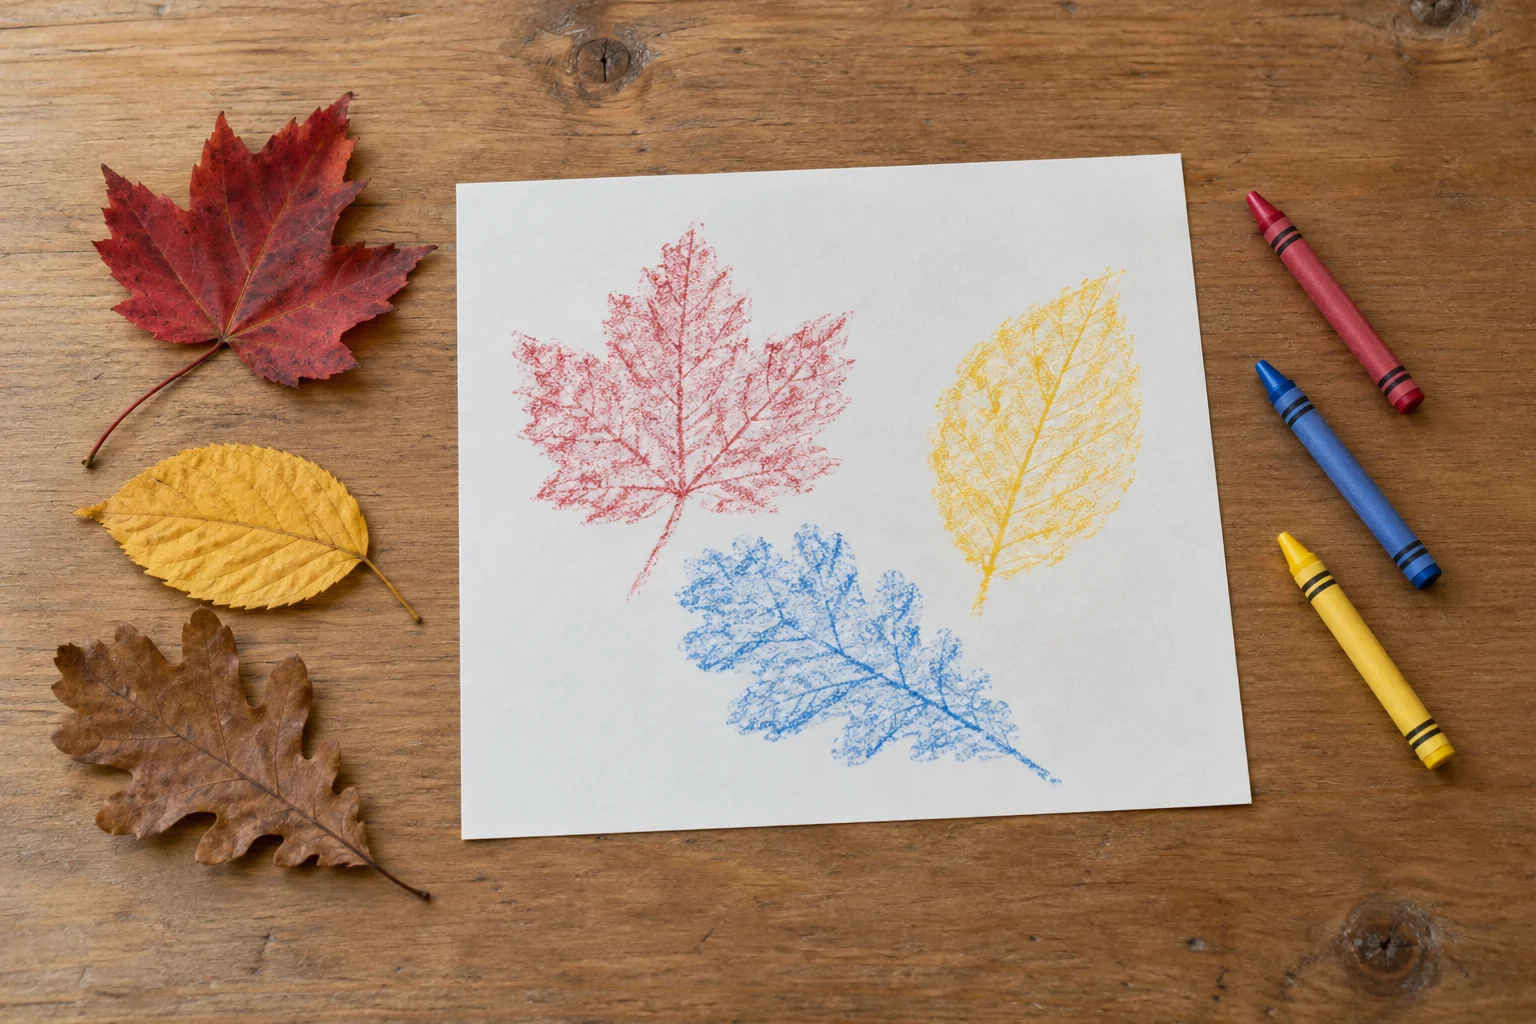
To make leaf rubbings with crayons, cover a fallen leaf with paper and lightly rub the crayon across the paper above it. Look at the leaf's outline and texture in the marks that appear. Begin with one leaf, then compare three different leaves if you have suitable material available. You can finish with separate studies or arrange several impressions on another sheet.
This tutorial uses the National Park Service's Acadia Leaf Rubbings Activity as its starting reference. That lesson asks learners to find three different fallen leaves, cover them with paper, rub lightly with a crayon, and compare the results. Here, the same simple activity becomes an unhurried craft session at home. It does not require either of the large retail crayon packages discussed below.
Set out paper and crayons for leaf rubbings
For paper and crayons for leaf rubbings, gather the paper you intend to use, an available suitable crayon, and the leaves. The Acadia materials list also names a clipboard. Put the paper on a firm working support where you can keep it from moving while rubbing. Use an existing working surface and protect it as appropriate for the materials you have. The selected Crayola offer is expressly labelled non-washable.
Begin with an ordinary spare sheet rather than the final page of a larger project. You will use that first sheet to see how your actual leaf and crayon behave together. Keep a second sheet nearby if you want to try another arrangement. Leave the remaining paper in its pack until you need it. Take out more paper when you want to make another picture.
Choose one crayon to begin. Hold it so the usable side can make contact with the paper, instead of relying only on its point. The Acadia lesson says using the side can be easier. Use a crayon whose actual exposed surface allows that movement; the retail descriptions do not explain a wrapper-removal procedure. You can decide whether to use another available crayon before adding tools or trying to alter an unfamiliar product.
Choose fallen leaves from a permitted place
Use fallen leaves from a place where you have permission to collect them, such as your own appropriate garden material. The Acadia lesson encourages finding leaves already on the ground instead of picking them from living plants. Its existence does not grant permission to remove material from a park or protected site. Choose familiar material that you can handle appropriately and leave anything you cannot confidently use.
Look for three leaves that give you something to compare. You might choose different outlines or leaves with visibly different vein patterns. Those are choices for this exercise, not a claim that the leaves belong to three different tree species. If you do not know their identity, call them by your own temporary descriptions, such as the narrow leaf and the leaf with the broad tip.
Place the leaves where you can look at each one before covering it. Notice its overall outline, the broad flat part, and any visible stalk attaching to that part. Turn it over and compare the two surfaces. You do not need to settle a botanical identification before making the picture. Look for those same visible details in the rubbing.
Make the first impression with a light movement
Set one leaf on the working support and cover it with the paper, following the Acadia method. Keep track of where its outline lies beneath the sheet. Hold the arrangement steady with your free hand without placing that hand in the path of the crayon. Begin over a small part of the covered leaf so you can see what your light rubbing produces before working across the rest.
Rub the usable side of the crayon lightly across the paper above the leaf. Continue across the area you want to include, watching the marks appear. The reference asks for a light rub over the leaf; pressing as hard as possible is not the activity it describes. If you want to see the actual leaf again, pause and lift the paper carefully instead of continuing from a guess about its position.
After the first pass, look at the rubbing beside the leaf. Which parts of the outline can you recognise? Where do marks follow the vein pattern you saw? Some areas may remain indistinct. Describe what actually appeared before deciding whether you want another pass. A faint section can be part of the result you compare with the next leaf rather than something that must be corrected until every mark looks uniform.
If you continue, return to the area you meant to develop and keep the arrangement steady. You can finish when the marks show the detail that interested you. Remove the leaf and look at the paper on its own. Keep the result with the leaf you used while comparing the marks. It is not a measured test of one retail crayon against another.
Comparing three leaf rubbings starts with the actual leaves
For comparing three leaf rubbings, repeat the basic light-rubbing method with your next leaf and another clear area of paper. Keep the first leaf identifiable until you have compared the results. If you use another colour, recognise that the colour has changed as well as the leaf. You can enjoy that variation without claiming it isolates the reason one picture looks different from another.
Make the third rubbing when you are ready, leaving enough visible space to recognise each impression. The Acadia activity asks learners what they notice about the differences and whether some leaves were harder to rub than others. Answer from your own session. One leaf might have been harder to hold in place, or you may have found an outline easier to see. Those observations belong to the actual attempt you made.
Put each leaf beside its corresponding impression and compare one feature at a time. Start with the outside shape, then look at the pattern within it. If a detail appears clearly on the leaf but not in the rubbing, point to both places. You can try to show that particular detail on another sheet. You do not need to explain every difference before deciding which image you enjoy looking at.
If the impression has two outlines, look at the actual arrangement before assuming the crayon caused it. Consider whether you moved the leaf, the paper, or both during the attempt. You may remember a movement without knowing exactly which mark it produced. On another spare area, use the same leaf and pay attention to keeping it still. Compare what you see afterwards. That is a useful practice question, even when it cannot establish a single proven cause for the earlier picture.
You can also choose just one part of a leaf to study. Before covering it, decide which detail interests you and where it will lie on the sheet. Make the light rubbing across that area, then compare it with the actual feature. A partial impression can be an intentional choice rather than an unfinished full leaf. Keep enough context in your own observation to remember which part you selected, especially if you later put several partial studies together.
Use leaf words only where you can point to the feature
The Acadia vocabulary calls the broad, flat part of a leaf its blade and names the petiole as the stalk connecting the blade to the stem. Look for those parts on your actual material, then see whether your rubbing includes them. A stalk outside the paper area will not appear in the picture merely because the leaf originally had one. Keep the term with the feature you can actually identify.
Look at how the vein marks branch within the impression. Describe their direction or where a line becomes difficult to follow without assigning a species name from the picture alone. You can write a short observation beside a rubbing if you want, such as which leaf it came from or what you noticed during the attempt. Leave an uncertain identification unresolved instead of turning a guess into a label.
Arrange another page around one visual idea
After the separate studies, you can make another page using the same permitted materials. Decide whether you want a row of distinct impressions or a looser arrangement. Place a leaf, cover it with the paper, and rub the intended area before choosing the next position. Work from the marks already on the page so you can see how much room remains. You can stop after one impression if it is the one you want to keep.
A single colour keeps one part of the arrangement consistent. Several colours let you make a different visual choice. Neither approach has to reproduce the leaf's natural colour. Decide what you enjoy in the picture and keep that artistic choice separate from identifying the plant. A blue rubbing can show an outline without claiming that the leaf was blue when you collected it.
If another person joins the session, let each of you choose a page to make. Share the materials by agreement and keep unfinished work distinguishable. One person may want three separate comparisons while another prefers a composition. You can discuss the actual marks each noticed without grading the pictures or requiring both people to finish at the same point.
Read the NOBRAND and Crayola supply descriptions separately
The NOBRAND three-colour regular crayon pack describes red, blue, and yellow crayons in individual cellophane, with boxes for storage. Its title identifies three hundred packs and nine hundred crayons. The description presents a bulk classroom supply. It does not specify a formulation, a washability claim, or measured rubbing performance, so none of those properties should be inferred from its low number of colours.
The Crayola regular Classpack offer identifies SKU sku-17414812147 and UPC 012899901160. It describes sixteen assorted colours and an order of two boxes with eight hundred crayons per box. The stated size is 3.63 by 0.31 inches, and the crayons are labelled non-washable. These details identify the offered supplies; they do not establish a tested advantage for making leaf impressions.
Choose supplies for the work you actually expect to do beyond this one session. You may already have enough suitable crayons to begin. The difference between three colours and sixteen concerns the stated assortment, while the package quantities concern storage and purchasing. Neither quantity tells you how many leaves a household needs to collect or how many pictures someone must make.
Keep the finished study with the activity you chose
If the leaf reminds you of a place or person, the separate postcard-writing afternoon guide suggests beginning a message with an ordinary detail worth sharing. You could write about what you noticed without treating this rubbing paper as approved postcard stock. Presentation and delivery remain separate decisions from choosing the words you want to send.
For another paper activity, the origami practice-cup guide follows a traditional square-paper folding reference. Follow its square-paper sequence for an empty practice model. When you make leaf rubbings with crayons, keep the impression you enjoyed and the observation that might guide another attempt. You can return to the leaf activity without turning every spare sheet into a new project.
Conceptual scene to make leaf rubbings with crayons, with whole generic leaves, crayons, and a finished sheet; no exact retail supplies or measured technique comparison is shown.