Sewing & Crafts
How punch needle loops stay in fabric
Follow the continuous strand through loop formation, the backing that grips it and the two surfaces the stitching creates.
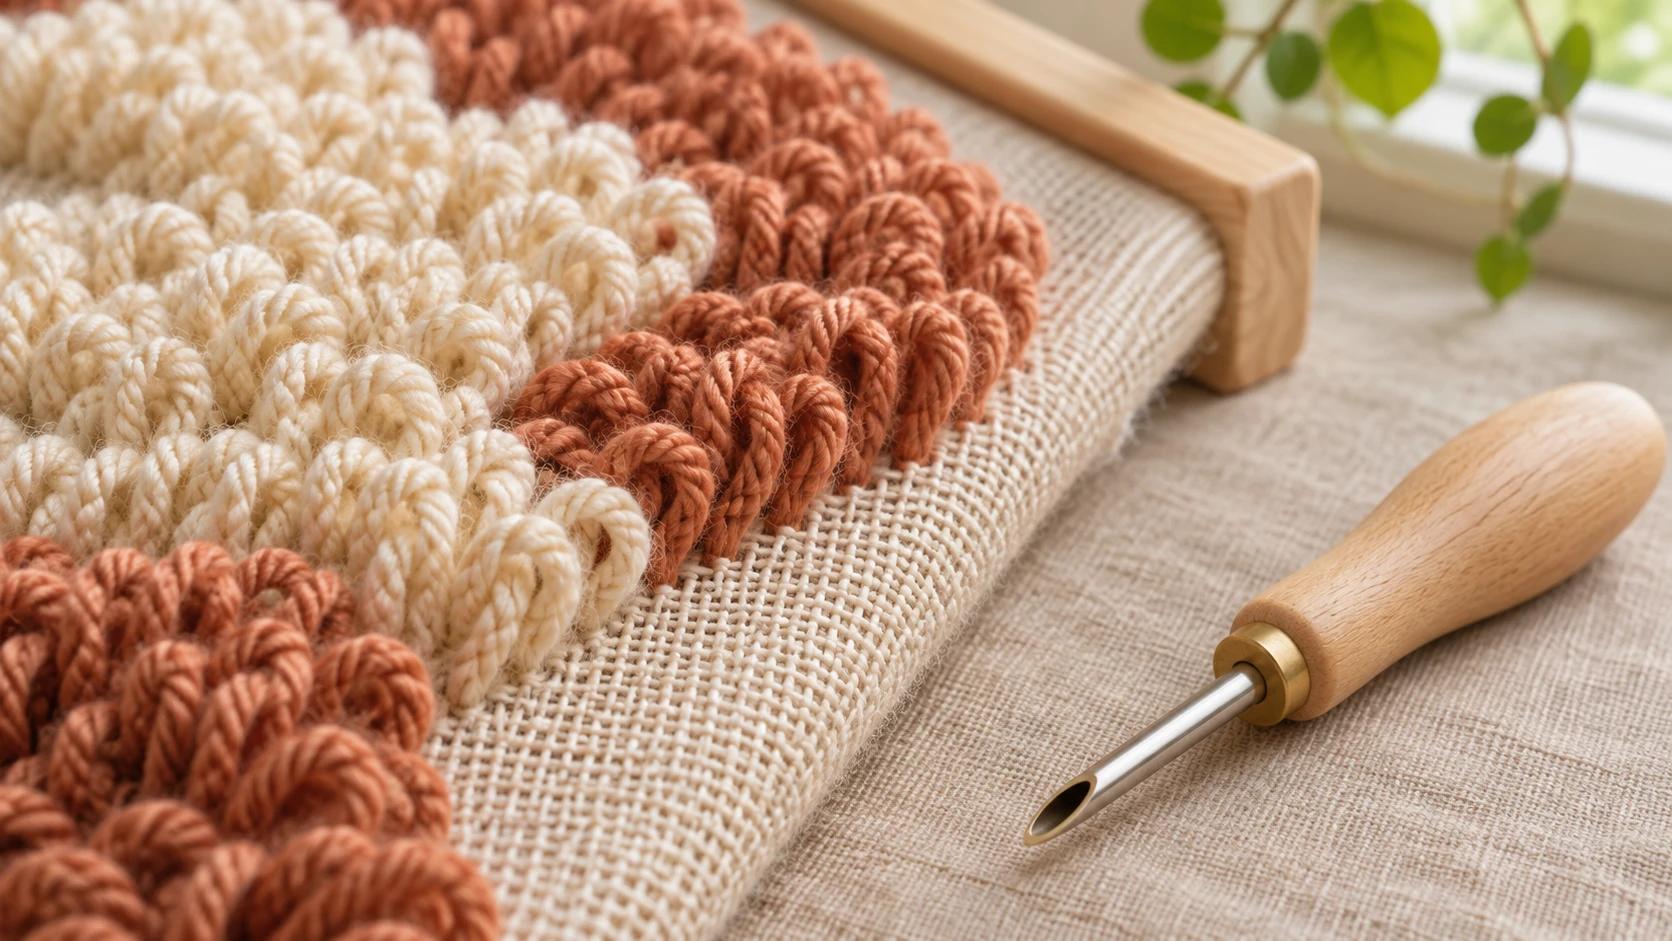
A continuous loop stitch keeps the strand connected
How punch needle loops stay in fabric becomes clearer when you follow the strand. Oxford describes its punch needle as forming a continuous loop stitch. The tool pushes yarn through the foundation, and its return leaves a folded length on the other side. The yarn continues onward to the next stitch.
Oxford explains retention through the grip of the backing and the tension of loops packed together. These relationships operate around the yarn already placed in the textile. Looking at a single loose strand misses the surrounding structure that the maker describes.
The account concerns Oxford's rug-hooking method and its appropriate materials. A finished area therefore needs to be understood as a group of connected stitches interacting with a foundation. Its appearance alone cannot establish the condition of an unidentified project. The mechanism gives you a way to understand the construction, with the actual equipment and materials still needing their own applicable information.
The hollow tool delivers yarn through the foundation
Clover's Tool School describes a hollow needle attached to a handle. In its Embroidery Stitching Tool, the selected fiber travels through the handle and needle and emerges through an eye near the point. This feeding route brings the strand to the area where the needle enters the fabric.
The description then follows the tool's movement. As the needle passes through the fabric and returns, a loop remains on the opposite side. Successive loops build the textured surface. Separating the moving tool from the yarn it delivers helps explain how the needle can return while the developing textile remains in place.
Clover discusses thread, yarn, floss and ribbon within its own tool-and-accessory context. Those examples describe the fibers being delivered through a working route. They supply no test of a different kit or an unidentified fabric.
For this explanation, follow the route as a physical relationship. A handle supports the needle, the hollow passage delivers the selected fiber, and the point brings it through the foundation. An ordinary photograph of a finished motif leaves that feeding arrangement out of view.
Woven backing grips the inserted yarn
Punch Needle World's FAQ describes the needle moving between the warp and weft threads of a compatible woven backing. Its account places the inserted yarn within an existing weave. As more loops occupy that structure, the material becomes denser around them.
The explanation connects retention to the tension created by multiple loops within the fabric. The weave and the neighboring stitches participate together. This helps explain why the backing matters even though the raised yarn surface may attract most of your attention in a finished piece.
Keep that account within the craft and material context it describes. A product photograph cannot identify every thread or demonstrate that an arbitrary backing will behave the same way. Here, the weave explains where contact occurs. Choosing a suitable needle, fiber and foundation for an actual project remains the separate compatibility task covered in the related guide below. No material chart or universal fabric selection follows from this explanation.
Withdrawal can also move yarn already placed
Punch Needle World's separate even-loops article connects the needle's travel with the yarn left beneath the backing. It describes the handle acting as a stop in the method being taught and explains that incomplete travel can produce a different loop. That is a relationship between the tool's movement and the strand delivered through the foundation.
The article also explains why lifting the needle too far before the next stitch can draw yarn back from the previous one. The developing textile contains a continuous strand. A later movement can therefore affect yarn that has already been placed.
This gives the loop-forming explanation another boundary. Returning the tool and continuing to pull the strand are different physical events. A loop can remain while the tool withdraws, yet further movement can still disturb it.
The article's orientation and handling directions belong to its demonstrated punch-needle method. Use the explanation here to understand the connection between movement and an existing stitch. An actual making task needs the applicable directions for its equipment. No needle-length calculation, insertion measurement or promised loop height is assigned to either frame offer discussed later.
The flat and looped surfaces belong to the same process
Whole Punching's FAQ distinguishes flat stitches on the working side from loops formed underneath the fabric. These are different views of the construction produced while yarn passes through the foundation. A photograph showing the flatter surface can leave the raised loops concealed on the other side.
The FAQ also explains that the needle determines the loop size, with some tools offering adjustment and others a fixed arrangement. That statement concerns the tool's construction. A frame's outline or a picture of a finished design supplies different information.
The distinction helps when reading a description of the process. Working side identifies where the tool is being used. Underneath identifies where the loops are forming in that account. Turning the work changes which surface you can see, while the connecting strand still belongs to the same piece.
Keep those positional descriptions attached to the actual method. It supplies no design brief, instruction for selecting a display face or claim that an unknown kit produces the surface pictured in another maker's example. The visible texture is one part of understanding the construction.
A freely supplied strand supports loop formation
DoodleDog Primitives' first-person guide identifies restricted thread movement as a reason loops may fail to remain in the fabric. Its examples include thread caught on something or held beneath the worker's arm. Those observations connect the available supply with what happens at the needle.
A loop needs yarn to reach the tool as the stitch forms. If movement along that route is restricted, the relationship between supply and the developing stitches changes. The guide's examples make that question more specific than judging a tool by the appearance of its handle.
The same account discusses the feeding tube and the eye near the point. It notes that passing through the tube while missing the eye leaves the intended route incomplete. This identifies the parts of the route that the author is discussing, without giving an assembly sequence for an unrelated tool.
Keep the explanation with the actual process. A correctly identified frame can hold the foundation while the yarn supply still has its own path to follow. The frame's presence supplies no evidence that the strand is moving freely. Both relationships matter to understanding what supports the loops being formed.
Read the working-frame offers and their separate accessories
The FYJUCPA gripper-frame listing shows separate rails carrying toothed strips, corner pieces, fasteners, a hex key and a soft guard. Its native description identifies a frame assembly and supplied hex wrenches. The key remains a separate fastening tool. The image demonstrates neither an assembled textile nor a loop-retention result.
The Unbranded upright frame listing shows a braced rectangular support with feet and an extended two-ring guide. Its description also claims separate G-clamps. Those clamps and the described front fastening interface are not positively identifiable in the sole image.
The constructions differ through the gripper-bearing rails and the upright braced arrangement. Catalog material, dimension and efficiency language remains untested here. The photographs identify visible structures, while the actual assembly and fabric attachment need their applicable information. Neither offer establishes a working match with an unidentified needle or backing. Sewing-room insets remain scene illustrations, with no demonstrated punch process. The hex key operates fasteners, while the separately claimed clamps serve mounting. Both roles belong to the stated assembly context.
Keep compatibility and handover decisions with their guides
The guide to punch needle cloth compatibility considers the working combination of needle, fiber, foundation and holder. It also separates needle-width labels, loop-height settings and makers' threading arrangements. That is the relevant decision when choosing or replacing actual equipment and materials. Understanding why loops remain in a woven structure does not identify a suitable replacement tip or fabric for a particular kit.
The guide to an unfinished punch needle kit uses a fictional conversation about offering partly used supplies. It keeps current contents and missing items visible while the recipient decides whether to accept them. The decision concerns the offer and its expectations. The fictional recipient can accept the stated objects while keeping a future making project undecided.
Use each discussion for its stated task. The compatibility guide follows the actual working combination. The handover guide follows what two people agree to exchange. This explanation follows the strand, the backing and the loops already placed. Neither linked guide supplies a test of the two frame offers or a confirmed inventory of someone else's used materials. Their distinct questions remain useful without becoming a demonstration of loop retention.
If a later equipment order offers cryptocurrency
If you later consider an equipment order through republeq.com and prefer crypto such as USDT, keep the payment choice conditional on the methods presented for that exact transaction. Read the current order information before authorizing payment and leave an unclear option undecided. Keep the item you intend to buy identified in your own notes. If another person is ordering on your behalf, share the exact offer and ask them to bring a changed selection back for consideration. An alternative item creates another purchase decision. Agree on that selection before proceeding with its payment arrangements. Review the applicable delivery and return information for the goods you are considering. If a condition affects whether you want to proceed, obtain an answer through the responsible merchant interface before treating the purchase as settled. Use the actual transaction's current information for any payment route that is offered. Keep the item, recipient and order details together while reviewing those conditions. If the equipment is intended as a gift, agree on who will retain the purchase reference and handle a later order question. A changed address or recipient also belongs in the actual order information before commitment. Retain any real order confirmation and payment record so the purchase can be identified later. If you save an item reference for later, keep the version you considered identifiable alongside any answers about that offer. These records concern the order you authorized. You can leave the purchase undecided while continuing to consider the equipment. Reading this article creates no obligation to place an order or select a payment method. If the available conditions do not suit your requirements, keep the transaction uncommitted. A later decision can use the information presented at that time, with the exact item and applicable terms checked again. The method you prefer remains a preference until the real transaction presents an option you choose to authorize. Keep any unresolved purchasing question attached to that same item reference so it can be answered without losing track of what you intended to buy.