Sewing & Crafts
glue stick not sticking to paper: check the lifted edge
Trace a lifting paper edge to coverage, handling or surface fit before changing glue sticks.
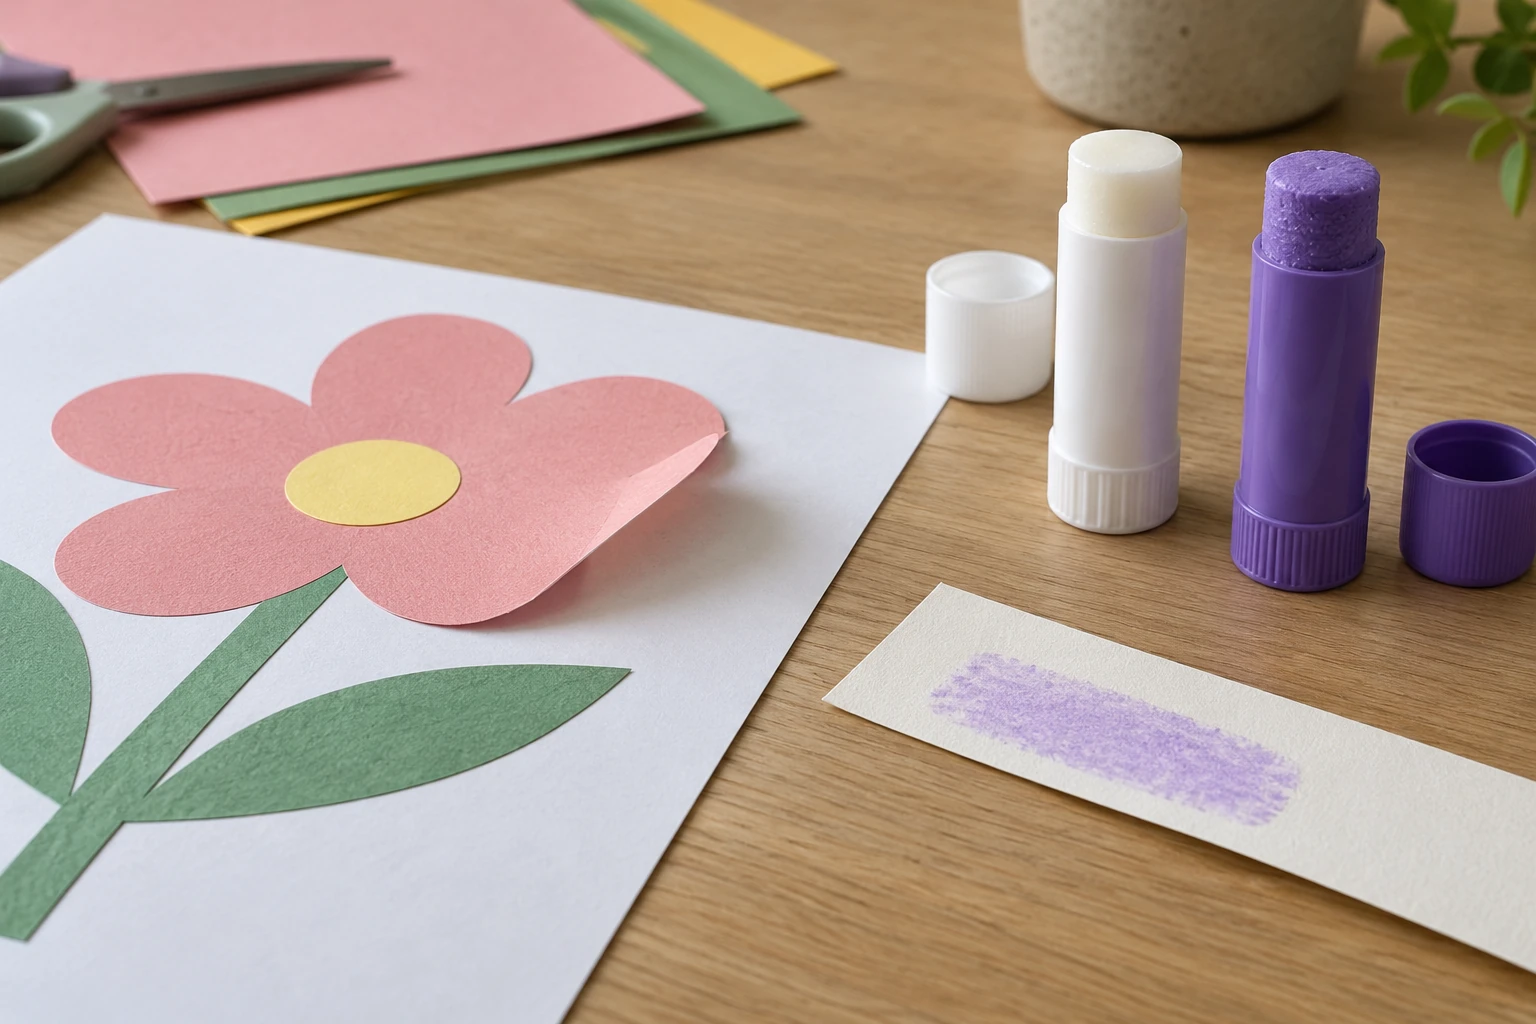
A lifted corner can spoil an otherwise tidy paper project. Before adding another coat, find out which edge is loose and what happened just before it lifted. Was that part of the cutout missed when you applied glue, moved while the sheets were being aligned, or handled before the joint had settled? The useful question behind a glue stick not sticking to paper is specific to that sheet and application. A fresh stick may help if the old one is damaged, but changing products will not reveal a missed patch of coverage.
Look closely at the lifted edge
Set the piece on a clean, level surface and lift only the part that has already come free. Notice whether the loose area is a thin strip along one edge, a whole corner, or a scattered set of spots. A strip can point you toward the way glue was applied near the perimeter. A corner that moved during placement may need a different handling sequence. Keep the rest of the paper attached if it is holding well. Pulling a whole cutout up to inspect one small edge can create damage you did not have at the start.
Check the back of the free corner and the paper beneath it. You are looking for an obvious dry gap, a thick lump, or a torn fiber, not trying to diagnose the adhesive from its color alone. If a clear-drying stick was used, the original path may be hard to see. On a spare offcut, a purple application indicator can make coverage easier to observe while you work. That advantage is about visibility during application. It does not establish that the purple formula makes a stronger finished bond than a white one.
Take a moment to identify the paper itself. Lightweight sheets, textured craft paper, coated card, and printed photos are different surfaces. A listing that says a glue stick is suitable for paper or photos is still the seller's statement; it is not proof for every coating or valuable original. If the surface has a finish you do not recognize, test a small scrap or offcut with the same finish. For an irreplaceable photo or document, follow the material maker's conservation guidance instead of experimenting on the original.
Try to distinguish a new failure from an old one. If several corners lifted only after the paper was put into a folder, rubbed against another sheet, or bent around a display board, handling may be part of the story. Make a spare sample and let it rest as the product directs, then handle it in the same ordinary way as the finished project. Do not bend or pull a delicate original to reproduce the problem. The aim is to learn whether the application method suits the actual use, while keeping the finished work intact.
Check the stick before repeating the pass
Look at the exposed face of the glue stick. If it is visibly nicked, recessed below its tube, contaminated with paper fibers, or difficult to turn up, the applicator may be making an uneven path. Gently extend only enough material to make contact, following the package directions. Do not force the twist mechanism. A smooth-looking top is useful, but it cannot prove how much glue reached the far corner of a large cutout. A short test line on spare paper gives you a better observation.
When a fresh pass begins well and becomes patchy halfway across a larger shape, pause before blaming the whole stick. Look at the applicator face again and at the paper beneath it. A raised fold, overlapping cutout, or worktable debris can interrupt contact. Flatten the spare test piece on a clean surface and repeat a short pass with the same pressure. If the line still looks uneven, follow the product's use directions or try a different intact stick on spare stock. Keep the real artwork out of that diagnostic until you know what changed.
Both examples here are complete twist-up paper glue sticks. The BAZIC disappearing-purple 8g offer says its colored formula helps the user see where glue is placed. The native gallery shows a display of purple-labeled sticks and repeats the disappearing-purple and dries-clear claims on the packaging. The listing also describes washability and other qualities. Treat those performance statements as seller claims; the picture does not show a finished paper joint or a test of the edge you are repairing.
The BAZIC white 8g glue-stick offer is a white alternative. Its native gallery shows a four-stick blister package, and the seller describes a twist-up applicator that dries clear. The two captured images appear to show the same package view. A white stick may be easier to place if you already have a reliable application pattern; a purple indicator may be more useful when missed sections are the concern. Neither listing provides a controlled comparison of bond strength on your particular paper.
Try one small coverage test
Cut two pieces of spare paper from the same stock as the project, including a corner or narrow tab like the one that lifted. Place them on a clean work area. Apply the glue stick to the back of the top piece with light, even contact, paying attention to the perimeter. Keep your fingers away from the joining faces. If you use a purple stick, observe where color appeared before bringing the pieces together. The color is a guide to your application path, not a guarantee that a particular amount of adhesive is present everywhere.
Join the test pieces in the same order you use for the real project. Start at one side, align the paper, and press across it gently with clean hands or a suitable tool that will not mark the surface. Avoid sliding the top piece repeatedly after it meets the backing sheet. Let the sample rest for the time directed by the product label before judging its edge. A fast look immediately after pressing tells you about alignment and visible coverage; it may tell you little about the joint after the seller's drying period.
Make only one change at a time. For example, use the same paper and stick but pay closer attention to the perimeter, then compare with an earlier sample. If the improved sample holds while the first lifts, coverage or handling deserves attention. If both samples lift in the same way, check whether the stock is coated or dusty and whether the product is intended for that surface. This is a practical observation, not laboratory evidence about the adhesive. Do not promise a bond will last based on a single short test.
Handle the actual piece with care
Once the test gives you a workable sequence, return to the loose edge. If the paper is fragile or the artwork is valuable, a small visible imperfection may be preferable to lifting more material. When a simple craft piece can safely be opened a little, apply a controlled pass to the loose area and press it back into place according to the glue's instructions. Keep the applicator from scraping fibers off the paper. If the face of the stick picks up loose pieces, stop and clean or replace it as directed rather than carrying debris across the project.
Do not bury a lifted corner under a thick layer merely because the first pass did not hold. Excess material can change how a thin sheet lies, and it can make it harder to see whether the original problem was missed coverage or handling. The better move is a small sample and a deliberate pass on the actual area. If the paper wrinkles, tears, or changes color during a test, stop. Check the material and adhesive instructions before extending the method to the finished piece.
There is also a difference between a cut edge and an adhesive edge. A rough or frayed paper cut may refuse to lie neatly even when the glue reaches it. The guide to a rotary paper trimmer that frays paper edges deals with checking the cutting result on one spare sheet. That is a preparation question. Here the job is to locate a lifted joint after a glue-stick application, so inspect the cut separately before blaming the adhesive.
Choose for coverage visibility
A purple indicator can be useful when several people work on the same craft, when a large cutout has many narrow projections, or when you repeatedly miss the perimeter. It gives a visible cue during the pass. A white stick can be enough when the project is simple and you can follow the same complete path each time. In either case, check the exact current listing for stick size, supplied quantity, and the seller's surface and drying directions. The two BAZIC offers have different package configurations; the gallery image alone does not settle what a carton will contain.
For a classroom, consider who applies the glue and who handles the finished sheets. A clearly visible application path may help a learner notice a missed corner, while a short drying routine may reduce immediate rehandling. Those are workflow choices. The native pages describe both products for craft or paper use, but their statements about fast drying, smooth application, washability, or permanent bonding are not independent test results. Use a spare piece from the same supply before assigning either stick to a batch of projects.
Do not treat all products called “glue sticks” as interchangeable. Hot-melt rods used in a heated glue gun and a threadlocker packaged as a stick have different applications from these twist-up paper adhesives. If your actual project uses a heated glue gun and leaves strands while the nozzle is moved, the guide to hot glue strings addresses that separate tool and motion. It does not provide a repair method for a paper glue-stick corner.
Decide from the small test
Return to the original loose edge with three observations: where it lifted, whether the application path reached that spot, and what happened on a spare-paper sample. If a deliberate perimeter pass solves the sample, use that sequence on a safe part of the project. If the sample still lifts or the surface changes, pause and check the paper and product guidance before adding more glue. The visible purple option helps you track coverage; the white option leaves you to track the pass by position and habit. Neither color is a shortcut around the surface test.
Before storing the finished paper, let it rest according to the chosen product's directions and check the corner again without pulling on it. Note which paper and stick you used if the project will be repeated. That simple record can save another round of guessing when a later sheet behaves differently. If the spare test exposed a coverage gap, plan a more careful perimeter pass for the next project. If it exposed a surface mismatch, check the paper and adhesive directions before choosing another stick.