Garden Care & Watering
garden rake handle replacement: confirm the exact head connection before a repair
Identify the exact rake and attachment before choosing a replacement handle or returning a repaired tool to use.
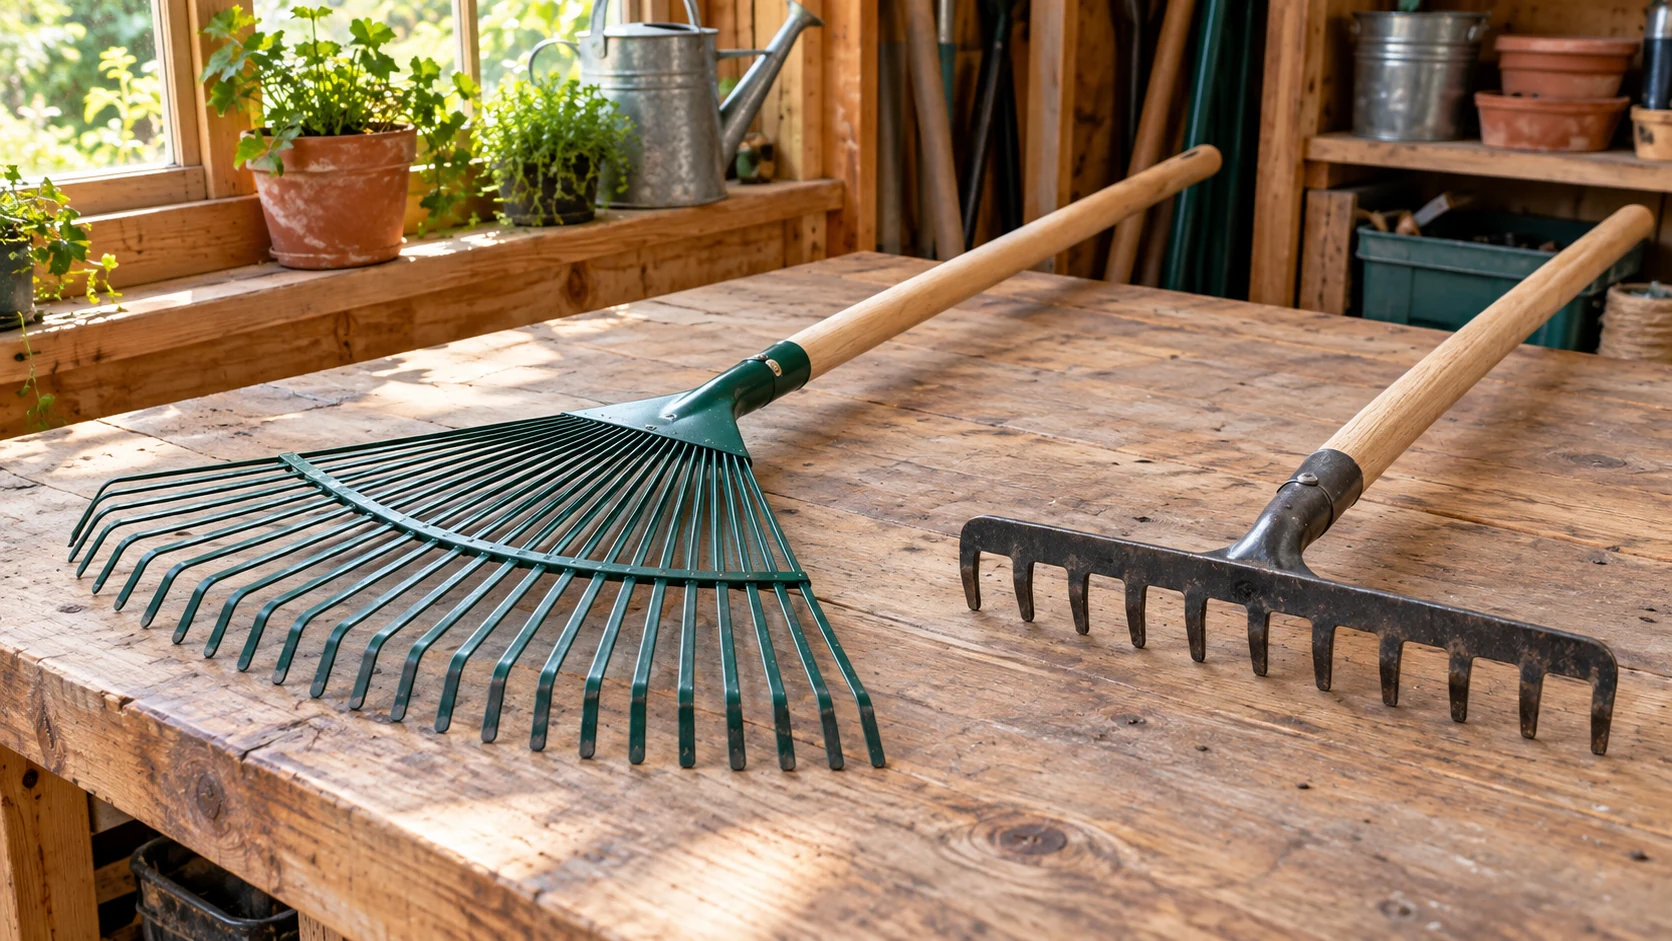
A garden rake handle replacement is a fit question before it is a repair task. A head that looks familiar may use a different connection, fastener, or factory assembly from the one already in the shed. The safe first move is to identify the exact whole rake and the failed part, then ask whether its maker supplies an approved replacement or repair method. A generic handle that is close in length or color is not proof of compatibility.
Identify the whole rake and the actual fault
Take the rake out of use if its head moves on the handle, the shaft is split, or the connection has an exposed sharp edge. Do not keep pulling it through leaves or soil to see whether the problem gets worse. Photograph the complete tool, its label, and the joint from a safe angle. Note whether the head, handle, grip, or a removable fastener appears to be the failed component. Avoid disassembling an uncertain joint just to learn its shape.
Write down the model name, product identifier, and any markings actually visible on the tool. A retail title can be shortened or reworded, so the delivered rake label and maker instructions matter. If the label has worn away, preserve photographs of the head shape, handle material, and attachment. Do not call a visual resemblance an exact model match. A seller or manufacturer may need those images to identify the right part.
Separate a loose head from a bent tooth, torn grip, or ordinary surface stain. Those conditions do not necessarily have the same remedy. A handle that flexes from damage is an immediate handling concern; a leaf tine out of line may affect gathering. The public guide to leaf and soil rake head roles owns the task-selection distinction. Here, that distinction helps identify which exact whole tool needs a compatible component.
If several household rakes are stored together, tag the defective one and keep it away from ready tools. The person who next needs it should not discover the failed joint while applying force. Do not tape over a split handle and return it to service as though the attachment has been repaired. A temporary label is a communication aid, not a structural fix.
Use the product identity, not a silhouette
The current Fiskars leaf rake listing identifies a 24-inch leaf rake. The public listing establishes the whole-product identity but does not supply a replacement-handle diameter, joint drawing, or approved fastener specification. If this is the rake in hand, use its exact maker and model information to request a compatible part or service guidance. Do not infer the connection from the broad leaf-head outline.
The current Kent & Stowe soil rake listing identifies an R504KS whole soil rake with a stainless-steel head. That description likewise does not establish that a generic handle, wedge, or screw fits its attachment. Verify the delivered model and actual joint before asking the manufacturer or an authorized parts source. A soil rake can experience different working forces from a flexible leaf rake; visual similarity is not an interchangeability test.
Do not assume that two rakes from the same category share a replaceable handle. A head could be fixed at the factory, connected with a specific socket, or built with a proprietary component. The current product pages do not settle that question for a broken unit. Record what the actual instructions say, and ask the maker whether the damaged part is user-replaceable. If the answer is uncertain, leave the tool out of service.
A product ID helps narrow the conversation with a parts supplier, but the ID alone does not approve a repair. A revised model can change a joint while keeping a similar sales name. Confirm any offered part against the exact delivered variant and the maker's compatibility statement. If the seller offers a generic part only, ask for dimensions and connection details in writing and compare them with authoritative specifications for the tool. Do not guess a fit from a thumbnail image.
Check the interface in a safe order
First ask whether the manufacturer specifies a replacement at all. If it does, obtain the exact part name and instructions. If the product is meant to be replaced as a whole, forcing a new handle into the head could make it unsafe. A damaged tool may also have a cracked head socket, so replacing only the shaft may not address the failure. Inspect the whole connection with the tool unloaded and clean enough to see, without taking apart a joint whose method is unknown.
Next confirm which part carries the connection. A handle may enter a head socket, attach through an intermediate ferrule, or have a fixed molded transition. Do not equate a matching outer width with a secure fit. A joint also depends on insertion depth, material, fastening method, and the forces expected in use. Only the maker's exact instructions or a qualified repair professional can establish the assembly method for a specific rake.
Check for hidden damage around the attachment. A loose head may have worn the socket, enlarged a hole, or split the handle end. A new shaft cannot restore a damaged receiving part by itself. Photograph the area before cleaning and again after loose dirt is removed. Do not grind or drill the head to make an accessory fit unless the maker explicitly approves that alteration. It can change strength and create sharp edges.
Keep measurements and model details separate. A measurement of the existing shaft may help a manufacturer identify the part, but it is not a universal fit rule. Measure only while the tool is stable and safe to handle. Note whether the number is an actual measurement of this tool or a value supplied by the maker. If those disagree, resolve the difference before buying or assembling anything.
Fasteners deserve the same care. A screw that enters a hole may still have the wrong length, thread, head shape, or material for the connection. Do not reuse a bent or corroded fastener merely because it is available. An approved replacement kit may include the right hardware and a sequence for fitting it. Follow that sequence exactly. If there is no documented method, seek qualified help rather than testing an improvised joint under force.
Decide whether a part or a whole tool is the right path
A repair decision should consider the condition of the entire rake. If the head and handle are both damaged, one replacement component may leave a second failure. If the maker supports a specific part and the rest of the tool is sound, a controlled repair may be practical. Do not label a generic component compatible simply because it is sold beside similar rakes. Ask for a fit statement tied to the exact model.
Keep the work separate from ordinary seasonal maintenance. The public guide to garden rake winter storage covers cleaning, drying, and keeping tools ready after their last yard job. Cleaning can expose a crack or loose joint, but it does not repair one. A rake with a failed handle should be stored in the repair area with a clear note, not returned to the ready rack because it looks clean.
Ask whether the part source identifies a return or support route if the component does not fit. Keep the original model information, photographs, and the compatibility response together. This is useful evidence for a household decision, even when the repair does not go ahead. Do not discard the old joint hardware until the approved part and method are confirmed; its markings may be needed to identify the correct replacement.
If the tool is unsafe and the maker offers no supported repair, retiring the whole rake may be the responsible option. Follow local rules for handling and disposal of metal, wood, or composite materials. Do not put a sharp damaged head loose in a place where someone can pick it up. The goal is a functional tool that can be used safely, not a repair attempt completed at any cost.
Verify the assembled tool before normal work
If a maker-approved replacement is fitted, review the written steps and check that every specified part is present. The handle should sit in the intended position, the head should not wobble, and fasteners should be installed as directed. Do not tighten by guesswork when a torque or sequence is specified. Keep fingers away from teeth and sharp edges during the check. If a qualified service person did the work, ask what was replaced and how the fit was confirmed.
Begin with a controlled, low-force check in a clear area. Do not swing the rake overhead or pull hard against a root to test the joint. Stop immediately if the head shifts, a fastener moves, or the handle cracks. A static inspection alone is not proof that an improvised connection is safe, which is why the approved method matters. Record the repair date and part identity so a later user knows what changed.
Return the rake to the job its head is designed for. A leaf rake and a soil rake place different demands on a connection; a repaired tool should not be pressed into a new role just because its handle feels secure. After an ordinary use, inspect the joint again while the tool is clean and dry. If movement appears, remove it from service and revisit the exact repair instructions rather than repeatedly tightening an unknown fastener.
Share the repair record with anyone else who uses the shed. A note tied to the rake can state the exact model, the approved replacement part, who fitted it, and the date of the first ordinary-use check. That information prevents a later owner from assuming an unfamiliar connection is original. If the same joint loosens again, preserve the observation and ask the maker or repair professional what it means. Do not silently repeat the same adjustment each season. A recurring fault deserves a new assessment of the whole head and handle before the tool is used again.
A garden rake handle replacement succeeds only when the exact tool, damaged part, and approved connection are identified. Start with the whole model, ask the maker whether a compatible component and method exist, inspect the receiving joint, and keep the rake out of use while fit is uncertain. A generic handle may look close without being safe. The decision is finished when the repaired whole tool can be verified for its intended work, or when an unsupported repair is set aside.