Sewing & Crafts
Fold a lucky star paper strip: a small practice station
Use a small batch of precut paper strips to practise the knot, pentagon wrap, tucked tail, and gentle final puff.
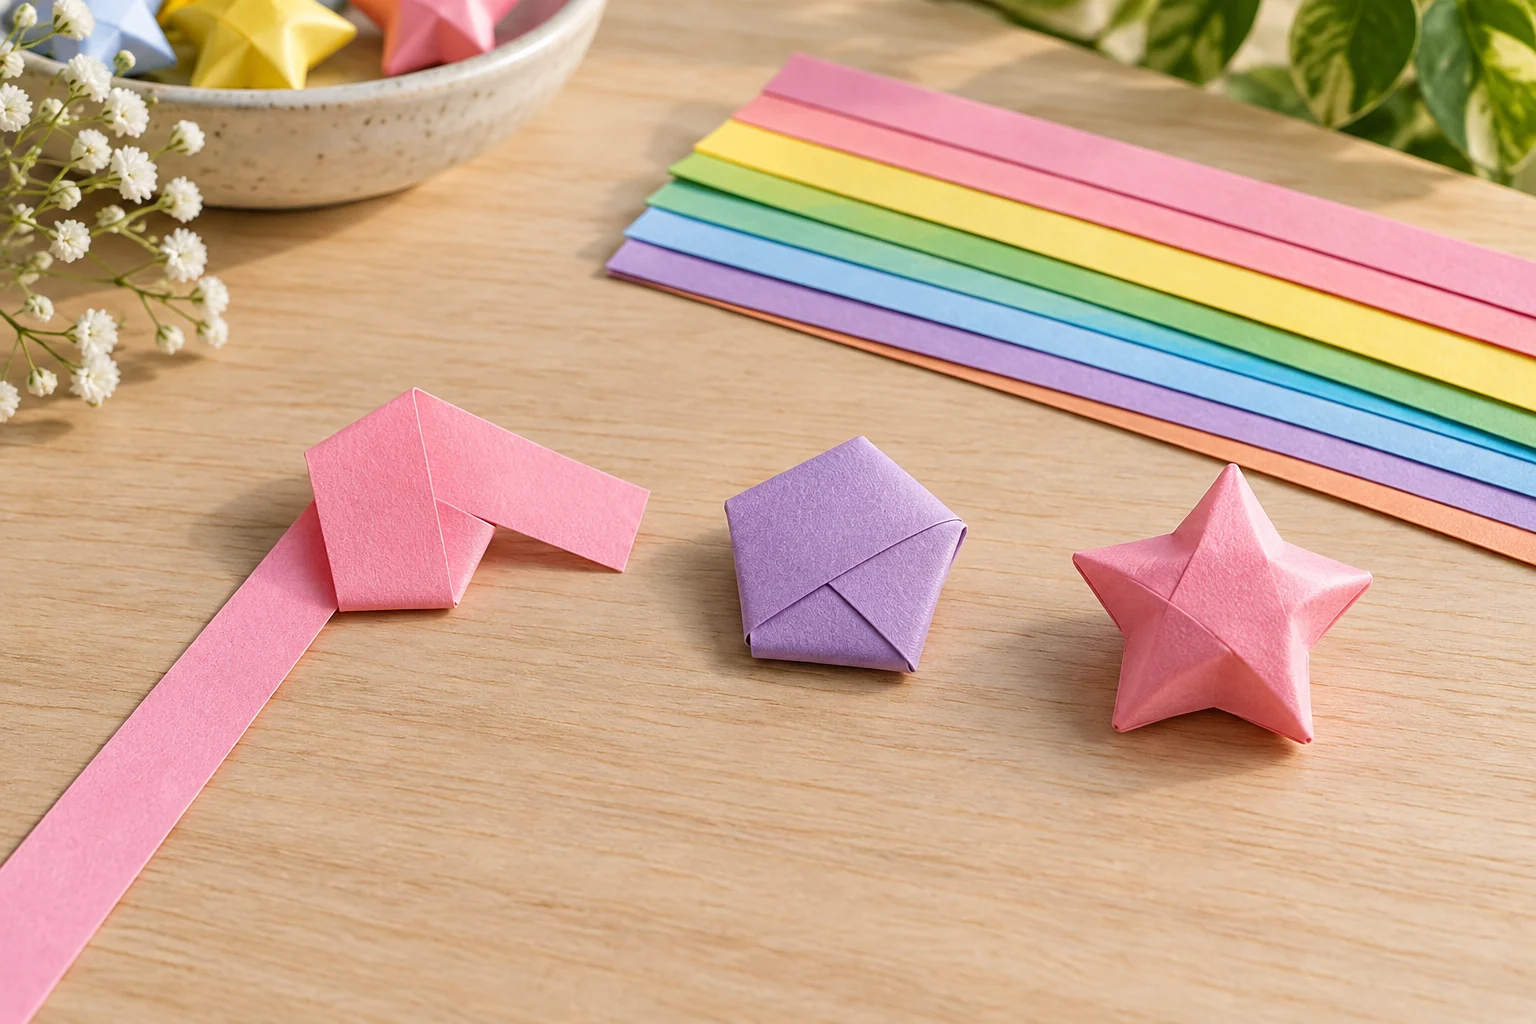
A lucky star paper strip is already the narrow shape needed for a small folded star. You can use one strip to practise the knot, the repeated wrapping, and the final gentle puff before setting out a whole stack for a group. This guide shows how to arrange a simple practice station and work through one model at a time. It does not turn a paper-count claim into a promise of finished stars. Some strips will be creased during learning, and a different folding hand may prefer a different strip length or feel. Keep a clear surface, a small place for unused strips, and a separate place for completed or unfinished examples. If you are teaching someone else, make one model slowly enough for them to see where the strip changes direction. The task is to understand the path around a five-sided base, not to finish a large advertised quantity.
Set out a modest practice batch
Place a few strips in reach and leave the rest of the package closed or stacked. The live DEEPCRAFF star-folding strip listing describes a multicolor pack of 4,050 strips. The live Ounona lucky-star strip listing also describes 4,050 precut multicolor strips. Both are offered as paper strips intended for this folding task. The count describes supplied pieces of paper, not how many intact stars a learner will make. The first product photograph shows separate color stacks and example puffy stars. The second shows strips alongside example stars. These images establish the offered form and use; they do not demonstrate that every folded example will match a display photo. Pick one strip for the first attempt, then keep its color visible so you can recognize your own folds when you pause.
Give every participant a small clear patch of table rather than pouring the entire pack into a shared pile. Each person can place a new strip at the top of the patch and leave the finished or abandoned fold at the bottom. A separate example made by the guide or instructor helps someone compare the pentagon stage with the final puffed star. Label the example as an example if several people are learning together. Do not count a folded pentagon as a finished star, and do not discard an incomplete piece immediately; its crease pattern may show the exact point where the method became confusing. If colors matter to the final craft, make that decision after the fold is familiar. A first practice strip is a tool for learning the sequence. A display project can use a chosen palette later without requiring every learner to reach the same speed.
Before the first fold, decide how you will keep the strips from sliding or tangling on the table. A shallow tray or a clean sheet of paper can give each participant a defined area without changing the fold itself. Keep drinks and damp materials away from the practice pile so that a softened strip does not become a confusing comparison with a dry one. If a strip arrives bent, use another for the demonstration and save the bent piece for later practice. This is a preparation choice, not a quality judgment about either listing. Both products are presented as large multicolor packs; neither listing tells you how many attempts your group will need. Record the number you actually take from the pack if you want to plan a later session, instead of assuming one attempt per person.
Make the first flattened knot
Start near one end of the strip. Bend that short end over the long part to make a loose loop, pass it through, and bring the paper together into a simple knot. Flatten the knot carefully rather than yanking the paper tight. The result should resemble a small pentagon with a short tail and a longer strip leaving it. A photographed paper-folding tutorial from Origami Way shows this initial knot, then turns the shape over before the repeated wrapping. Use that sequence as a visual reference if the flat shape does not make sense from words alone. If the first knot wrinkles sharply or tears, take another strip and make a wider, gentler loop. It is easier to learn the geometry from a clean pentagon than from a crushed one. No tool or adhesive is needed for this initial observation; consult the chosen tutorial for its exact finishing method if you later decide to fix a tail permanently.
Check five sides before you wrap the long tail. A side can be shorter or less even during a first attempt, but you should be able to see the paper path crossing the little pentagon. If the loop never flattened into a five-sided base, pause here instead of winding more paper around a shape you cannot recognize. Gently unfold the attempt if the paper still permits it, or set it aside as a practice example. Tell a learner exactly what you are checking: the knot provides the base that the remaining strip follows. This check is a useful teaching point because later steps can look repetitive while the foundation is still wrong. A small adjustment now costs one strip and a moment, while wrapping the entire tail around a misshapen knot makes the problem harder to identify. Keep the short tail against the base and avoid pulling it so hard that the paper tears.
Follow the pentagon with the long tail
Turn the flattened knot and fold the long portion of the strip across an edge of the pentagon. The strip naturally points toward the next side; carry it around that side, crease lightly, and continue. You are wrapping the same five-sided base, not making a fresh square fold each time. Origami Way's photographed steps show the tail following the pentagon edge repeatedly before the loose end is tucked into a pocket. Work slowly enough to notice which edge the strip meets. If the tail begins cutting diagonally across open space, stop and compare the model with the last clear step in your visual reference. Unwind only the most recent layer if it can be done cleanly. There is no benefit in wrapping fast and hiding the path. A person learning beside you should be able to point to the edge they are following before they make the next crease.
As the long tail becomes shorter, resist the urge to use a new strip to keep the model growing. The little star is one continuous strip wrapped around one pentagon. The paper pack count does not change that structure. When the remaining tail is short enough to tuck under an existing layer, slide it into the pocket indicated by the folding reference. Do not force a thick wad beneath a tight fold; ease back the layer slightly if necessary, or start a new practice piece if the paper has become damaged. A loose tail that will not stay tucked may reflect an earlier wrap that wandered off the pentagon. Put the model beside the flat example and look at the edge path, rather than assuming the material itself failed. If you choose a tutorial that adds glue at a finishing step, follow its exact direction and keep that choice separate from the basic folded sequence described here.
Puff the points without crushing the center
A wrapped pentagon is still fairly flat. The final familiar star shape appears when you press inward on the middle of its sides so the five points rise. Origami Way's visual instructions show pressing the sides after the tail is tucked. Hold the model gently between fingers and work around the sides one at a time. The aim is to create a small hollow center and defined points, not to squeeze every surface flat. If one point stays low, rotate the piece and compare its side with the others. A tight crease, loose layer, or uneven foundation may make that point harder to shape. Stop before the paper tears. A slightly uneven first star is a useful record of what happened; a second attempt can focus on the particular fold that led to the uneven side. It is reasonable for a first model to show fingerprints or a soft corner.
Place the completed star next to the earlier flat pentagon example. Ask the learner to name the stage at which the model changed from flat to puffed. That question is more useful than asking whether the result looks exactly like a seller photograph. The photograph shows what the offered strips can be used to make, while your model shows what the learner actually made. If the shape collapsed while puffing, look at whether the end stayed tucked and whether the wrapping followed the five sides. Make one targeted change on the next strip: perhaps start with a cleaner knot, follow one edge more precisely, or press the sides with less force. Changing several things at once makes it difficult to know what helped. Keep both attempts visible until you can explain the difference between them.
Keep other paper lessons distinct
The separate origami practice cup guide begins with a square sheet, a reference pinch, crossing corners, and separate flaps. Its square-paper method does not become a lucky-star method simply because both projects are called origami. Star strips are long and narrow; they make the knot and repeated pentagon wrap possible. Keep the cup guide available if someone wants a second paper exercise, but do not swap its starting sheet into this station without changing the lesson. The bookbinding paper-signatures guide is another distinct fold-and-check exercise, focused on sheets and page order before binding. It can help a learner appreciate why a named stage matters, but it is not a star-folding reference. For the star itself, use a visual step sequence that actually shows the knot, wrap, tuck, and puff.
After one or two complete stars, decide what to do with the remainder of the practice batch. You might put the finished examples in a small container, save one clear model beside the next session's strips, and return unused strips to their stack. If the intended craft is a display or gift, make a separate plan for how many finished stars it requires and how they will be attached or contained. This tutorial does not assert that a particular paper pack is suitable for every display method, nor that its entire listed count will become finished models. Give participants time to stop when the hand motion becomes tiring or the fold stops making sense. A short session can still succeed if each person can identify the five-sided base and complete the wrap on one strip. The best next attempt starts from the stage each person understands, with the last incomplete example kept nearby as a reference.