Home & Living
drawer liner bunching in drawer: check the fit before changing the material
Find whether a flexible drawer liner folds from an oversize cut, a corner obstruction or an item pressing it during use.
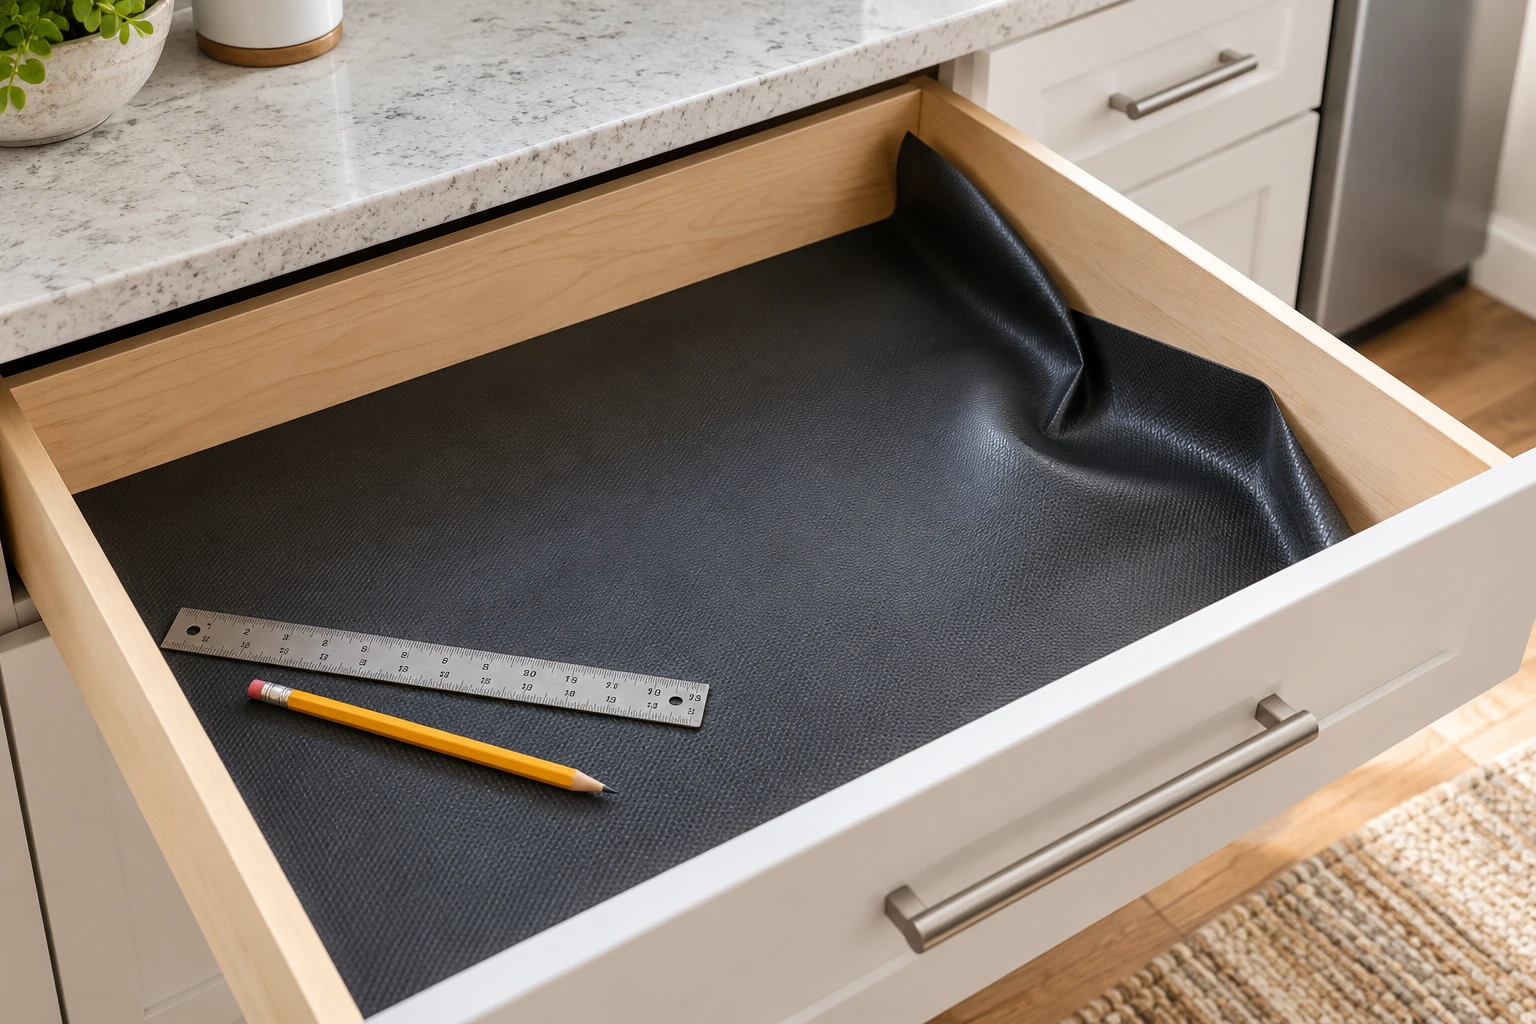
A liner can look flat in an empty drawer and gather into a ridge as soon as the drawer is used. The wrinkle may appear at the back, along one side, or beneath a heavy item. Start by noticing where it forms. A sheet that is too wide needs a different correction from a sheet that catches on something stored above it. Removing everything at once without recording the trouble spot makes that distinction harder to see.
This guide deals with a flexible roll liner already chosen for one drawer. Two current store examples show the form: a floral cut-to-fit drawer liner roll listed at 15.7 inches wide and a black raised-dot liner roll listed at 13 inches wide. Their product pages describe different materials and lengths. Neither listing proves that a sheet will stay flat in your particular drawer.
If you are still deciding between a loose sheet and an insert with its own sides, the separate sheet-versus-fitted-insert guide covers that choice. Here the question is narrower: why does a flexible sheet bunch after it has been put in place, and what can you learn from a careful dry fit before trimming or replacing it?
Find the first place the liner moves
Open the drawer slowly and look at the sheet before lifting any contents. Is one corner folded up? Does the back edge bow forward? Is the whole liner traveling toward the front? Photographing the arrangement or making a quick pencil sketch helps if you need to empty the drawer. Record the direction of movement and the objects nearest the wrinkle, rather than assuming the liner itself is defective.
Take the contents out in a way that preserves their positions. Set objects from the front together, then those from the back. Lift the liner without pulling or stretching it. If it has an obvious crease, note whether that crease was already there or developed where an object pressed into it. The goal is to separate a sheet-size problem from a use problem before any irreversible cut.
Place the same sheet back into the empty drawer without fastening it. Press it lightly into the base with your hand and release it. Watch the corners and the back edge. If a ridge appears immediately with nothing on top, the drawer footprint or the liner's cut edge deserves attention. If it lies flat now, return to the contents and drawer motion before cutting more material away.
A liner that shifts as one complete piece can leave a clear strip of bare drawer base on one side. A liner that is compressed by an object may wrinkle only where that object touches it. These observations are more useful than a product-page phrase such as “strong grip.” The floral listing uses that phrase and calls its sheet non-curling; those are seller claims, not a test of this installation or a reason to skip measurement.
Measure the base that the sheet actually covers
Measure the flat base from side to side at the front and again near the back. Then measure front to back along both sides. A drawer can have rounded corners, a rear stop, or a small change in width that a single quick measurement misses. Write down the smaller usable span in each direction. The liner belongs on the flat base; forcing it up a wall creates a fold that may be pushed inward when the drawer moves.
Check the inside corners with the drawer empty. A square sheet corner can meet a rounded drawer corner before either straight edge reaches the wall. The excess has nowhere to lie, so it rises. That can look like poor grip when the real issue is a corner that needs a tiny relief cut or a more carefully marked outline. Follow the liner's own cutting guidance and keep the first trim small enough to reassess.
The listed widths of the two captured rolls illustrate why the exact sheet matters. A 15.7-inch roll and a 13-inch roll may each be appropriate in some drawers, but neither width describes yours. Do not infer fit from the product image or from the word “drawer” in the listing. Measure the base, compare it with the actual material in hand, and account for a pattern edge or textured side only where the chosen product's instructions make that relevant.
If the sheet was cut using the outer drawer front as a guide, it may be wider than the interior base. A face panel often extends beyond the box that holds the liner. Likewise, tracing a removed tray will reproduce that tray's footprint, which may differ from the bare base. Put the ruler inside the drawer and mark the liner against interior measurements instead of a convenient external edge.
Leave yourself room to correct a cut. Mark the proposed line on the back or a removable paper guide as the product allows, set the liner on a flat work surface, and cut only after confirming which side is width and which is depth. A long roll can be turned around by mistake. For a patterned sheet, a skewed cut may also make a straight drawer look crooked, even when the functional fit is acceptable.
Dry-fit after every meaningful adjustment. Lay the sheet back in the empty drawer and check that the corners rest on the base without curling up the side walls. Open and close the empty drawer once. If the sheet catches a seam or lip, stop and identify the contact point. Cutting the whole sheet narrower before finding a local obstruction can leave an avoidable bare gap elsewhere.
Check what happens when contents return
Replace a few items in their old positions, starting with pieces that sit nearest the original wrinkle. Open and close the drawer gently. If the liner stays flat, add the next group and repeat. This staged return tells you which contact, weight distribution, or movement coincides with the bunching. It also keeps you from blaming the final item added when the sheet had already started to creep earlier.
Look underneath objects with narrow feet or rough edges. A foot that presses into a flexible sheet can push a small fold ahead of it when the object moves. You do not need to prove a particular friction coefficient to notice that motion. Shift the object slightly within the drawer and test whether the wrinkle still forms at the same place. Keep fragile or sharp objects secure while experimenting.
Check whether a utensil handle, container corner, or stored packet crosses the liner's back edge. When the drawer closes, that object can drag the edge forward. A ridge at the back may therefore come from contact above the liner rather than from its roll memory. Move the object clear of the edge, then test the drawer once more. Do not wedge the sheet into a drawer mechanism to hold it down.
A flexible liner also changes how much clearance remains under stored items. If the drawer already closes tightly, adding material beneath a tray or container may create a new point of pressure. Remove that item and see whether the sheet relaxes. The separate drawer-organizer tray guide addresses a rigid tray that slides around; this check concerns whether a tray or another item is pressing a loose liner into a fold.
After the contact point is clear, give the sheet another empty-drawer test. A wrinkle that remains without contents may reflect the cut or the sheet's current shape. A wrinkle that disappears until one item returns points back to that item's footprint or the available clearance. Keep those results separate in your notes. Changing the liner material before you know which case you have may leave the same drawer geometry untouched.
Read listing claims as descriptions, not guarantees
The floral product page calls its PVC liner thickened, non-slip and non-curling. Its gallery shows a rolled floral sheet in several settings, including a drawer. The black listing describes an EVA sheet with a raised-dot top and smooth bottom, sold as non-adhesive and cuttable. These details identify the physical forms in the store. They do not establish how either will behave under your objects, on your drawer finish, or after repeated openings.
The gallery images are useful for recognizing a roll and a textured surface, but a staged photo cannot measure your drawer or prove long-term grip. An image overlay saying “easy to clean” or “waterproof” is still a seller presentation. If cleanup or contact with particular items matters to you, read the current chosen package directions and limitations. This fit exercise does not certify food contact, liquid protection, finish compatibility, or material safety.
Check the real product package before any cleaning, fastening, or cutting step beyond a simple dry fit. The captured web descriptions do not supply a complete installation procedure for every surface. In particular, do not add tape, spray adhesive, heat, or weights solely because the liner shifted. Such changes can affect the drawer finish or the ability to remove the sheet, and they are outside what these pages substantiate.
When the sheet came from a roll, it may initially retain some curve. You can lay it out and observe whether it relaxes without trying to force it into the drawer. The amount of time, temperature, or pressure needed is specific to the actual material and its instructions; this article cannot promise a universal flattening method. If the sheet remains sharply curved or creased, treat that as a reason to reconsider using it in this drawer.
Decide whether another trim is justified
Trim only when the dry fit shows a specific excess edge and the chosen liner can be cut according to its instructions. Mark that edge while the sheet is resting naturally in the drawer, then remove it to make a controlled cut on a safe surface. A narrow reduction at a folded corner is easier to evaluate than taking a large strip from the entire side. Once material is gone, a persistent gap cannot be undone.
After trimming, put the sheet back without contents and repeat the same opening-and-closing test. Compare it with the original observation. If the corner now lies flat and the sheet does not travel, return objects in the staged order that exposed the problem. If the same ridge reforms under a particular item, more trimming may be the wrong response. Reconsider that item's position or the liner form.
Stop cutting when the sheet is visibly smaller than the usable base yet still bunches. The problem may be a persistent crease, surface interaction, or item contact that a narrower outline will not solve. Continuing to shave edges can make coverage worse while producing no useful new information. Keep the remaining material as a sample if you need to compare another format, but do not present a failed dry fit as a successful installation.
Some drawers have an uneven base, screw head, rough patch, or lip at the rear. A liner can bridge that feature and form a small tent. Identify the feature before doing anything to the drawer itself. Do not cover a damaged mechanism or interfere with drawer travel. If the drawer hardware is catching, the liner fit test ends there; repair or assessment of the drawer is a separate job.
Know when to remove the sheet
A liner should not need constant repositioning just to allow the drawer to close. Remove it if the edge enters the slide path, if contents repeatedly catch it, or if the sheet will not lie safely flat during an empty-drawer trial. Those are observable stop points, regardless of the product's advertised grip. A gap that exposes some of the base may also make the sheet unsuitable for your intended coverage.
If a flexible sheet never settles, revisit the form choice using the sheet-versus-insert comparison. A fitted insert and a cut sheet solve different physical problems. The right next step depends on the drawer shape, what is stored there, and how much movement you can tolerate. This article does not turn the two captured store listings into a ranked recommendation or claim that a different product will fix every drawer.
Keep the measurements and the location of the first wrinkle. They will help you compare a replacement with the actual base rather than the outside dimensions of the cabinet. Note whether the sheet moved alone, folded at a corner, or bunched only under one object. That short record is more actionable than “liner slips,” because each observation points to a different fit check.
The final check is ordinary use. With contents returned, open and close the drawer at the pace you usually use and look at the back and side edges. A flat first impression is insufficient if the ridge appears after the next few movements. If it recurs, remove the sheet and reassess the contact or form. A clean, repeatable fit matters more than making a particular roll work at all costs.