Heating, Cooling & Air Quality
dehumidifier drainage troubleshooting: trace the tank, hose, and pump route
A model-specific external-check sequence for a dehumidifier that fills its tank, leaves a hose dry, or stops unexpectedly.
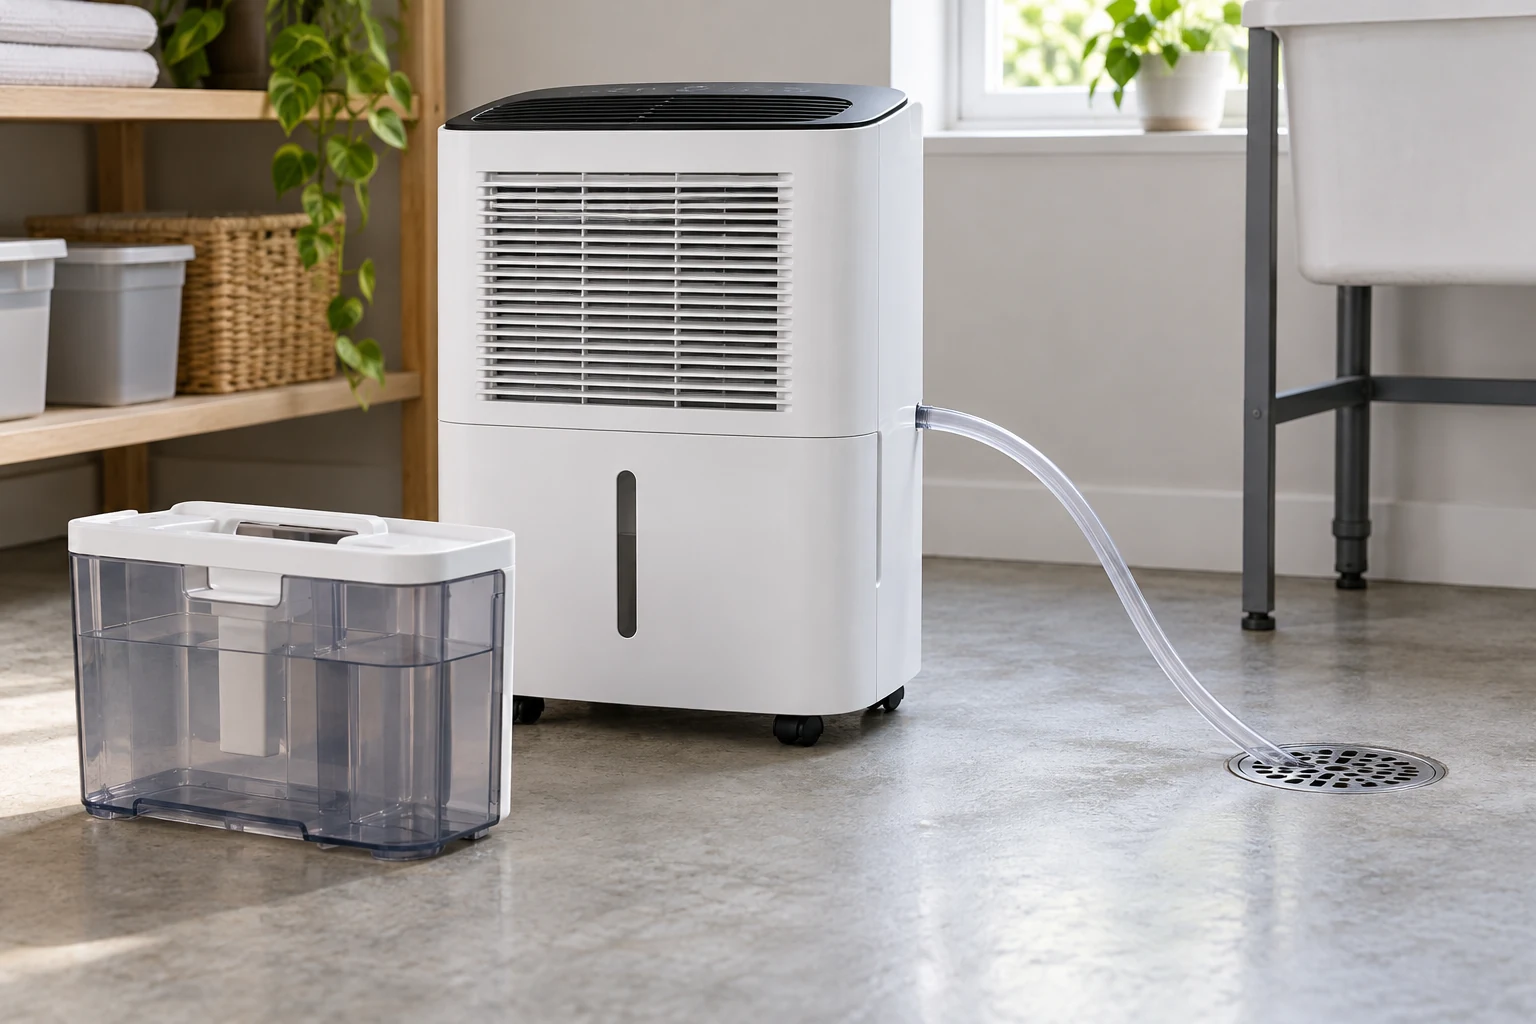
Dehumidifier drainage troubleshooting begins with a simple question: where is the collected water supposed to go in this exact setup? A unit may use a removable tank, a gravity hose, or a documented pump arrangement. Those paths are not interchangeable. Before treating a full-tank light, a dry hose, or a stopped machine as a defect, identify the selected route in the model instructions and look at what the unit is actually doing.
The Beddle dehumidifier listing describes a tank and a continuous-drain option. Its gallery shows a white wheeled unit and marketing diagrams for manual and automatic drainage, but a diagram is not a view of an installed household hose. The Demifill dehumidifier listing describes manual tank emptying, a gravity hose, and a pump route. Its single gallery image establishes a whole white-and-black unit, not the hidden plumbing or the pump's working condition. Use these offers to see why the route question matters, then rely on the delivered unit's exact instructions.
Start with the water tank and the selected route
A dehumidifier pulls moisture from room air and collects water. If the removable tank is the active route, a rising water level is expected. The unit may stop when the tank is full or not properly seated, depending on its design. If continuous drainage is selected, the hose must have an approved connection and an actual destination for the water. The labels on a listing cannot tell you which route someone chose on the unit in front of you.
Write down the model and the route you intended to use: “tank,” “gravity hose,” or “pump,” but only if that model's manual names the route. Note whether a hose is connected, where it ends, and whether the tank is seated. Do not assume a connected hose automatically disables the tank or that a tank must remain empty during hose use. The exact manual resolves those details. A brief setup note prevents two people from diagnosing different configurations as if they were the same one.
If the tank is full, follow the maker's instructions for stopping the unit, removing the tank, emptying it, and reinstalling it. Check that it sits as the manual shows. Avoid reaching inside an energized appliance or bypassing a tank switch. If the machine resumes after correct tank seating, record that observation; it narrows the question. If it does not, keep the result as an observation rather than declaring a failed sensor or control board.
Read a drain hose path before changing settings
A gravity drain depends on the route and height relationship described by the manufacturer. A hose that rises above its permitted path, loops sharply, is pinched behind furniture, or ends in a blocked drain may prevent water from leaving as intended. That is a visible external check, not a reason to dismantle the cabinet. Compare the installed path with the exact model diagram and correct only the external setup the manual allows.
Check the hose itself for the size and connection specified for the model. An attachment that merely seems to fit can leak or obstruct flow. Make sure the free end goes to an approved drain and cannot spill onto an electrical outlet, floor covering, or walkway. If the hose end is in a sink, tub, or floor drain, keep it secured as the instructions require. Do not route water to a place you cannot observe, and do not leave a first test unattended.
When the hose looks dry, ask whether the unit has had enough time and suitable room conditions to collect water. A dry hose after a brief run does not prove a clog. Look at the tank and any status indicator while following the manual's observation sequence. If water appears in the tank instead, the continuous route may not be selected or connected as expected. If no water appears anywhere, the question may involve operation or room conditions rather than just drainage.
The Beddle native account mentions a continuous-drain option and a full-tank alert; one gallery graphic also advertises an included drain hose. That is enough to ask what route the exact delivered Beddle supports. It does not prove the hose is installed correctly, that a nearby household drain is suitable, or that the stated dimensions and flow claims apply in your room. Keep seller claims separate from observations made at the actual appliance.
Separate a pump route from gravity drainage
Some listings describe a pump that can move collected water along a different route from a gravity hose. The Demifill native description names manual tank emptying, a gravity connection, and a pump connection. Its photograph does not reveal the inside of the machine or show either hose in use. Do not infer that a different dehumidifier has a pump simply because it has a drain port, a tall hose, or a similarly shaped cabinet.
If your exact model documents a pump mode, identify the correct outlet, hose, mode setting, and destination in its instructions. Keep the discharge route within the maker's stated limits. A hose intended for gravity drainage is not automatically a pump hose. A connection at the tank is not necessarily the same as a connection lower on the cabinet. The unit's diagram matters more than a broad label such as “continuous drain.”
A pump that does not send visible water to the outlet is not automatically broken. First confirm that the pump route is actually selected, that collected water is present, and that the hose path follows the manual. Check only accessible external parts. If the instructions call for a priming step or explain an interval before discharge, follow that exact procedure. If they do not, do not invent one by adding water, opening covers, or cycling power repeatedly.
Do not turn a drainage question into an electrical repair. Water and powered equipment share the same workspace here. Stop and use the maker's service path if the unit leaks into an electrical area, has a damaged cord, repeatedly trips protection, or requires access behind a panel to continue. The useful owner record is the exact model, selected route, observed indicator, water location, and the external checks already completed.
Use indicators as clues, not diagnoses
A full-tank light, a beep, a displayed humidity number, and a running fan answer different questions. An indicator can report a state the manufacturer defines, but its meaning can vary by model. Read the manual's status table before assigning a cause. If a tank light stays on after emptying and correct seating, record the precise behavior and stop at the manual's external checks. Do not defeat a switch to make the machine run.
The relative humidity and temperature guide explains why one room reading needs context. This drainage check has a narrower purpose: find the water route and compare actual water collection with the selected setup. A humidity display may help describe conditions, but it is not a measurement of hose flow, pump output, or tank seating. Keep those observations in separate lines on your note.
Likewise, a dehumidifier that pauses does not necessarily have a drainage fault. It may be following its target setting, a full-tank condition, a temperature-related protection, or another model-specific rule. Avoid using a listing's advertised coverage area or daily pint figure as a promise about what should collect in one hour. Those figures are presented under particular conditions; your room, setting, and time interval differ.
Make a short, safe observation sequence
Start with the model label and manual. Confirm the unit is on a suitable surface with the clearances and power connection the maker requires. Check the tank seating and visible hose connection without opening the housing. Record the selected mode and displayed status. Look at the hose route all the way to its destination. Then observe water collection during an interval the manual permits. Change one documented external setting at a time so the next result means something.
If you find water on the floor, stop the test and address the leak before further operation. Note whether it is near the tank, the hose coupling, or the drain destination; do not guess which internal seal failed. If the hose is kinked or unsecured, restore an allowed external path according to the manual. Dry the area and check again only when the electrical surroundings are safe. A recurring leak calls for the maker's support route.
The guide to moving a dehumidifier for a cooler season owns the separate decision about changing rooms and conditions. A move can change the drain destination, hose path, surface, and room temperature. Recheck those basics after relocation, but do not treat this article as a transport or seasonal-storage procedure. Its job is to keep the water path intelligible in the current setup.
Use a small table in your notes with columns for intended route, actual connection, indicator, tank water, hose discharge, and next manual step. “Hose connected; tank half full; no water at drain” is more useful than “drain broken.” Add the time and room condition if relevant. The note can travel with the unit when someone else takes over; it also gives customer support a clearer starting point.
What the two offers do and do not establish
The Beddle gallery shows eight images of one complete white unit, including graphics about tank and continuous draining. The Demifill gallery shows one complete white unit with a black top. They are distinct physical products, and their native accounts describe different drainage choices. Neither gallery verifies a household installation, a clear hose, actual pump output, or any claimed moisture-removal rate. Those remain questions for the exact delivered model and observed setup.
A buyer choosing between them should ask which route the room can support. Is there an approved nearby drain at a suitable height? Would a removable tank be manageable? If the listing describes a pump, what does the exact manual say about its connection and limits? Is a compatible hose included, or must one be obtained? Keep unanswered questions blank until the native documentation resolves them. Do not buy based on a diagram that silently assumes your room's drain layout.
For a current problem, begin with the water tank, follow the drain hose path, then check whether a pump route is actually documented for that model. Compare each observation with the instructions before changing settings. Dehumidifier drainage troubleshooting works best when the water's intended destination is explicit and each external check stays within the maker's directions. If that path still does not explain the behavior, preserve your notes and use the model's support process.