Home & Living
Cool-mist humidifier no mist: safe first checks
Use a safe first-check sequence for a cool-mist humidifier that appears to have no output, then know when to stop and contact support.
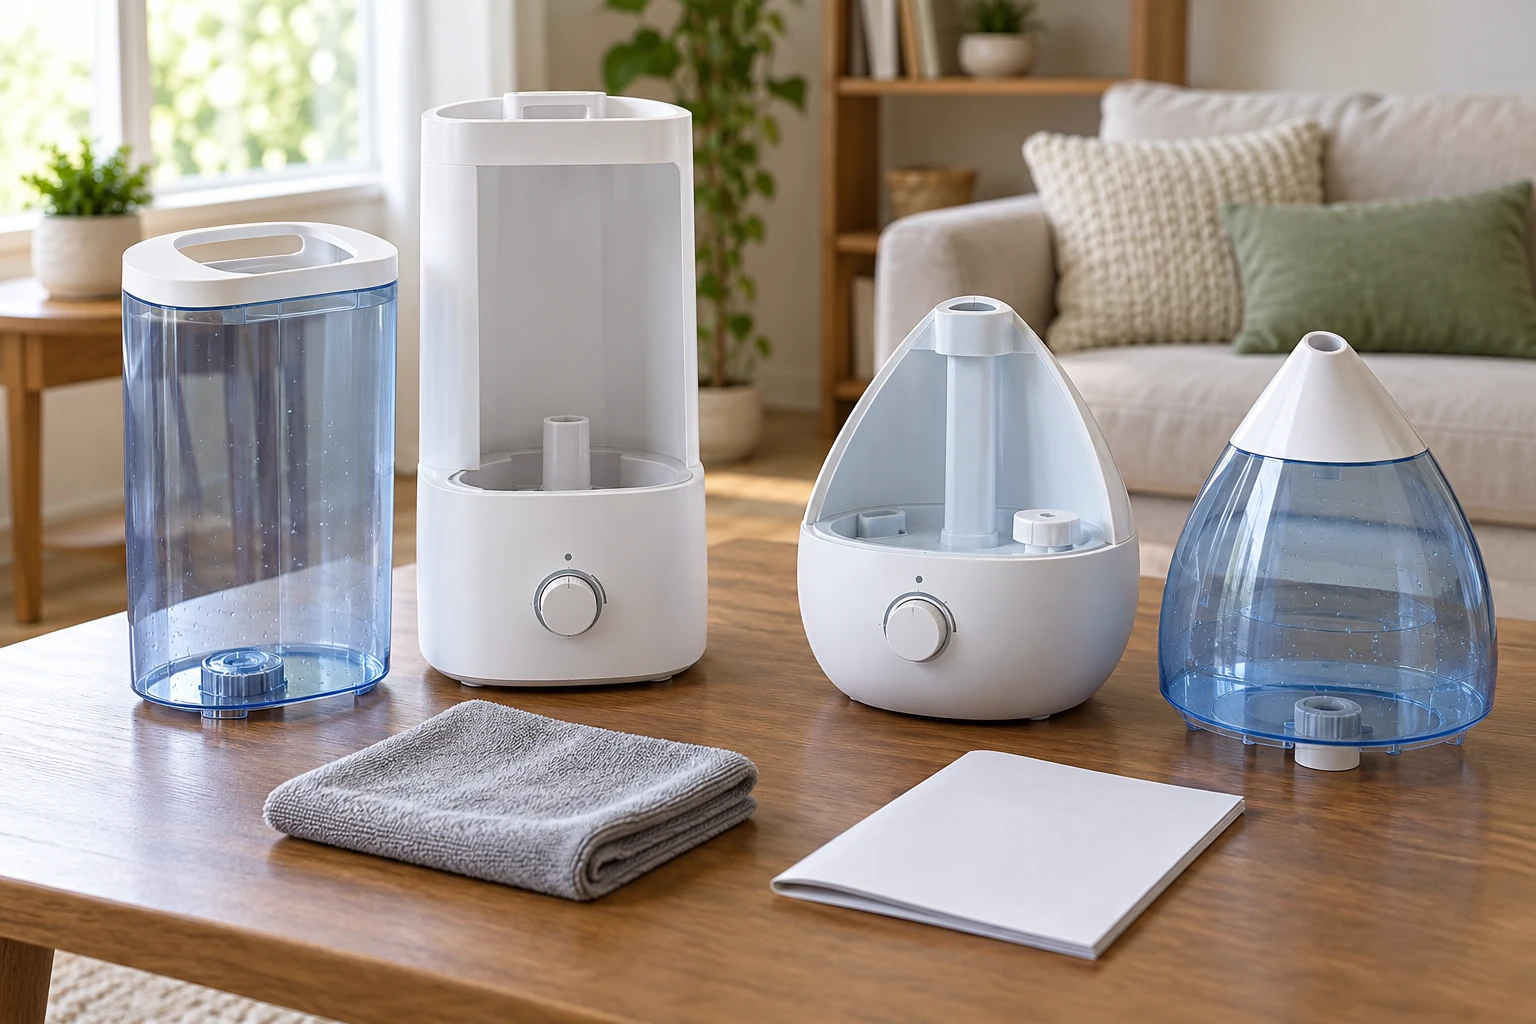
When a cool-mist humidifier seems to produce no mist, the tempting response is to buy another one. First decide what “no mist” means on the unit in front of you. Is the tank empty, is the control set low, or is the appliance powered but showing no output at all? A short, safe set of external checks can separate a simple setup problem from a unit that needs the maker's support. This guide stays with owner-visible controls, water, tank fit and normal cleaning. It does not ask you to open the electrical housing or repair internal parts.
Find the model label and its instructions before changing settings. Cool-mist units can have different refill paths, controls and automatic stops. The first featured 6L top-fill cool-mist humidifier is listed with a directional nozzle. The separate teardrop cool-mist humidifier is described as a one-gallon tank model with automatic shutoff. These product pages establish two different physical examples, not a shared repair manual. Use the actual manual for the unit you own, and do not assume the control positions or tank parts are interchangeable.
Describe the symptom before touching the unit
Write down what you observe when the humidifier is in its usual location. Is a power light on? Does the display indicate a target humidity, timer or low-water state? Does the fan or another normal sound start? Is there visible output at the nozzle, or is the room merely not feeling more humid? Those are different symptoms. A setting that prevents output is not the same as a blocked outlet, and a perception about room comfort is not proof that the unit never ran. Keep the first observation brief so the later test has a useful baseline.
Look at the water level without moving a running appliance. If the tank is empty, switch the device off and follow its refill directions. If it recently shut itself off, allow the normal reset or restart process described by the maker. Do not defeat a low-water switch or hold down a control to force operation. Automatic shutoff may be doing exactly what it is designed to do. If the unit has an indicator you do not recognize, check the manual rather than assigning it a meaning from another model's product page.
Check the chosen mode and target setting. Some units change output when a target humidity is reached; others have simple manual levels, timers or a sleep mode. Turn the control to one documented test setting and wait the amount of time the maker recommends before judging the result. Do not change several controls together, because you will not know which one mattered. Record the original setting first, then restore it after the test. If the unit belongs to someone else, ask before changing their schedule or target.
Make the first test in a suitable location. Put the unit on a stable surface with the clearances its manual calls for. Keep its outlet away from objects that could be dampened, and keep water away from the electrical connection. If the nozzle can be directed, point it according to the manufacturer's instructions rather than toward a wall, outlet or sensitive furnishing. Placement will not fix a failed component, but it can keep a visible stream from being hidden against a bright window or deflected into nearby objects.
Check the removable tank and water path
Turn the appliance off and unplug it before removing or reseating a tank, unless the manual gives a different safe handling sequence. Check that the tank contains the amount and type of water the maker specifies. A tank can appear full while the base receives no water if it was not seated correctly. Set it back in place gently, without forcing a catch or tilting the powered base. Watch for a leak. If water escapes where it should not, stop the test, unplug the unit and seek the maker's guidance.
Inspect only the removable parts that the instructions identify for routine owner care. A cap, seal, valve or filter may be present on one model and absent on another. Confirm that each part is installed in the correct orientation for the exact model. Do not use a utensil to push an unfamiliar valve, and do not improvise a missing seal. If a part is cracked, warped or lost, record the model and part identity before seeking a replacement. A tank that cannot seat safely is a reason to stop, not a reason to press harder.
Look for visible mineral buildup or residue where the manual tells you to clean. Follow the product's cleaning directions, including its approved products, rinse sequence and drying time. Do not mix cleaning chemicals or pour a treatment into a powered base. If the manual prohibits additives in the water tank, follow that instruction even if another humidifier's listing advertises aromatherapy. The two featured units have different descriptions; the existence of an oil feature on one listing does not make oil suitable for the other tank or for every owner.
After routine cleaning and reassembly, run one controlled observation. Use the same room, surface and documented test setting you selected earlier. Note whether the tank feeds normally and whether output appears. If the symptom changes, record exactly which owner-care step preceded the change. If nothing changes, do not repeat the cleaning cycle indefinitely. Repeated soaking or aggressive scraping can damage a part while adding no information about the original fault.
The humidifier capacity and timer guide explains how to read tank, output and timer labels while choosing a unit. This article has a narrower job: identify why the owned unit appears to have no output today. A large tank label does not tell you whether a particular valve is seated or the present setting is asking for mist. Use the capacity guide if the question becomes whether a replacement's size fits the room routine; keep the current symptom separate.
Separate a room problem from a unit problem
If the unit visibly produces mist but the room still seems dry, do not call that “no mist.” Check where it is placed, how long it has run and how the room's conditions are measured. Use the unit's instructions and a suitable room measurement if the decision depends on humidity. An open door, a heating cycle or a room larger than the unit's intended use can change the experience. Avoid a medical or comfort guarantee from a seller's coverage number. The relevant next step is to observe the room and placement, not to take apart a working appliance.
Likewise, condensation near the unit is not proof that it is humidifying the entire room well. It may indicate the outlet is aimed at a nearby surface or the unit is too close to an obstacle. Stop if the area becomes wet, correct the placement as the manual allows, and check the surface before resuming. Keep the goal modest: determine whether the appliance can run normally and whether the location is appropriate. More visible vapor is not always a better result for the room or its furnishings.
A dehumidifier removes moisture, so it is a different tool with a different problem. The dehumidifier seasonal room check concerns moving that device as conditions change. It is linked here to keep the two appliance roles clear. Do not copy its tank or control procedure onto a humidifier. If the household uses both kinds of appliance, label the symptom and the exact device first. That simple distinction prevents a confusing search for advice that belongs to the opposite moisture task.
For a shared household, ask whether another person changed the timer, emptied the tank or moved the appliance. Keep the question neutral. The goal is a reliable history, not finding fault. If the unit worked yesterday in one position and now does not after being moved, compare its tank seating, plug and setting with the last known arrangement. Do not assume movement broke it. A single changed condition is a lead to check, while a drop, leak or damaged cord is a reason to stop use and seek qualified help.
Know when the owner check is finished
End the owner-level sequence if the cord, plug or housing is damaged; if water reaches an electrical part; if the unit leaks; or if it smells hot or behaves unexpectedly. Unplug it when safe to do so and follow the maker's support instructions. Do not bridge a sensor, open a powered base, replace internal electrical parts or try an unrelated online repair trick. Even a seemingly simple no-mist symptom can involve an internal part that is outside ordinary owner care. A stopped, accurately described unit is safer than a forced test.
If the appliance remains powered but no output appears after the documented refill, setting, tank and cleaning checks, gather the model, purchase information, symptom notes and the steps you already tried. Contact the maker or seller through the current official channel. State whether the unit showed a light, whether it recognized water and whether a documented test setting changed anything. That detail is more useful than saying only “broken.” Ask for the exact next step for that model and whether a replaceable owner-service part applies.
Do not order a replacement tank or filter by visual resemblance. Compare the exact model and part number in the maker's documentation. A physically similar tank might not seat, seal or feed in the same way. If no genuine matching part can be identified, keep the purchase pending rather than guessing from photographs. The same caution applies to buying an entire replacement humidifier: first decide whether the old unit's issue was setup, routine care, a damaged part or an unresolved internal fault.
If a replacement becomes necessary, carry your observations into the shopping decision. Choose a unit whose tank handling, cleaning access, controls and placement suit the actual household. The two featured products illustrate different tank shapes and stated features, but their listings do not prove that either will solve your room's problem or share maintenance steps. Verify the current product details and manual for the candidate you would buy. Avoid paying twice for the same misunderstanding about a setting or an unseated tank.
Keep the result in a short household note: model, symptom, water level, setting, tank check, care step and outcome. If a refill or correctly seated tank restored output, that note can shorten the next check. If the maker takes over, it gives them a clear sequence without asking you to repeat risky experiments. The useful outcome is an ordinary, supported operating state or a well-defined stop point. Neither requires claiming a repair you did not perform or a safety result you cannot verify.