Home & Living
Christmas yard inflatable placement: keep the route clear
Sketch the route, power and anchor zone before placing a Christmas yard inflatable, then check it inflated and deflated.
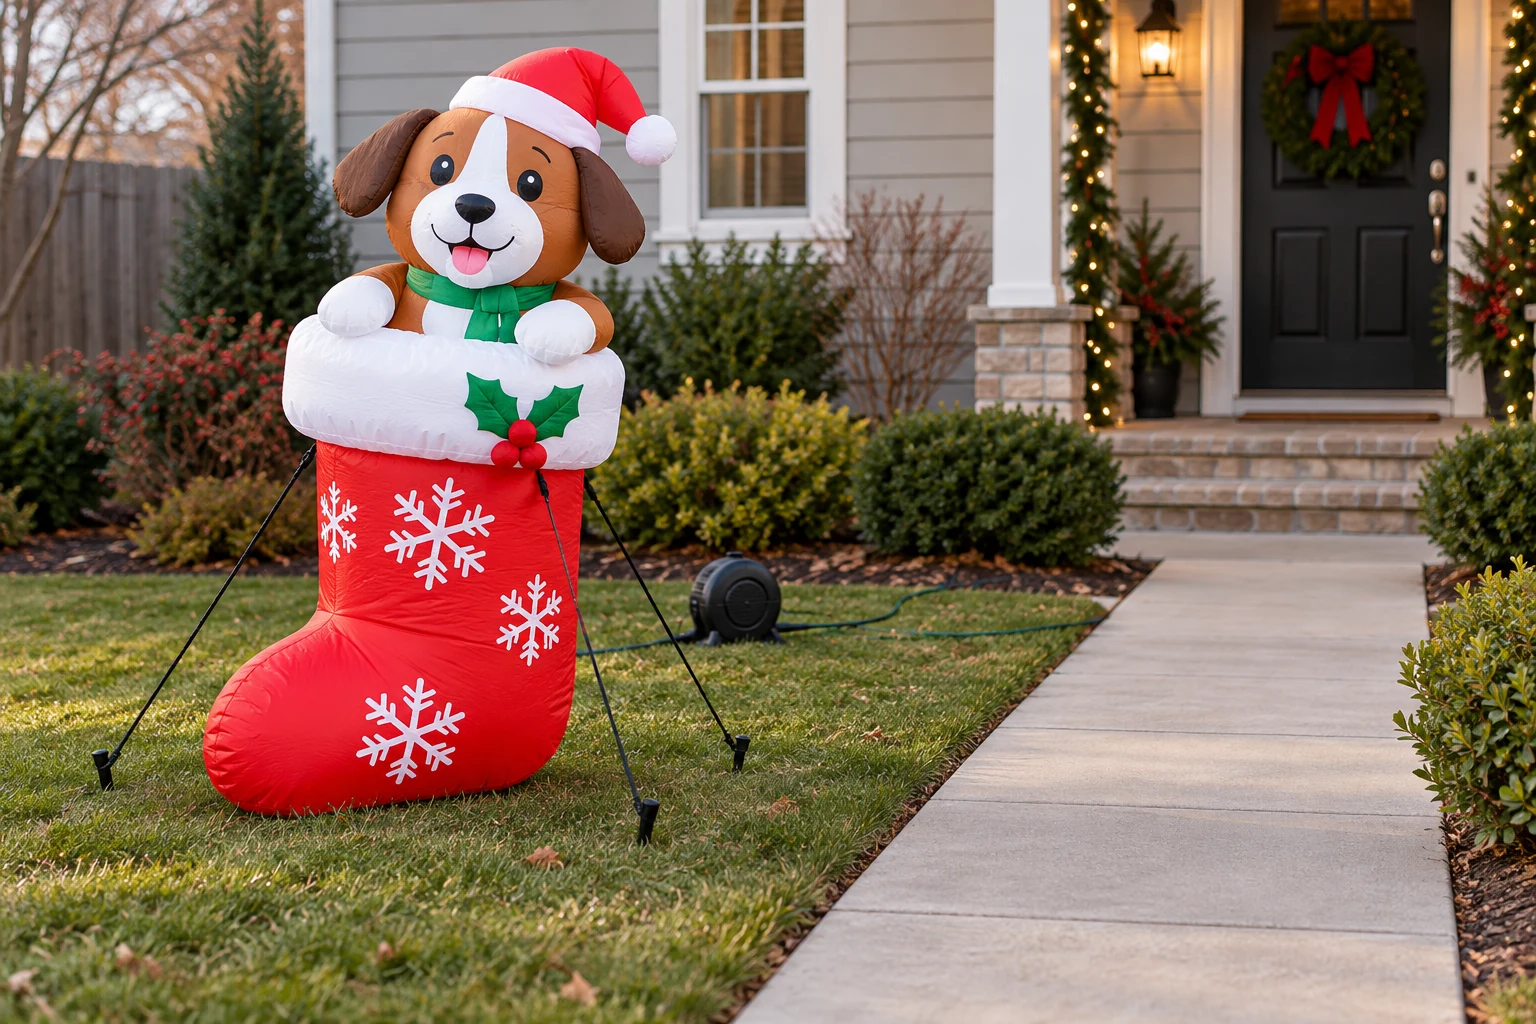
A Christmas yard inflatable placement plan starts with the space the decoration will occupy after it fills with air. The box or product picture gives a character and an advertised size, but your lawn also has a walking route, a power source, drainage, and places to secure the tethers. A display that looks good in an open product photograph may interrupt a porch approach or hide an address sign at home. This guide uses two complete Christmas inflatables as scale examples. It is about choosing and testing a location, not diagnosing a blower that fails or promising that either decoration will withstand a particular storm.
The first example is an OurWarm dog in a stocking inflatable. The native gallery shows a black and white dog rising from a red stocking, with candy-cane accents. Its listing calls it a six-foot decoration with built-in lights. The second is a Grenacu Santa on a dinosaur inflatable. Its three images show a wider, lower scene with a dinosaur, Santa and a gift. The seller calls it nine feet across and describes lights, stakes and lines. These are seller descriptions, not measurements of your yard or proof of night visibility at your address.
Mark the walking route before placing the decoration
Walk the route visitors, delivery people and household members actually use after dark. Start at the sidewalk or parking place and finish at the door. Keep the route open when the decoration is fully inflated and when it lies flat between uses. An empty inflatable can spread over more ground than expected, especially if its fabric is pushed by wind. Do not place tethers across the route merely because they are easy to attach there. A person should be able to follow the ordinary approach without stepping over a cord, a stake or folded fabric.
Stand where a visitor first sees the house. Check whether the fully inflated form hides the address, the entry light or a sightline toward steps. A six-foot figure may be tall enough to block a window or sign when close to the wall. A broad dinosaur scene may extend into a turning path even if its central character is set well back. Outline the proposed footprint with temporary markers before unpacking the product, then add a margin for guy lines and movement. The catalog dimensions are a planning prompt; the delivered item's full footprint and its instructions are the final references.
Give the blower and power lead a deliberate place
A powered inflatable needs a place for its blower that does not trap loose fabric or sit in standing water. Identify the product's intake and outlet arrangement from its instructions before deciding which way its back should face. Avoid placing the unit where fallen leaves or a snow pile could cover the blower. The product gallery focuses on the lit figures, so it may not show the exact cord route or blower clearance of the delivered unit. Keep those unknowns in the plan until the item is unfolded and inspected.
Plan the power route from the approved outdoor supply point to the decoration without running it across the walking path or through a doorway. Follow the actual maker's electrical directions, the ratings of the connected equipment and local rules. Do not assume a plug, cord or extension is outdoor rated because a photograph places the decoration outdoors. If a safe route is unavailable, choose another location or have a qualified person assess the electrical setup. Hiding a cord under a mat can make it harder to inspect and may add a trip or damage point.
Allow space for the full shape and its anchors
The inflatable silhouette changes as it fills. A tall dog in a stocking needs room above its hat and beside the candy-cane shapes. A dinosaur with an extended tail and Santa's arms needs a broader horizontal zone. Look at every gallery image, not only the hero photograph, to understand which parts project beyond the central body. Leave room so those parts do not rub a railing, shrub, parked vehicle or moving gate. The listed sizes do not describe every protrusion, and a styled winter background does not establish the clearance at your home.
Set out stakes and tethers according to the delivered instructions. Before anchoring, check for buried utilities, irrigation, edging and surfaces where stakes cannot be used. A product description may mention included stakes or water bags, but the quantity and approved use of the delivered pieces must be confirmed in the box. The ground also changes with the season: frozen soil, saturated soil and fresh mulch do not behave alike. If the available anchors cannot be used as directed at that location, move the display rather than improvising a hidden tie to a fragile object.
Use size as a layout constraint, not a spectacle score
Advertised height and width help estimate whether a product might fit a space. They do not guarantee the final inflated dimensions, the length of its lines or how imposing it will feel beside a small entry. The OurWarm gallery includes a size illustration, while the Grenacu gallery presents a wider figure with a separate height and width graphic. Such diagrams are useful for an early sketch. When the product arrives, compare the actual fabric, fan location and anchor points with the chosen spot before you commit holes in the lawn.
A compact front yard can still carry a large display if its route and sightlines remain clear, but bigger is not automatically better. Draw the footprint on a simple plan of the yard and include the front door, steps, shrubs, parking edge and service access. Then view the proposed position from the sidewalk and from the entry. If the figure works from one view but blocks another, move the markers. This test costs nothing and makes the seasonal scene respond to the house instead of forcing the house to accommodate a product photograph.
Check the display in daylight and after dark
Inspect the figure in daylight first. You can see fabric contact, anchor locations and cord routing more clearly before the lights become the main attraction. After dark, stand at the visitor approach and look for glare, dark steps and signs that disappear behind the decoration. Built-in lights are part of both sellers' descriptions, but neither native gallery measures the light at your location. Trees, nearby porch lamps and streetlights can change what is visible. Do not rely on the decoration's LEDs to light a walkway that needs its own safe illumination.
Notice the view from neighboring properties as well. A character aimed directly toward your own door can still shine into another window or create visual clutter near a shared drive. Adjust the position while anchors are easy to move. If the figure needs to sit near a property edge, confirm that no fabric or tether crosses it. The goal is a festive scene that remains readable at ordinary walking speed. You do not need to prove that it will look exactly like a staged seller photo taken with a different camera and lighting.
Build a seasonal scene around one clear subject
The dog in a stocking is a vertical figure that can act as one focal point near, but not on, an entry approach. The dinosaur scene reads wider and may work better where a lawn offers a long uninterrupted view. Those are visual readings of the native galleries, not claims that one product is universally suited to a certain yard. If you already have a lit tree, wreath or garland, let one piece lead the scene and keep enough empty space around it for people to identify the subject without having to scan a crowded row of figures.
The published Christmas garland layering guide deals with a different setting: depth and visible layers on a mantel or photo backdrop. An inflatable yard piece has a blower, anchoring zone and visitor route that the garland decision does not address. You can borrow the general idea of leaving a subject readable, but the outdoor placement decision here remains grounded in the physical footprint and safe approach. A styling principle is useful only after the practical space is reserved.
Read gallery backgrounds as examples, not included property features
Both native galleries place the inflated characters against winter homes and lights. Those houses, trees, snow and surrounding decorations are context, not components of the offer. A scale graphic may place a person beside a figure; it helps a reader picture relative size but does not confirm the finished dimension of the delivered item. Inspect what belongs to the inflatable itself: the dog and stocking or the Santa and dinosaur scene, the visible fabric shape, and the lights the listing describes. Leave all background landscaping out of the purchase and layout assumption.
The published Christmas wreath listing guide separates a wreath from the props in its listing photos. The same distinction helps with an inflatable: a snowy yard in the gallery is not a promised operating environment. This article then makes a separate placement decision using the actual yard route, power and anchoring locations. It does not assess whether the wreath or inflatable is the stronger visual choice; that depends on the space and the homeowner's intent.
Recheck the spot when the weather or use of the yard changes
A location that works on setup day may become awkward after a snowfall, a moved trash bin or a parked guest vehicle. Walk the route again while the figure is inflated and after it deflates. Check whether snow removal equipment will need the same ground and whether its operator could miss a stake or cord. Follow the maker's instructions for wind, precipitation, storage and unplugging. Seller claims about waterproof fabric or winter readiness do not replace those instructions or a local weather decision. Bring the decoration in when conditions exceed its documented use.
Look at the anchor zone during the season without tugging on an energized decoration. A line that has moved into a walkway or a stake that has loosened changes the placement decision, even if the lit character still looks upright. If the blower sounds unusual or the figure stays soft, that is a separate troubleshooting problem; stop relying on this layout guide and use the product instructions or qualified service. This article's task is to keep the location workable, not to explain a motor fault from appearance alone.
Make the placement decision with the delivered item
Choose a tentative position from the footprint sketch, then unfold the delivered inflatable and compare its real blower, lead, tethers and fabric with that plan. Inflate it only under the maker's directions. Revisit the visitor route and the view from the sidewalk before final anchoring. Record a daytime and nighttime photograph from the same point so you can see whether the entry and address remain clear. If any part crosses the walking route or cannot be secured as directed, change the position. A different spot is usually easier than explaining away a preventable obstruction for the rest of the season.
Christmas yard inflatable placement succeeds when the decoration has enough room to become itself and the property still works as a home. Let the dog or dinosaur be a distinct holiday subject, with the blower, cord, anchors and access route accounted for in the same sketch. The native product pages tell you what those two offers claim to include; the full galleries show their broad forms. Your final decision comes from the delivered instructions and an on-site check, with weather and access reviewed again as the season changes.