Home & Living
Christmas tree blocking walkway: compare pencil and full tree footprints
Use a floor marker and ordinary walking test to see whether a pencil or fuller tree leaves enough usable room.
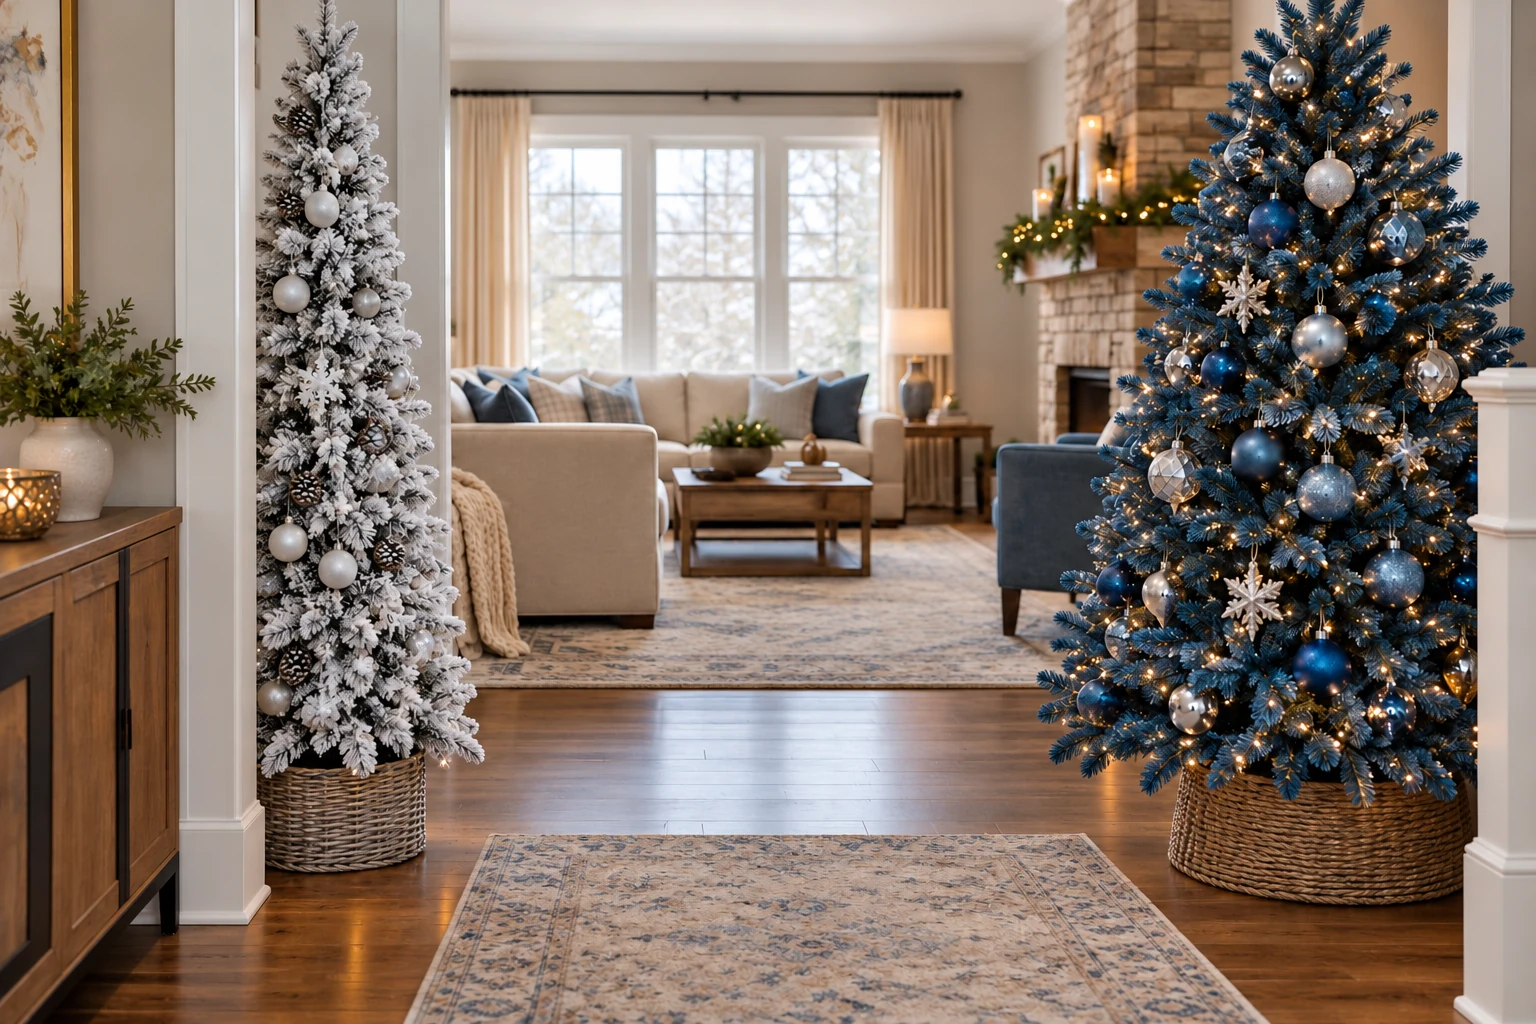
A Christmas tree can fit the corner and still make the route past it feel cramped. The problem usually becomes clear only when the tree, its stand, and the nearby furniture are considered together. Before choosing another shape, mark the space you can actually spare on the floor. Two trees with similar height can occupy different widths where people walk.
Find the part of the route that feels tight
Start with the path you use most often. Walk from the doorway to the sofa, kitchen, stairs, or whichever destination sends people past the proposed display. Notice where you naturally turn, where you carry a bag, and where two people might meet. You are looking for the narrowest part of the route, not a perfect floor plan for the whole room. A tree can look well placed from across the room while the branches project into that narrow point. The useful measurement is the floor width available after the ordinary route is left open.
Move a chair or small table only if you would actually keep it in that new position during the season. A layout that depends on temporary clearing may look convincing for a photograph and then fail during normal use. Open the nearby door or drawer while you check the space. Stand where you normally reach for a coat or a shelf. These simple movements reveal whether the proposed tree position interrupts another routine. Write down the tightest width you are willing to give the display and use that number when you compare product dimensions.
Mark the proposed outline with a removable floor marker, a piece of paper, or objects you already have. Keep the marker on the floor; there is no need to attach anything to furniture or walls. Make a first outline for the tree itself and a second for any skirt, basket, or other base decoration you plan to use. Walk the route again with the outline visible. If you find yourself changing direction to avoid the marker, the display may take more practical space than its catalog image suggests.
Compare two full-height tree shapes
The snow-flocked pencil artificial Christmas tree is listed as seven feet tall and shown with a narrow profile. Its gallery labels the approximate width as two and a half feet. It is an unlit tree with a pale gradient appearance. Those details make it a useful example when height is welcome but floor width is the constraint. The listing's promotional claims about ease, materials, or safety are not needed for this decision; check the actual dimensions and the visible shape instead.
The Costway blue artificial Christmas tree is also seven feet tall. Its gallery depicts a broader profile, marked around three and a half feet wide, and blue built-in lights. The product description identifies it as a complete artificial tree with a folding stand. This is a different footprint choice even though the height matches the pencil example. The gallery dimension is a catalog indication, so measure the actual spot and check the current product details before treating either outline as a guaranteed fit.
The gallery widths for these two examples are about two and a half and three and a half feet. That is roughly a foot of difference on the floor.
Draw both widths on the same floor area rather than imagining one tree after seeing the other. Set both outlines against the same wall and walk the same path. That side-by-side test shows what you gain in walking space with a slimmer profile and what visual fullness you give up. It also shows whether neither profile is suitable without moving the display elsewhere. A small difference on a product card can feel substantial in a narrow route, so use the marked floor as the deciding view.
Check the base and the branch edge
A listed tree width often describes the broadest branch spread. Your floor plan also has to account for the base and whatever sits around it. Look at the actual stand image and the place where the lowest branches end. A base basket or skirt may extend beyond the tree's branch outline. You can test this with separate floor markers, then remove the larger marker if you decide to keep the base plain. This keeps the tree decision distinct from the later choice of floor decoration.
Stand beside the marked outline and make the ordinary turn around the furniture. A branch edge that ends near the route can feel different from a stand placed farther in. If the shape seems tight, move the entire outline a little and repeat the walk. Do not assume that shifting the trunk alone solves the problem; the widest branches move with it. A second position may open the route while leaving the tree visible from the room. If it does not, the smaller profile or another location is the practical next comparison.
Look upward as well as across the floor. The overhead relationship deserves its own check. Note ceiling fixtures, a low shelf, or a sloping ceiling near the proposed spot. This article does not infer a required clearance from a product photograph. Measure the available height and compare it with the seller's current dimensions and any decoration you plan above the top. A tree that fits the floor but conflicts with the space above it has not solved the room problem.
A paper sketch can keep these measurements together. Draw the wall, the route, and the nearest furniture as simple boxes. Write the measured floor width beside each proposed tree outline. Then add the overhead height beside the location. The sketch does not need to be to scale to expose a contradiction, such as a wide branch edge drawn across the walking line or a top that reaches a shelf. Keep the notes with the product links until you have made the decision. They are more reliable than trying to remember which dimension belonged to which tree after looking at several listings.
Keep the walking test realistic
Repeat the route with the room arranged as it usually is, including a rug or side table you plan to keep. Try it at the time of day when the area gets the most use. A corner that feels open when everyone is out may feel busy when people are moving through together. You are making a comfort judgment for your own room, not applying a universal clearance number. If the path causes you to turn sideways or brush the marked edge, record that observation and use it to reject the placement.
If the tree is near an entry, think about what people bring through the door. A shopping bag, coat, or box changes how much room a route feels as though it has. Walk the marked path once carrying an ordinary item. There is no need to stage an extreme test or guess what a future guest will do. The exercise tells you whether your chosen position works for the movements you already know. If the fuller outline fails and the pencil outline passes, that is more useful evidence than a vague preference for a slimmer shape.
Consider the display from the room's main viewing place after the route test. A tree pushed deep into a corner may solve walking space while becoming hard to see. Move the floor outline slightly to find a balance between the path and the view. This is still a floor-footprint problem. The separate half-tree placement guide addresses a tree designed for a wall and its viewing sides; it does not decide whether a pencil or fuller tree leaves enough usable route width here.
Decide whether floor decoration changes the answer
Some rooms have enough width for a tree until gifts, a skirt, or another object is placed around the base. Test the bare tree outline first. Then add only the floor items you actually expect to use. You can keep gifts elsewhere until they are needed, or choose a smaller base treatment, if that better suits the room. The tree skirt diameter guide covers the size of that separate floor circle. Keep its measurement apart from the tree's listed width so you know which choice creates the pinch.
Take a photograph of the marked floor from the main room view and another from the direction of travel. The first helps you judge whether the tree feels visually squeezed. The second makes a narrow route easier to notice. Photos are only a second view of what you already measured and walked; they cannot prove that a particular tree will fit. If you later move furniture, repeat the test instead of relying on the old picture. The route is defined by the whole room arrangement.
Do not buy a shape solely because its name sounds slim. Pencil is useful shorthand, but the actual width on the current listing is what you can compare with your floor marker. A fuller tree may fit a different corner beautifully even if it fails this route. If neither outline leaves a comfortable path, change the proposed position or tree size before considering extra decoration. The point of the test is to solve the obstruction before the tree arrives, while changing course is still simple.
Give yourself one last comparison with nothing marked on the floor. Remove the paper or objects and walk through the room normally. Then put back only the outline of the leading choice. This short reset helps you notice whether the marker itself has made the route feel unfamiliar. If the room feels much easier without it, the proposed footprint may still be too ambitious. If the change is barely noticeable, check the viewing angle and overhead notes before deciding. A few minutes of ordinary use can reveal more than a long debate over product photos.
Make the choice from the marked floor
Keep the floor outline in place for a little while and use the room normally. If the route still feels natural, you have a practical reason to prefer that profile. If you keep stepping around it, move or shrink the outline and test again. The result may be a pencil tree, a fuller tree in another spot, or no tree in that corner. Each is a valid answer to the same problem. The shape should fit the way the room is used, not merely the empty space visible in a product photograph.
Before ordering, compare the current product page's height and width with your final floor and overhead notes. Check whether the stand and any planned base decoration change your own outline. Keep the two example products in their actual roles. Do not infer shared lighting, assembly, or material behavior from a similar tree height. Once the placement works, ornament editing and other finishing choices can be handled separately without hiding a route problem underneath them.