How-To Guides & Tutorials
How to braid a friendship bracelet in three working groups
Make a long braided friendship bracelet using verified project instructions, keeping nine working lengths distinct from six-strand retail floss descriptions.
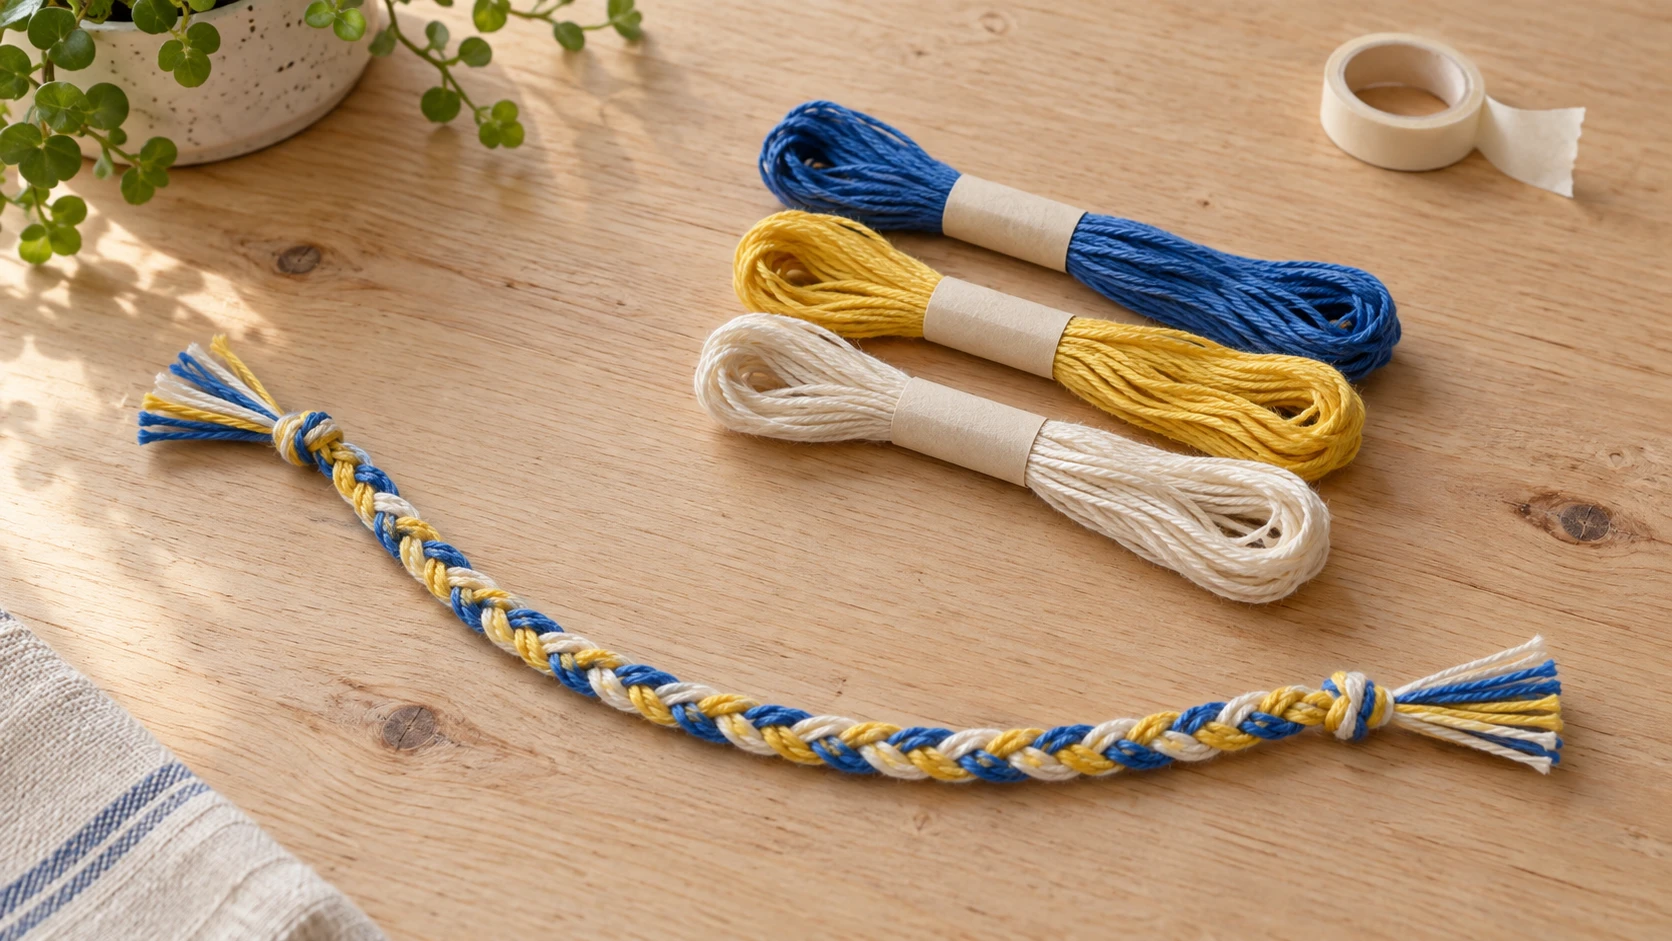
To braid a friendship bracelet, keep track of the lengths you cut and the groups you braid. The word strand can describe a component of embroidery floss or a working length in a craft instruction. This project uses three groups of cut lengths. The six-strand wording on a floss package describes the supplied thread and should not silently replace the project's count.
This adult project follows Hallmark's Braided Friendship Bracelet, a long version checked for three wraps. A starting measurement supplies no universal wrist-fit guarantee. Choose colors you enjoy from your actual supply.
1. Read the actual floss offer before choosing colors
The NOBRAND rainbow embroidery floss offer has 447 skeins in its title. Its description says 447 colors and also says the color is random. Preserve that qualification if a specific palette matters. The wording does not provide an exact color chart, a named shade code or a promise that your preferred three colors arrive in the selected package.
Each floss is described as about 8.75 yards long. The description says each thread consists of six strands and each strand is formed from two thinner intertwined threads. It lists bracelets among several possible uses. The seller describes the construction but supplies no measured strength result or finished-bracelet lifetime.
The NOBRAND Anniversary Collection floss pack lists 36 colors of six-strand, 100% cotton thread, with 8.7 yards per skein. Its identity is SKU 18751859867 and UPC 757060406159. The description includes friendship bracelets among its uses. Keep those actual material and length statements with this offer instead of copying them into the rainbow pack's specification.
The Anniversary pack also includes a size 18 hand embroidery needle. That is an inventory statement for this package. The braided project described here does not require the supplied needle, and its presence supplies no reason to add sewing or embroidery steps. Confirm the actual contents if another project is the reason you want that needle.
Suppose a friend asks for a bracelet in the exact blue of an older one. The rainbow offer's broad color account cannot confirm that match. A named color family leaves shade and batch questions open. Ask about the actual supplied color if an exact match determines the purchase; otherwise, agree that you will choose from the colors available. The Anniversary pack's count also provides no shade-by-shade list in its short description. Thirty-six colors can describe a useful selection while leaving that particular blue unidentified. Keep an exact-match request separate from a willingness to enjoy a new combination.
2. Preparing embroidery floss lengths
For preparing embroidery floss lengths, Hallmark names floss, pearl cotton or yarn, scissors, a measuring tool, and tape or a large safety pin. This version uses tape. Confirm the additional tools separately from either retail floss pack.
Hallmark's floss example starts with nine approximately thirty-inch lengths. Count those working pieces separately from the six components named in the retail thread description. This version keeps the supplied floss together instead of selecting individual internal filaments.
Choose from the actual colors you have. You could give each group one color or combine colors within a group as a personal design choice. Neither selected description promises a particular arrangement or a preview of the finished braid. A random-color package may suit open-ended choices while leaving an exact matching-color requirement unresolved.
The crochet practice-strip guide offers a useful comparison between material selection and a project's working count. Its actual wood-handle and Xanye hook offers describe millimeter ranges, while the practice instructions count chains and stitches. That guide's hook dimensions and yarn requirements do not convert to floss pieces or authorize a hook step in this braid. Keep the instructions for each craft with their own materials.
3. Secure the start and make three working groups
Align the cut ends, knot about two inches from one end and tape that end to the table. Hallmark then divides the pieces into three equal groups for braiding.
Before continuing, look at the three groups you prepared. If you have nine working pieces but have placed four in one group and two in another, the groups are not equal. Correct that grouping while the pieces are still easy to count. Nine divided by three gives three working pieces per group; it does not describe the number of internal components in each piece.
The basic crossing is shown on page 40 of Girl Scouts of Montana and Wyoming's Outdoor Skills Activities Guide. Move the right strand over the middle so it becomes the new middle, then move the left strand over that new middle. Alternate those movements. Here, move each prepared group together. The guide's one-foot, three-strand material example is a separate project; keep Hallmark's prepared lengths and finish for this long bracelet.
Keep your chosen groups recognizable as the work progresses. A color choice can make the groups easier for you to distinguish, but it provides no automatic correction if loose lengths become mixed. Return to the actual three-group arrangement when you lose track. A pause to recover the groups can remain part of making the braid.
Keep the outside positions distinct from the colors. After the first crossing, the group that began on the right occupies the middle; its color has not changed. A direction such as left or right describes where the group is now. Repeating a movement with the same color merely because it started on one side would answer a different instruction.
For an imaginary starting arrangement with blue on the left, cream in the middle and yellow on the right, the first right-over-middle movement puts yellow in the middle. The left group is still blue. Moving that left group over the new middle puts blue in the center. These are invented color choices for explaining positions, not promised contents of either pack.
4. Check the long bracelet before finishing it
Use a loose end knot to check the braid around your wrist three times, with the knots near each other. Hallmark shortens an overlong braid by undoing that knot and unbraiding a little before rechecking.
Do that check before treating the end as finished. Your own wrist and the braid you made are the relevant objects, while the product's skein length describes the supply. Neither 8.7 yards nor about 8.75 yards is a finished-bracelet measurement. A longer supply statement cannot tell you where this particular braid should end.
A bracelet intended for someone else introduces another fit question. A check around your own wrist does not establish that person's preferred fit. Agree on what can actually be confirmed rather than presenting the project as a universal adult size. This article supplies no standard wrist circumference or guarantee that one cut length fits every recipient.
5. Keep the braided bracelet knot closure with this pattern
For the braided bracelet knot closure, finish with two tight end knots about half an inch apart and trim the ends. After three wraps, Hallmark passes the starting knot through the unbraided gap between those ending knots.
The half-inch statement describes the gap between the ending knots, while the earlier two-inch statement located the starting knot. They are different points in the instructions. Keep each measurement with the place it describes instead of treating both as interchangeable lengths of spare thread.
Neither retail floss description supplies a tested knot-holding result, a closure-load limit or a wear-life claim for this bracelet. The project explains a craft method; it does not certify a protective accessory or a restraint. Keep your assessment of the actual finished item separate from the product's broad list of craft uses.
Keep a gift message personal
If you are making the bracelet for a friend, a short message can explain the color choice or the reason you thought of them. Let it come from a detail you want to share. You do not need to claim a traditional meaning for a color or invent a history for the pattern to make the gift specific to that person.
The postcard-writing afternoon guide develops a note around the person receiving it, using actual Compulabel and Avery card offers while keeping their dimensions and inventories distinct. That is relevant if you want to place a handwritten message beside the bracelet. Its card specifications do not establish that the bracelet fits an envelope or that the complete gift meets a postal requirement.
You might thank the friend for a recent visit or suggest meeting again. The message does not need to become an instruction to wear the bracelet every day. Let the recipient decide how they want to use the finished gift, while any unresolved fit question remains stated plainly.
Keep a floss order separate from the craft result
If buying floss on republeq.com and considering USDT, check the payment options displayed for the actual selected order. If the presented checkout leaves that preference unanswered, check the current order information before treating the planned payment choice as confirmed. A general cryptocurrency reference does not confirm every asset for every transaction. Keep that payment question attached to the offer you would purchase, including the selected package identity and any color information still needing clarification. A preferred payment option does not supply a missing color chart. The rainbow pack describes random color, while the Anniversary pack supplies its own 36-color and cotton account. Confirm the materials relevant to the project before treating an available payment method as a reason to choose one package. Neither the number of colors nor a convenient checkout proves that a particular bracelet will fit. Review the current delivery and return terms for the order if the project is intended for a date or a gift. This guide promises no arrival before that date and no particular refund outcome. Retain the actual order confirmation while keeping the unfinished craft result open. If another person places the order, share the exact offer and the question you still need answered. Keep the actual confirmation with the selected item. A remembered cryptocurrency purchase cannot establish today's supported payment choices. This discussion supplies no wallet instructions, token-transfer sequence, network selection or assurance about transaction security. You can decide on a project and a palette while leaving a purchase open until its relevant details are known. Confirming the payment question still leaves the actual making and length check to complete.
Leave the project with its own instructions
Keep the selected floss description and the Hallmark project distinct as you finish. One describes what the seller offers; the other gives the nine-length example, equal groups and checked long-bracelet closure. If you choose another pattern later, return to that pattern's own material count and finish rather than carrying this closure into it by assumption.
You can braid a friendship bracelet using a small palette and an actual length check. Preserve the difference between the components of the floss and the lengths in your hands. Check the actual braid before calling it finished, then use the same material distinctions when you choose a later project.
Conceptual table for a guide on how to braid a friendship bracelet, with whole generic floss skeins and an unfastened braid; no exact retail pack, working count or measured fit is shown.