Tools & DIY
automatic needle threader for hand sewing: fit the needle first
Choose a hand-sewing threader by checking the actual needle eye, thread, and tool mechanism rather than relying on a product label or pack size.
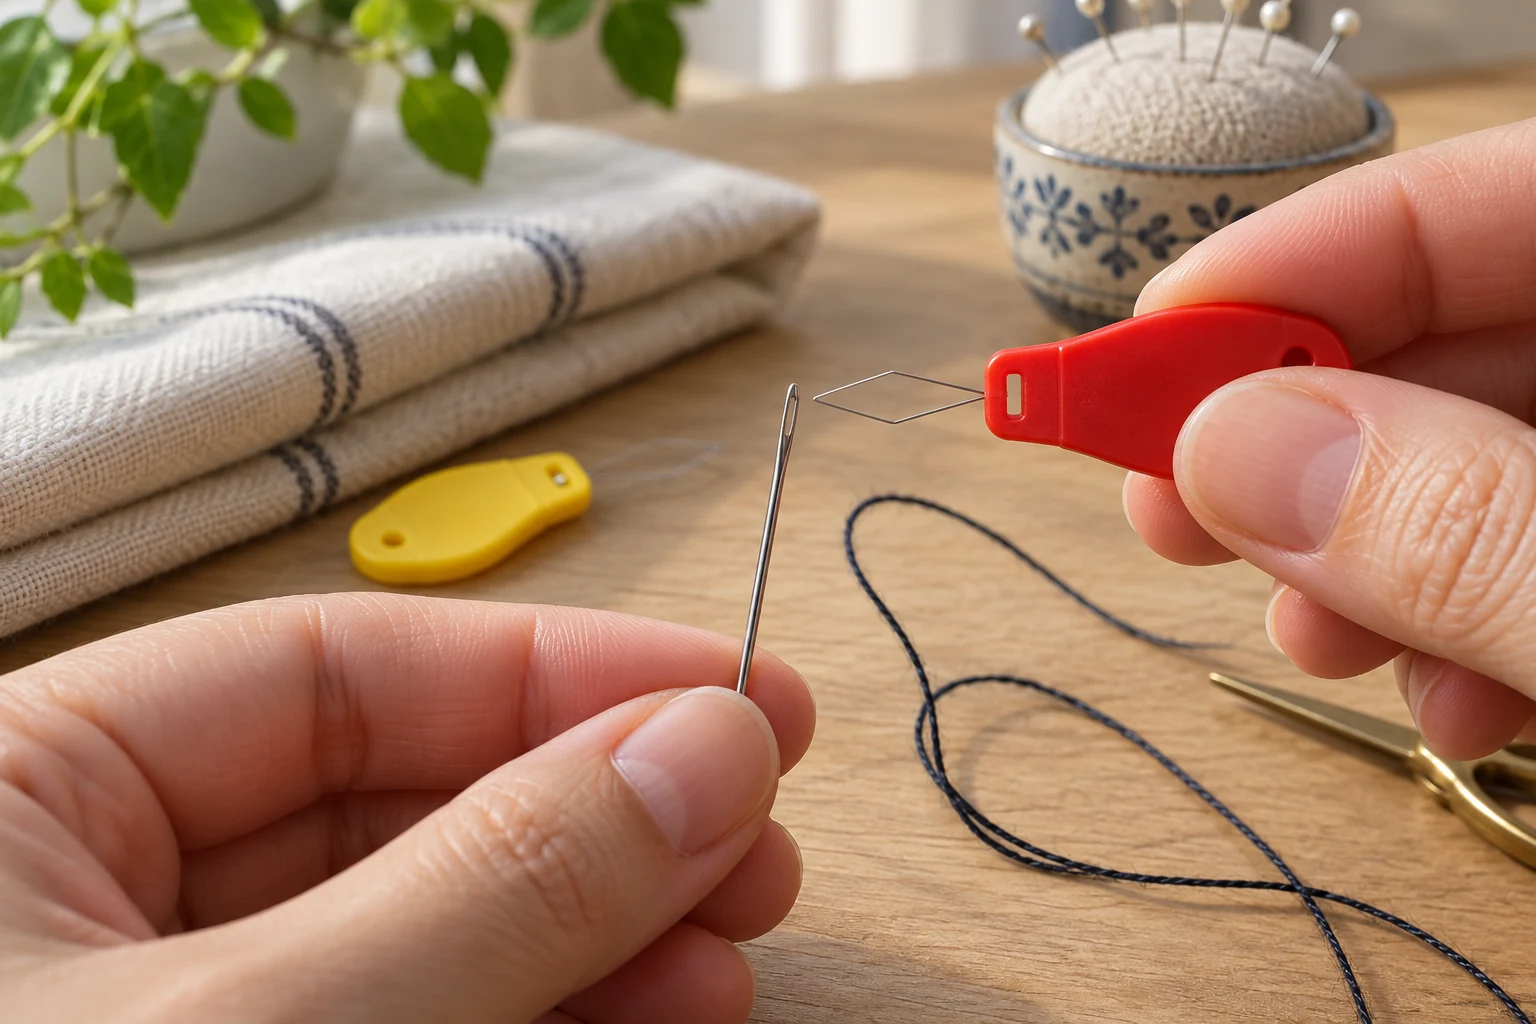
An automatic needle threader for hand sewing can make a small needle eye easier to work with, but the word “automatic” does not tell you which needle or thread it accepts. A handheld tool must bring its guide, hook, or loop into a position that matches the eye of the needle in your hand. Before pressing a slider or pulling thread through, identify the tool's actual opening and the needle's eye. If the parts do not line up, forcing them can bend the tool or the needle without making threading easier.
This guide covers a handheld aid used with a separate hand-sewing needle. It does not explain the built-in threader on a sewing machine or diagnose a machine's upper thread path. The Janome 2212 upper-thread guide is about that different machine route. Keep a handheld product's instructions beside it; products sold under the same “automatic needle threader” label may have different moving parts and use sequences.
Identify the needle and the tool first
Place the hand needle on a light, stable surface where it cannot roll away. Look at the eye rather than judging fit only from needle length. Two needles with similar shafts can have different eye shapes. Then inspect the threader's working end under good light. Some aids use a wire loop, some use a small hook or guided slot, and some combine threading with another function. The exact mechanism comes from the product in front of you and its maker's directions, not from a broad category name.
Check that the device is intended for a loose hand needle. A built-in sewing-machine threader is positioned relative to that machine's needle and may have a model-specific sequence. A handheld plastic tool is not a replacement part for a machine threader. If your goal is to sew a button by hand, the two-hole button sewing guide shows the later thread path through the shirt. Threading the separate needle is the preparation step; the button stitches themselves are outside this tool-fit question.
Set the needle, thread, and aid side by side before deciding what to buy or use. The needle eye is the opening that must receive the thread; the threader's fine end is only a temporary carrier. A larger plastic housing does not mean a larger working hook, and a smaller housing does not establish that it fits a finer eye. Compare the parts that actually meet. If the working tip is hidden inside a housing, use the product's directions to expose it safely before making a fit judgment. Keep the needle point away from the hand holding the aid.
Inspect the needle eye for visible damage or debris before using a tool. A burr, dried adhesive, or bent needle can make threading difficult even when the threader is sound. Do not use a sharp point to enlarge the eye. Replace a damaged needle with one appropriate to the fabric and thread. The aim is a smooth route through a sound eye, not an improvised alteration that could snag the fabric or break the helper's fine wire or hook.
Read the native product description as a product-specific claim
One current Anyway.go combination sewing tool is listed under notions and sewing accessories. Its native description says it combines a needle threader, seam ripper, and storage case, yet also uses both “3-in-1” and “2-in-1” language. That inconsistency is a reason to inspect the exact package and instructions rather than assuming every pictured opening has a particular role. Its gallery shows a small plastic body and a working tip near a hand-sewing example.
A separate CUITING 20-piece hand-sewing threader set is presented as small plastic threading aids for hand stitching. The first gallery image shows multiple red and yellow units and a close-up of a needle and thread at the tool. That image helps identify what the seller intends to supply; it does not prove that the tool fits every needle eye or every thread thickness. A twenty-piece package changes the quantity, not the physical compatibility of one unit.
Neither listing supplies a universal eye-size chart in the source material reviewed for this guide. Do not infer one from the product title, pack count, or photo scale. If you need a specific needle size, look for the maker's supported needle range or ask the seller for an exact fit statement. A photo can show the intended orientation but may hide the fine hook or loop that actually enters the eye.
Also distinguish what the native descriptions say from what the photographs merely suggest. A close-up can help you recognize a button, opening, or working end, yet its scale and staging cannot establish the dimensions of the needle you own. The Anyway.go text names several functions but does not resolve its own two-function and three-function wording. The CUITING title names a quantity and hand-stitching purpose but does not identify a compatible needle-eye range. For either product, ask for the exact maker instructions if that missing fit detail is decisive. Avoid treating a different seller's demonstration of a similar-looking device as instructions for these particular items.
Make a gentle fit check without forcing the eye
Hold the needle securely by its shaft with the sharp point directed away from your fingers. Bring the tool's working opening toward the eye only as its own instructions direct. Stop if you cannot see a clear alignment. Do not push a wire or hook through at an angle to make it fit. A fine part can bend while the plastic body still looks intact. If the tool has a slider or button, learn its unloaded movement first and use only the pressure the maker describes.
Use a short sample of the thread you plan to sew with. Separate twisted strands only if the thread and project call for it; do not strip or damage the thread merely to fit a tool. A thread can be too bulky for a particular needle eye regardless of the threading aid. If the sample bunches at the eye, recheck the needle/thread pairing rather than repeatedly operating the threader. The needle, thread, and tool all have to work together.
After a pass that appears successful, look at both sides of the needle eye. Confirm that a usable length of thread actually crossed the eye and that no fine tool part remains caught. This is a visual check of the result, not a license to tug hard. Pull the thread gently by its free length according to the tool instructions. If it snags, stop and inspect the path. Repeated force can fray the thread or damage a delicate guide.
Make that first test over a table instead of over a partly finished project. A dropped needle or tiny threader part is easier to find on a clear surface, and you can observe the eye without pulling against fabric. Work slowly enough to see which side of the eye the thread enters and exits. If the tool's directions specify a direction of insertion, keep that orientation. Reversing a small hook or slot because another threader worked differently can make a compatible pair appear unusable. One controlled attempt gives more information than repeated pressure applied to an unseen opening.
Do not treat the phrase “self-thread” in a retail title as a guarantee that no alignment is needed. Even a tool that moves a guide automatically must be placed relative to a separate needle. The seller's image may show a demonstration with one needle, while your needle has a smaller or differently shaped eye. Use the actual parts at the worktable as the evidence for this pair. If the maker supplies a diagram, follow that diagram over an image of a different model.
Separate a tool problem from a needle or thread problem
If the tool does not engage, set the parts down and check them one at a time. Is the guide bent or missing? Is the needle eye open and visible? Is the thread end frayed? This simple separation prevents a damaged needle from being blamed on a new threader or a bent threader from being blamed on thread thickness. Do not keep actuating a mechanism while a fine part is jammed inside the eye.
Try a second sound needle of a size the tool maker supports if that information is available. If the device works with that needle but not the first, the pairing may be the issue. If it fails with multiple supported needles, inspect the tool and consult its maker or seller. This is a practical comparison, not proof of a manufacturing defect. Preserve packaging and photographs if you need to describe the problem accurately to the seller.
A seam ripper built into a combination tool is a separate function. The Anyway.go description mentions one, but the same body may house parts for storage and threading as well. Keep the blade or point covered when you are using the threader, according to the actual product directions. Do not substitute a seam-ripper tip for a threading guide. The 20-piece CUITING set appears to offer repeated threading units rather than that same multi-function body; keep package functions distinct.
If the threader is meant for hand sewing, do not insert it into a sewing machine's needle area unless the machine and tool makers explicitly approve that use. Space around a machine needle, presser foot, and built-in threader is different. The linked Janome article owns the machine's upper-route problem. A hand tool's photograph near fabric does not turn it into a machine accessory.
Choose a tool by the actual sewing task
For a single mending task, one working threader that fits your needles may be enough. A large pack can be useful if several people need small tools, but quantity cannot solve an eye-size mismatch. A combination tool may reduce the number of separate items carried, yet its extra functions matter only if you will use them and can identify them safely. Decide from the needle, thread, and work setting first, then consider pack size and storage convenience.
Ask whether you need a temporary threading aid or a needle with a different eye. If the thread is too thick for the needle, changing only the threader will not enlarge the eye. A larger-eye needle may change the hole left in delicate fabric, so that choice also belongs to the project. Consult the fabric, pattern, and thread guidance where available. The tool is a helper for a compatible pair, not a way to ignore the pair's physical limits.
For small hand stitches, visibility can be as important as mechanism. A light background, steady table, and adequate lamp make it easier to see the eye and the tool's fine end. If you cannot see what is happening, stop instead of applying more pressure. Magnification or a different needle may help some users, but those are individual setup choices. An online listing cannot establish which arrangement gives you a stable grip.
Keep a short note about which needle and thread worked with the tool. A label such as “hand needle with medium cotton thread” is more useful than “works with everything,” but a maker's actual needle size is better if you know it. Put the threader away so its delicate working end is protected. A bent loop discovered at the next project can look like a fit problem when it is really a storage-damage problem.
When comparing a multi-function aid with a pack of simple aids, think about how the tool will be handled between uses. A threading tip can be small enough to catch on other notions in a sewing kit. Use any cap or case supplied for the actual model, and keep the needle separate if the case is not designed to hold it. Check the fine end again before the next use, especially after the kit has traveled. Storage will not prove compatibility, but it helps preserve the condition of the part whose fit you already checked. A second unit from a pack is useful only if it has the same intended mechanism and is sound.
Move from threading to sewing only after the pair works
Once the thread passes cleanly through the eye, use the amount of tail and any knot the sewing task calls for. The threading aid's job ends there. For a two-hole shirt button, the linked hand-sewing guide takes over with the stitch path and fabric context. Do not let a successful thread pass imply that the needle size, thread strength, or stitch sequence is suitable for every fabric. Threading success is one small part of a sound repair.
If the tool fails at the start of a project, you can pause and use another appropriately sized needle or a different supported threading method rather than forcing the same mechanism. Preserve the original attempt if the tool appears damaged, especially when it is new. Avoid claiming the tool is defective solely because one unidentified needle did not fit. The next useful fact is the exact needle, thread, and tool identity.
An automatic needle threader for hand sewing is most useful when its guide and the needle eye are a real fit. Read the product-specific directions, make one gentle alignment, and confirm that the thread actually crosses a sound eye. The two linked offers illustrate different hand-sewing packages, including a combination tool and a twenty-piece set. Their labels and images help identify what is offered, while the actual needle and thread decide whether either package solves your task.