Cooking & Food Prep
Mortar and pestle small-batch setup for dry spices
Set up a small dry-spice portion in a mortar and pestle, work it in short passes, and transfer it before adding more.
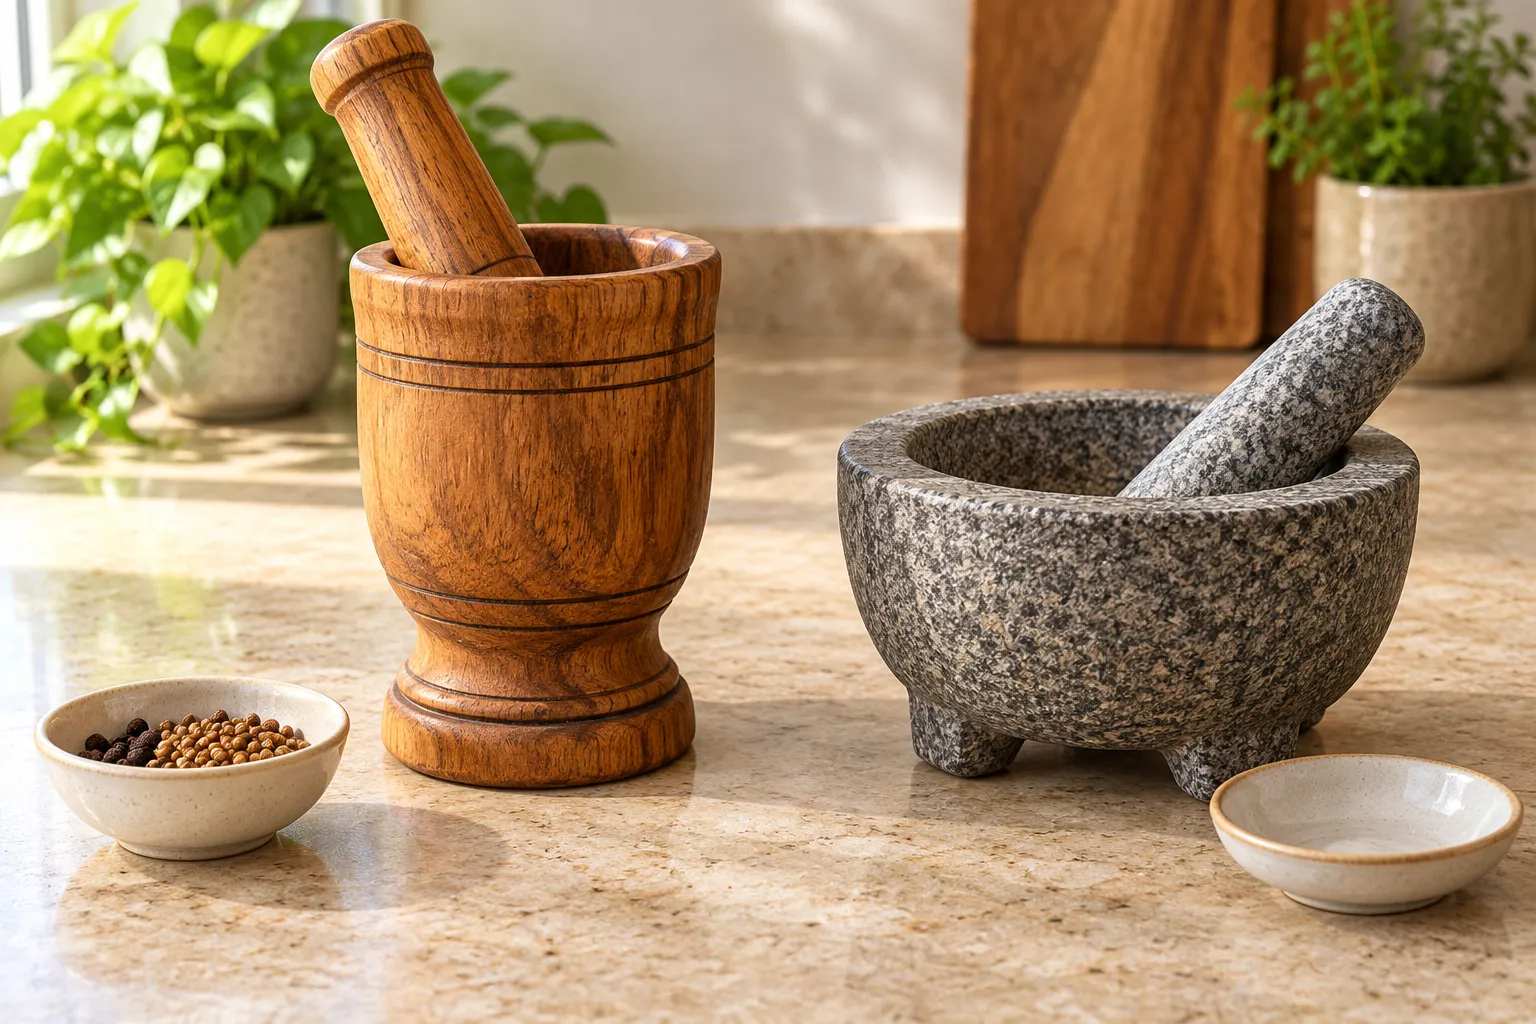
Mortar and pestle small-batch setup starts with a little dry spice and enough room to move the pestle. The first useful decision is how much to put in the bowl for one pass. A large vessel does not require a large batch, and a small vessel can become awkward when ingredients crowd the pestle. Set up one modest portion, work it, and move it out before adding more. That gives you a repeatable routine without guessing how much the finished bowl ought to hold.
Two Republeq listings show different vessels for this exercise. The tall wooden pilón mortar and pestle is described as a wood set for mashing garlic, grinding herbs and crushing spices. The gray granite mortar and pestle is described as a two-piece set with an unpolished grinding surface for spices and other ingredients. Their shapes differ, but neither product page proves that a particular quantity of spice will grind evenly in your kitchen. Use the actual delivered tool and its instructions to settle care and permitted use.
Choose a stable grinding station
A stable grinding station begins with a clear counter or table where the entire base of the mortar can rest. Remove loose packaging and leave room for your hand, the pestle, the ingredient container and a small receiving dish. Keep the path between them short. If you have to carry a loaded mortar across the kitchen to empty it, move the receiving dish closer before starting. A folded cloth, mat or other support is appropriate only if the selected tool's instructions permit it and the vessel remains stable; do not assume any particular surface needs a pad.
Put the mortar down empty and move the pestle through the stroke you expect to use. Does your hand clear the rim? Can you see the bottom where the first spice portion will land? A tall vessel and a broad shallow vessel give different views into the bowl. The wooden pilón's gallery shows a deep, upright form; the granite set's gallery shows a broad bowl and heavy-looking pestle. Those are visual observations, not measurements of grip safety or grinding efficiency. Try the motion with the empty tool before food is added.
Check the product's supplied care information before the first food batch. The listings describe intended kitchen use, but do not supply a complete cleaning or seasoning procedure for the exact delivered piece. Follow the maker's directions for any initial preparation. If no usable directions arrive and you are unsure whether a surface or finish is ready for food contact, ask the seller or maker before putting ingredients into it. This article does not substitute a general internet cleaning recipe for a wood or granite manufacturer's instructions.
Choose the vessel for this rehearsal
The tall wooden pilón and broad granite bowl are both complete mortar-and-pestle sets, but their listings give different kinds of detail. The wooden page emphasizes its upright shape and general uses. The granite page describes an unpolished surface and provides conflicting capacity figures. If you are deciding between them for a first small dry-spice run, compare what you can actually verify: where the base sits, whether the pestle reaches the ingredient, how much rim remains visible and whether the maker's use instructions answer your care questions.
Do not select a vessel by a photograph of a heaped bowl. A gallery scene may show herbs, vegetables or a paste for illustration, not a tested maximum for your ingredient. Start the rehearsal with the smallest portion that lets you observe the movement, then add a second portion only after the first is transferred. Keep the wood and granite care paths separate. If one product arrives with directions and the other does not, settle the missing directions before using that tool with food.
It is reasonable to choose a vessel for the space you have rather than for a claimed cup figure alone. A tall tool may need overhead hand clearance; a broad one takes more counter area. Those are layout questions you can test with the empty pieces. They do not establish which material produces a preferred spice texture. Save that judgment for your own recipe and the exact ingredients you use, after both tools are ready under their individual instructions.
Mark one dry spice portion
Choose one dry spice portion from an ingredient you already intend to use. Put a small amount in a separate dish, leaving the rest in its original container. This is a work portion, not a recipe amount or a promise about how many servings it will season. Begin with less than seems necessary if the pestle has little room to move. You can make a second pass after transferring the first result. A few grains or seeds scattered on the counter tell you the starting portion may be too large or the stroke too abrupt for that setup.
Look at the ingredient before it goes into the mortar. Remove packaging, ties or other material that is not meant to be ground. If a recipe calls for a specific whole-spice preparation, follow that recipe and its food guidance. Here the purpose is to rehearse the tool workflow with a dry ingredient, not to teach a particular seasoning formula. Keep a note of what you used and how much of the empty vessel stayed available around it. Next time you can repeat or adjust your own starting portion.
The word “cup” on a product title is not a target work batch. The granite listing calls the set four-cup in its title, gives a 3.5-cup bowl capacity in the description, and shows a 1000 ml graphic in a gallery image. These are not identical ways to state a reliable usable grinding volume. Ask for exact dimensions or check the delivered bowl if the discrepancy matters to a purchase. Even when a vessel's total capacity is settled, leave room for the pestle and ingredient movement during actual work.
Begin with controlled pestle contact
Place the marked portion in the mortar and settle the pestle gently on the ingredient. Use one hand to control the pestle and keep the other clear of the working area. Start with a slow press or short turning motion that stays inside the rim. Pause after a few movements. The goal of the pause is to see where the pieces have gone and whether the tool feels stable, not to declare the spice finished after a fixed number of turns. If ingredients ride up the side or escape the bowl, reduce the portion or adjust your motion.
Different dry spices may break at different rates. Do not treat the product description's broad phrase “grinding spices” as a tested time or texture for every seed, pepper or herb. Observe the ingredient in front of you. A gradual approach lets you stop at the stage your own recipe asks for, then continue if larger pieces remain. Keep the selected recipe's requirements separate from the tool setup; this guide makes no claim about flavor change or culinary outcome.
The wood pilón listing calls its tall form useful for mashing and grinding. The granite listing says its unpolished surface provides friction. Those descriptions support the basic physical identity of each set, but they do not prove that one is faster, more precise or easier for every ingredient. If you are comparing their feel, do the same small dry-spice task with each only after following each maker's use and care directions. Record what you noticed rather than turning a single kitchen trial into a universal ranking.
Pause and choose the next pass
Stop the pestle and look at the material before deciding what to do next. If the pieces already fit the recipe you are following, transfer them. If they are still larger than that recipe calls for, make another short pass and inspect again. Do not keep adding fresh whole spice on top of a partly ground batch without noticing how much working room remains. An overloaded bowl can hide the earlier material under later additions, making it harder to tell what has actually changed.
For a first trial, note the amount you started with and whether you had to split it. You do not need a laboratory measure; a small spoon or the dish you used to stage the ingredient can be enough for your own repeatable kitchen note. Keep that note separate from any advertised bowl capacity. The useful number is the portion that gave your hand and pestle enough room while making the texture your chosen recipe needs.
This is distinct from the pesto texture guide, which follows a basil and oil recipe sequence. Dry spice work here has no pesto oil stage. If you are making pesto, use the recipe and that guide for its ingredient order. The same mortar can appear in both conversations without making the cooking decisions interchangeable.
Make a clean batch transfer
A batch transfer starts when you set the pestle down in a stable place before lifting or tilting the mortar. Move the receiving dish close enough that you can transfer the ground spice without reaching over other food or equipment. Follow any handling directions supplied for the actual tool, especially if it is heavy or has a finish that needs particular care. A utensil used for transfer should be suitable for the vessel according to its instructions; do not scrape an unknown surface with a hard tool because it is nearby.
Check the bowl after transfer. If a little of the same ingredient remains and you intend a second portion, decide whether that residue belongs in the next batch or needs attention under the maker's care instructions. Do not assume a different spice can be added without affecting what you are preparing. For a question about old particles trapped in grooves, the mortar and pestle residue guide owns that separate diagnosis. This tutorial stops at staging, grinding and moving one fresh dry-spice batch.
If you need more than one portion, place the next one in the now-cleared bowl and repeat the same short sequence. Use the same ingredient and intended texture if you want comparable portions. When the recipe is complete, follow the selected mortar's own care and storage guidance. Do not borrow a rinse instruction shown in a different product's gallery as permission for your wooden or granite set. Materials and finishes may call for different treatment, and the captured listings do not settle that for every delivered item.
Keep a short note for the next use
Write down the spice, the starting work portion, the vessel you used and the movement that kept the ingredient inside the bowl. Note any unresolved instruction question beside the product model. This is especially useful when several people share the kitchen; the next person can see what was actually tried instead of guessing from a capacity claim or a styled photograph. The note need not become a formal recipe card unless you want to keep it with a recipe.
A first grinding session succeeds when you have a stable station, a portion the pestle can reach, an observable stop point and a clear transfer path. If the tool does not feel stable or its care instructions are missing for the use you planned, stop and resolve that before the next batch. You can choose a different amount or a different vessel without treating the first trial as a failed recipe. The point is to learn the work rhythm of the exact mortar and pestle you own.