Cooking & Food Prep
lunch outing packing setup: stage the meal before leaving home
Plan a lunch outing around the place you will eat, the order containers come out, and how used pieces return home.
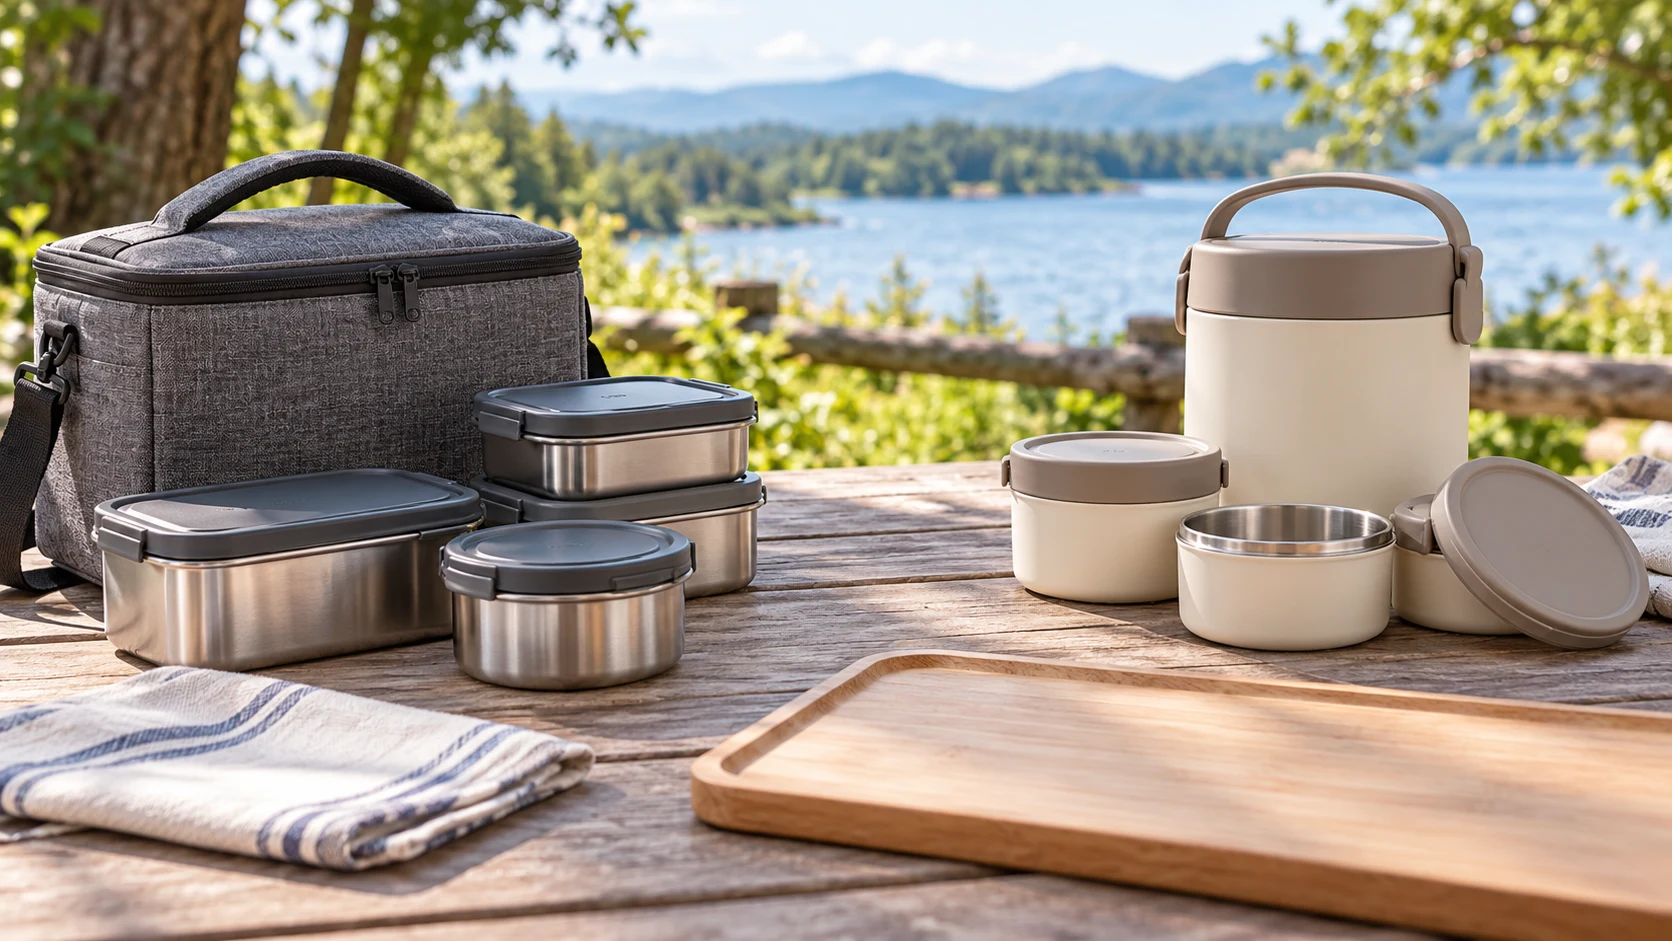
A lunch packed for an outing has a different rhythm from a meal eaten at a desk. You may open it on a narrow picnic table, a bench, or a clean patch of ground, then carry the used containers home. A useful lunch outing packing setup starts with that whole trip. Decide where the meal will be opened, which pieces need to be within reach, and how everything will go back into its case after eating. A product photograph can suggest a layout, but only your actual meal and destination can settle it.
Stage the containers, serving space, and return order before leaving for the outing.
Picture the place where lunch will be opened
Before filling a container, imagine the first minute at the destination. Is there a table large enough for several lids and bowls, or will one person hold the case while another clears a spot? Will the group sit together or eat at different times? These questions affect the order in which you pack. A container that opens easily at home can feel awkward when the only available surface is small or uneven. Choose a place to set the case and a separate place to put lids before deciding how many pieces to bring.
Make a short inventory of the physical pieces you intend to use: closed food containers, their matching lids, the outer case, and any serving items you actually need. Lay them on a table in the order you would take them out. If a lid has no obvious resting place, or one bowl must be moved before another can be reached, adjust the layout while you are still at home. This is a staging exercise, not a test of a product's temperature performance or ability to prevent spills.
Think about the route from the door to the eating spot as well. A case that is comfortable to lift once may be less convenient while carrying other bags, opening a gate, or helping someone else. Fill the actual containers you plan to use and make one ordinary walk with the closed case. Notice whether the handle, shoulder strap, and balance suit that route. Do not rely on a stated capacity alone to predict the feel of a packed meal.
Consider who will be carrying the case and who will be unpacking it. A person who packs at home may know where every piece sits, while another diner may open the case first at the destination. Show that person the intended order once, then let them try it without directions. If they have to remove a stack of containers to find the first item, revise the layout. The best arrangement is one the people on the outing can actually use, including when someone is tired or the available surface is smaller than expected.
Read the two container layouts as examples
The Milton Triple Decker lunch-box listing shows several stainless containers beside a soft carrying case. Its gallery helps you picture a meal brought as separate pieces rather than one divided tray. The description's package wording is uneven, so check the current offer and the pieces received before assigning each container a job. The case and containers are a physical layout example here; the listing does not establish how long a particular meal will stay at a desired temperature.
The Tiger LWR-A072 thermal lunch-box listing depicts a taller outer vessel with separate round containers. That changes the way pieces might come out and return to the carrier. The gallery supports the shape and separate-container idea, while leaving your actual packed load, serving space, and temperature outcome unknown. Compare the two arrangements by asking which pieces you would need first at your outing, not by assuming one product is universally easier to carry.
Both examples invite a dry run with the actual item. Set the empty pieces in the case, close it, then remove them in the order a meal would be served. Check whether the lid or outer vessel needs its own clean resting spot. Repeat the motion with the ordinary contents you expect to carry. A photograph can show the parts arranged attractively; it does not show the moment when someone is holding a plate, looking for a napkin, and trying to put a lid down.
If you are deciding how to keep wet foods from crossing into other compartments, that is a different packing problem. The public guide to separating wet foods in lunch-box compartments addresses that boundary. This outing plan assumes each chosen food container has already been matched to its contents. Its question is where the pieces go during the carry, serving, and return stages.
Stage the serving sequence before departure
Put the first item someone will need nearest the opening of the case. That might be a main container, a utensil, or a napkin, depending on the meal. Keep any item that will be opened later out of the way of the first serving action. This small decision matters when several people are sharing a limited surface. Nobody should have to unpack every closed vessel just to reach the one needed now.
Give lids a deliberate place in the sequence. A lid set on grass or a crowded bench is easy to lose or mix with another. During the home rehearsal, place each lid where you expect it to rest at the destination, then see whether that place remains available once food is served. If there is no suitable surface, simplify the meal or bring a clean, stable place for the parts you will remove. The plan should work with your actual setting, not an idealized picnic table.
Use the outer case as a boundary for the meal kit, but leave enough room to return pieces without forcing them. A case can be neatly packed at the start and hard to close later if containers are put back in a different order. Try the return order while everything is still empty. Notice which container must go in first and whether its lid needs to be attached before it will fit. A quick practice at home is easier than solving a packing puzzle after lunch.
If two people will serve from the same kit, agree on a simple sequence. One person can open the case and place the first vessel, while the other keeps the remaining closed pieces together. That avoids a scatter of lids and containers across a small table. The arrangement need not be formal; it just needs a place for each item. Change the order if a child or another diner needs access to a particular container sooner.
Make the carry route part of the layout
Pack the case as it will actually travel and lift it from the surface where it will be stored. Check whether the weight stays centered when you pick it up. If a removable container shifts, identify which empty space allows the movement rather than stuffing an unrelated object into the gap. Use the manufacturer's current instructions for any closure or carrying feature you depend on. A stable-looking product image is not a substitute for checking the closed, loaded item in your hands.
At the destination, plan where the whole case can sit while lunch is served. If it must stay on the ground, can you remove the containers without tipping it or reaching across people? If it sits on a table, does it take the space needed for eating? The answer may favor leaving some pieces inside until they are needed. Test that motion at home with the table space you expect, then be ready to adapt if the actual site differs.
Think about the last few steps before sitting down. If one hand is already holding a drink or another bag, the lunch case may need to be set down before its lid can be opened. Leave a spot for that first pause. Keep the case closed during the walk and open it only when there is a place for the pieces. This simple sequence reduces the chance of juggling loose lids while moving, without relying on any claim that the carrier seals, cushions, or stabilizes every item inside it.
Keep this trip plan separate from a home meal-prep station. The guide to a meal-prep container station deals with arranging ready meals and ingredients where they are prepared. An outing adds carrying, a temporary serving surface, and a return journey. A layout that works on a kitchen counter may need fewer pieces, a different order, or a more compact serving routine away from home.
Plan the return trip before the meal begins
After eating, every used lid and vessel still needs a place. Decide in advance whether each piece will be closed again and where it will sit in the carrier. Keep the parts together so a missing lid is noticed before leaving. If a container cannot go back in its original position after use, find that out in the dry run and revise the packing order. Do not assume the outer case can hold extra wrappers or other items simply because the starting arrangement left a little space.
Separate the question of keeping pieces together from the question of cleaning them. A used container should be handled according to the actual food, material, and circumstances, with appropriate food-safety guidance where needed. This article does not establish safe holding times, temperatures, or cleaning methods for either product. The practical return goal is narrower: account for all the physical pieces and avoid leaving a loose lid or utensil behind.
Before you leave the eating spot, count the containers and lids you brought. Look under the table or beside the bench for small pieces. Close and lift the case once to see whether anything catches or shifts. A short check is easier than discovering a missing part at home. If the return load feels awkward, make a note of which item caused it; that observation is useful when you plan the next outing.
Adjust the routine after one ordinary outing
Keep the first trip modest. A familiar meal and a manageable number of pieces make it easier to notice what the setup actually needs. Afterward, ask which item was hard to reach, which lid lacked a resting place, and whether the return order worked. You might remove an unnecessary vessel, change the opening order, or choose a different place for the case. Make one change at a time so the next trip tells you whether it helped.
Check the exact current product again if you later replace a container or carrier. A new lid shape, handle, case size, or number of supplied pieces could change the routine. The two listings here illustrate different physical arrangements, not a permanent specification for every item sold under a similar name. Verify the item you receive before relying on the plan, especially when the offer text and gallery leave a detail unclear.
A workable lunch outing packing setup gives each stage a place: carry the closed pieces, open them on the surface available, serve without scattering parts, and return every used piece in an order the case can hold. Start with the destination and the actual meal, then rehearse the opening and repacking once at home. Keep temperature, leakage, and food-safety decisions with evidence appropriate to those separate questions.