How-To Guides & Tutorials
How to use a plumb bob to transfer a point
Practise transferring a chosen upper reference to lower scrap with a plumb bob. Confirm the actual tool and attachment instructions.
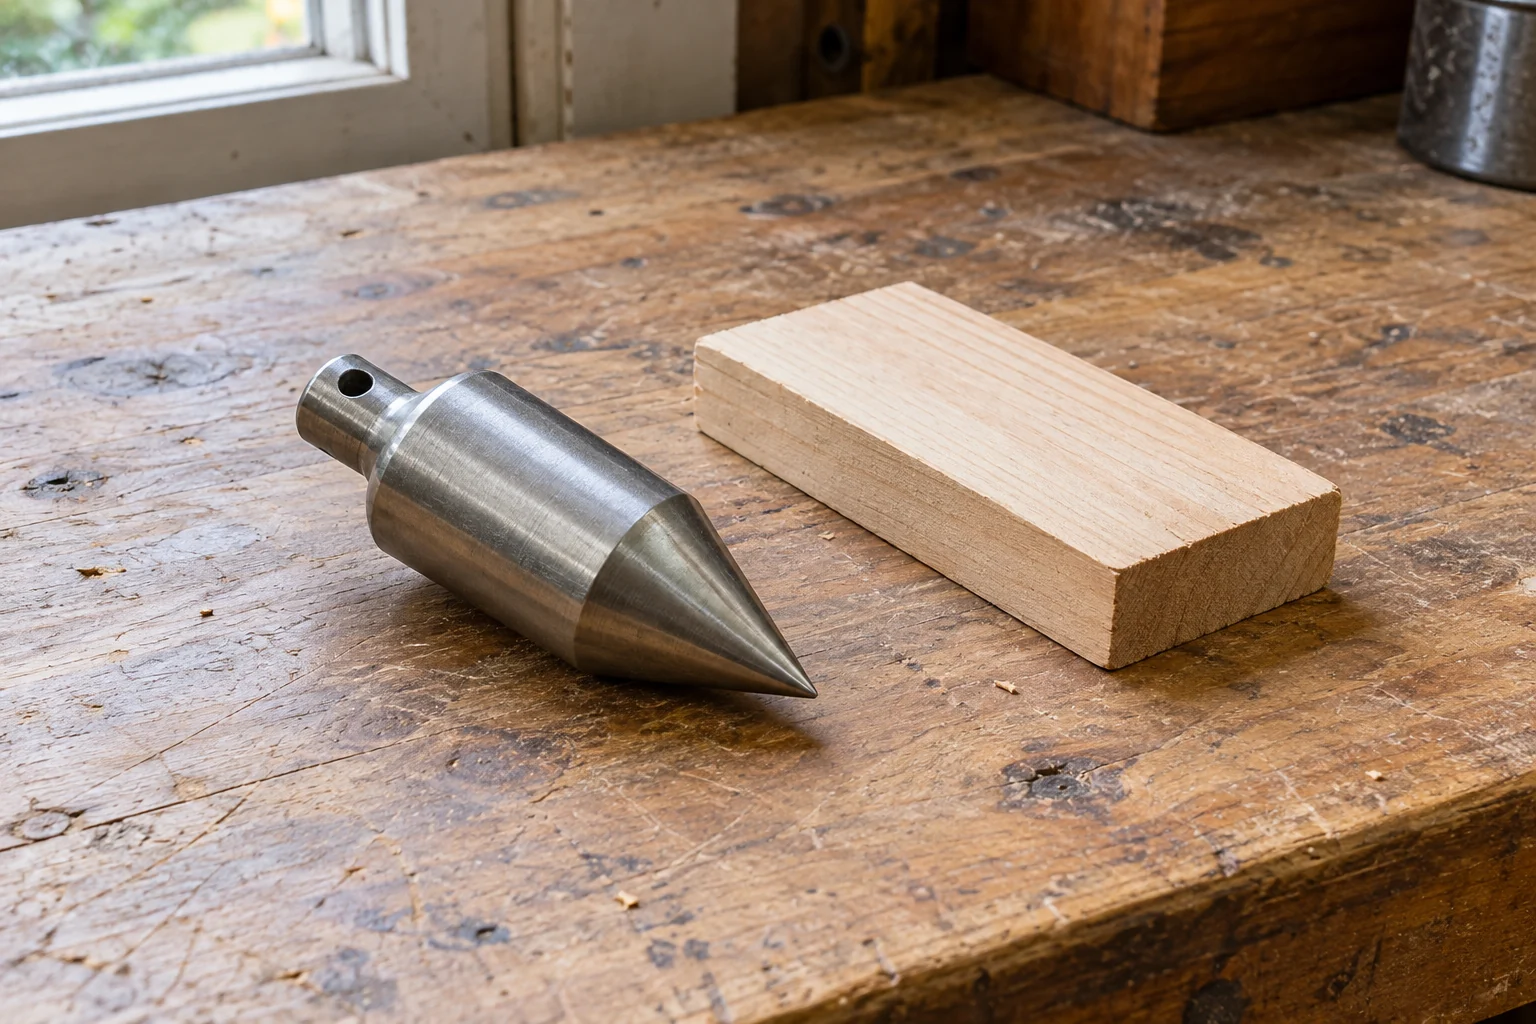
Learning how to use a plumb bob is easier when the first job has one clear purpose: carry a chosen upper point down to a lower practice surface. Decide which upper mark matters before arranging the tool. The exercise below uses scrap you are allowed to mark and a short working distance within comfortable reach. Keep the practice separate from any decision about where a wall, fixture or hole belongs in a real project.
Give the exercise an ordinary, visible finish. You want to identify the lower mark that came from your chosen upper reference, then clear the setup. There is no need to turn that mark into a building assessment or an accuracy certificate. If you are practising for a later job, keep that job's requirements on a separate page, including who will decide whether they have been met. A completed rehearsal still leaves those requirements to be established for the actual work.
Choose the reference before arranging the tool
Write a brief description of the point you intend to carry down. “The centre of this pencil cross” is a more useful instruction to yourself than “somewhere under the board.” Use a practice arrangement whose upper reference and lower scrap can remain identifiable throughout the exercise. If several old marks are already present, choose another piece or clearly identify the one that belongs to this attempt before bringing the tool into the space.
Johnson Level describes a plumb bob as a pointed weight suspended from string that provides a vertical reference through gravity. Its example waits for oscillation to finish before using the reference. That explains what the hanging tool contributes here. The location of the original mark remains your choice. Johnson's illustrated wall-and-nail example does not provide attachment instructions for either of the two particular tools discussed below.
Johnson's example asks about the distance between a wall and the hanging reference at different positions. This rehearsal asks where an upper point appears on lower scrap. Keep those questions distinct when reading instructions. You do not need to make a judgement about a real wall to practise the point-transfer method.
Identify the actual bob and supplied line
The Monument 381D steel plumb bob is listed as 450 g, or 16 oz, under Hardware and Fasteners. The offer's photograph shows a bare metal bob with a pointed end and a hole at its neck. Its SKU is sku-1574288192. Preserve that Monument identity when asking about the item; the catalogue category does not change the pictured tool into a fastening component.
Monument's 2016 export catalogue describes 381D as a nominal 450 g, zinc-plated, one-piece bob with holes for line. The same page identifies other models with different constructions. It explicitly includes line with 385P, which is a different product. Neither that statement nor the bare 381D photograph establishes that this offer includes line. Obtain the applicable line and attachment information for the actual item before suspending it.
The Tajima PZB-400 Plumb-Rite offer has a different arrangement. Its photograph shows a yellow housing, connected cord, bob and separate tip cap. The label reads PZB-400 and gives a 4.5 m cord length. Tajima's exact PZB-400 page describes a self-retracting line and a 400 g bob. Those are model specifications, not a requirement to deploy the whole line for this short practice.
The Tajima offer lists UPC 300026952674, while the maker's PZB-400 page lists 049296054120. Keep that conflict visible when confirming the offer. Its breadcrumb shows Shop followed by the product, with no intermediate category. The picture supports the PZB-400 model identification, but it does not settle the barcode difference or guarantee the contents of a parcel. Confirm the actual tool and its instructions before applying model-specific controls.
Tajima identifies a setting pin, magnet and hook as attachment features for different situations. Obtain the applicable directions before choosing an attachment for the practice.
A useful enquiry can stay specific: ask which item is supplied, what comes with it and which instructions apply to its line attachment. Keep the reply with the offer you asked about. If a supplier answers for a different item, retain the unanswered question instead of borrowing the other item's directions. You can prepare the practice marks while that question is open; deploying an undocumented attachment can wait for the missing information.
Begin plumb bob setup with the actual suspension point
This plumb bob setup begins with a suitable stable support and a correctly attached line, using the actual tool's applicable instructions. Establish where the line is suspended relative to the chosen upper mark. A retracting housing has its own attachment arrangement; the outside edge of that case is not automatically the reference point you meant to carry down. If you cannot establish the attachment or suspension point, leave this setup unfinished.
Choose practice material you can leave marked, with room to see the lower point and put the tool away afterward. Keep the upper reference and lower piece distinguishable if you take a break. A simple note naming both pieces is enough for this rehearsal. Avoid giving the lower scrap a project label such as “drill here” when you have only chosen a practice position. That label would add a decision the exercise has not made.
This Old House describes letting the bob hang freely with its point just above the lower surface, then waiting for it to settle. Its advice is to resist touching the moving bob. Apply that free-hanging requirement throughout the working space: the cord and bob need to remain clear, and the tip must stay off the lower practice surface. A bob resting on the surface is not the free suspension described by the method.
Look at the arrangement you actually have before accepting an observation. If the intended view is obstructed, clear the practice arrangement through the tool's applicable handling method before continuing. Keep the intended lower position available for marking. There is little value in finishing a rehearsal where you cannot later say which piece received the mark or which upper reference produced it. Change the practice arrangement while those choices are still open.
Wait for the tip before you transfer a point
Wonkee Donkee Tools' upper-to-lower method establishes the string at the chosen upper point, suspends the bob clear of the lower surface, waits until it has stopped swinging and marks beneath its tip. To transfer a point in this rehearsal, lower the bob under control using its applicable instructions and allow it to hang freely. Wait without touching it, then identify the point beneath the stationary tip on your lower scrap.
Make the lower mark only when you can identify that position. Keep it small enough to recognise the intended point again, rather than leaving an unexplained patch of pencil marks. This is a proposed way to organise the rehearsal, not a specified marking tolerance. If you cannot decide where the mark belongs from what you can actually see, leave the observation open. Writing down a confident location would not supply the missing view.
Keep a correction understandable. If you marked before you were ready, identify that mark as an abandoned practice mark or use a fresh lower piece. Do not quietly choose whichever old mark looks most convenient at the end. Your next attempt can have its own upper-reference description and lower mark. Separating those attempts lets you discuss what you did without presenting a collection of marks as one completed observation.
Keep other measuring questions separate
A bubble-level observation may raise a separate question while you are comparing ways of checking vertical alignment. The guide to spirit level readings that disagree explains why the actual location, vial and orientation belong in that account. It distinguishes a manufacturer's checking method from an acceptance decision. Use it to describe an apparent disagreement, without declaring either instrument faulty from that disagreement alone.
The peer discusses separate checks for horizontal and vertical vials and the need for the actual unit's specifications. It does not supply a tolerance for your plumb bob. If you want to compare observations, keep the question clear enough that the relevant supplier can answer it. “What procedure applies to this instrument?” and “Does this project meet its requirement?” need their own evidence and can remain separate enquiries.
One example in that guide changes a level's position on a tabletop between observations. The resulting disagreement concerns two locations. Its other example retains one location for a prescribed reversal. Those accounts explain why the position belongs in the question you ask, before anyone offers a diagnosis.
Join deliberately located marks when that is the next job
Once you have deliberately located two endpoints on supported markable scrap, the guide to using a chalk line for a short layout mark gives a useful next physical method. Its reel joins chosen endpoints with a powder trace. It asks you to identify the actual powder and decide whether its permanence suits the surface before marking a useful face. Keep that separate surface decision when planning another practice.
The chalk-line guide also keeps the endpoint reference explicit. It explains why a neat trace cannot settle where an endpoint should have been placed. Here, the bob exercise supplied one deliberately transferred practice point. Decide what any second point represents before joining them. If the next task has no reason to connect those marks, leave them as points rather than adding a line simply because another tool is available.
That guide also asks whether the intended position is the middle or the edge of the visible chalk trace. Keep that marking question with the chalk task. The appearance of the later powder line does not establish a numerical accuracy for the earlier transferred point.
Clear the practice and retain unresolved questions
Clear the bob and line under control using the actual tool's handling and storage instructions. The bare Monument and retracting Tajima arrangements still need their own directions at this stage. This tutorial supplies no universal winding sequence, knot or pin operation. If the tool's ordinary movement or attachment remains unclear, keep that question with its product identity and obtain the applicable information before putting it into another working arrangement.
Before putting the practice pieces away, decide whether you want to retain them or discard them. If you keep them, identify the upper reference and its associated lower mark together. Add any unresolved question in ordinary words, such as an attachment detail you still need to confirm with the supplier. That leaves a useful starting point for a later conversation without turning the rehearsal into a claim about an installed object or an instrument's accuracy.