Tools & DIY
Floor doorstop compatibility: check swing, height and mount
Measure the door path and contact height, distinguish a bumper from a catch, and confirm a permitted mount for the actual floor.
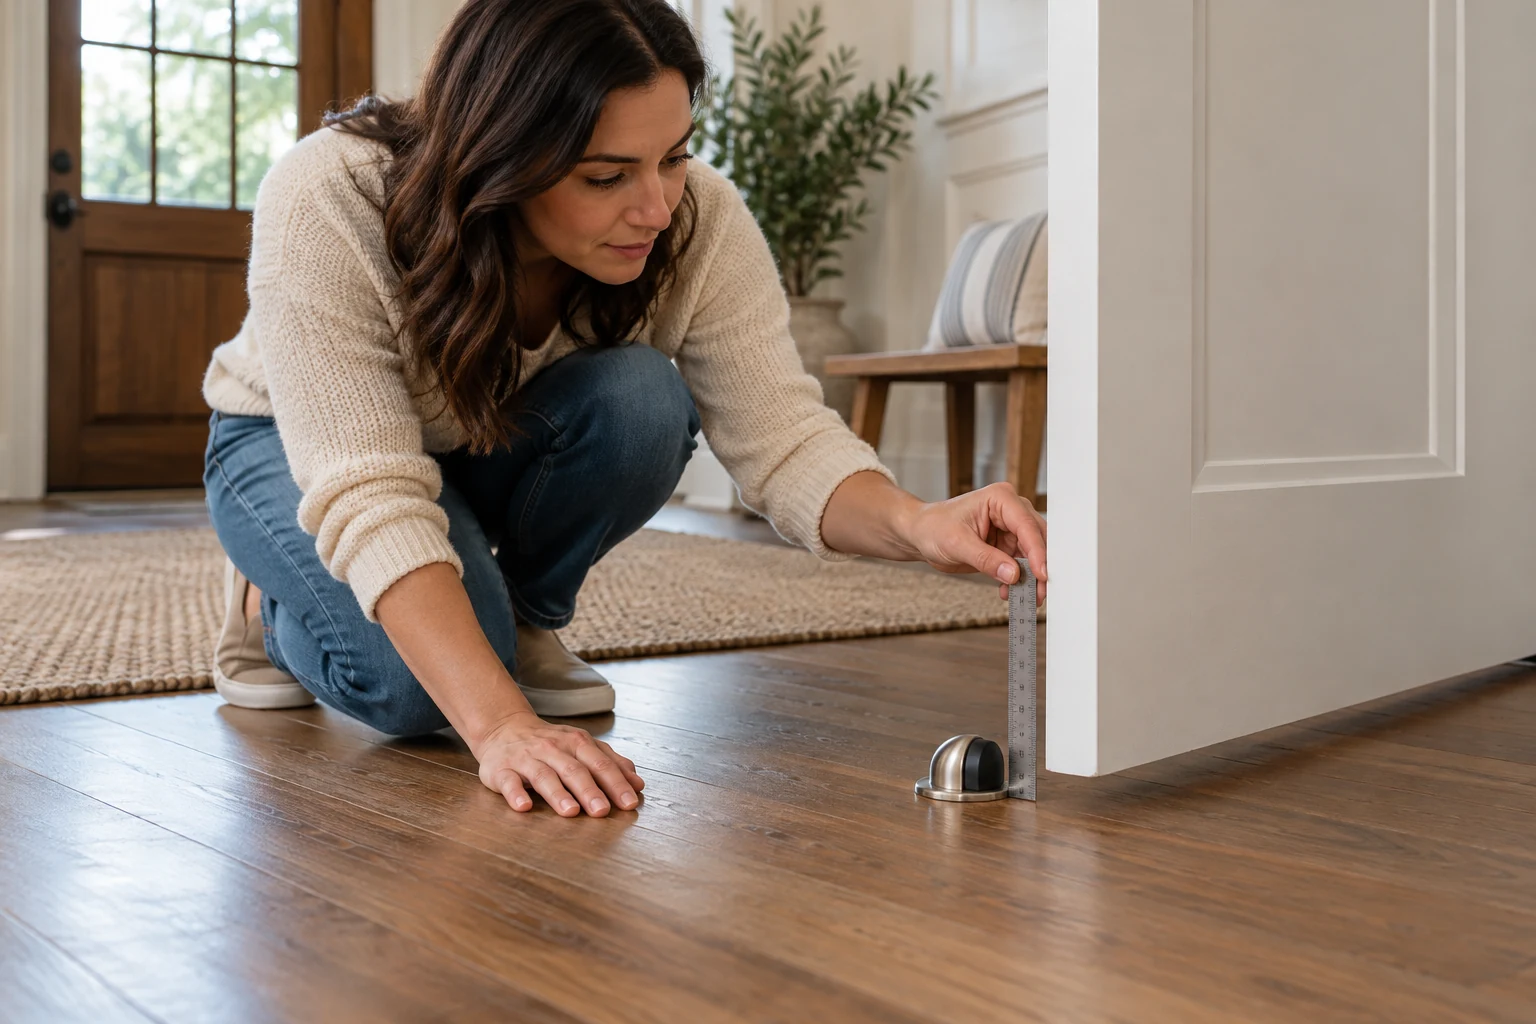
A floor doorstop can look like a small universal part, yet its location decides whether the door stops at the right angle, the handle clears the wall, and the mounting surface can hold the hardware. Floor doorstop compatibility begins with the actual doorway, not with the package photograph. Record the door swing, the first point of contact, the clearance beneath the door, and the floor material before selecting a shape or fastener. A stop that works at a neighbor's doorway may put its bumper in the wrong place at yours.
Map the door's real path
Open the door slowly through its normal travel while someone watches the handle, door edge, baseboard, and any nearby furniture. Mark the angle where you want the door to stop without letting the handle strike the wall. The mark is a candidate location, not permission to drill. A rug, seasonal mat, or a piece of furniture may change the usable path. Repeat the observation with the entry arranged as it is usually used, so the selected position is based on the real working space.
Check what the stop would actually contact. A bumper meant to meet the lower door face should not meet a thin trim strip, glass panel, loose sweep, or decorative molding instead. Some door bottoms are uneven above the floor, especially where a threshold changes level. Measure at the planned contact point, not at the hinge side. If the door has a closer, latch or hold-open device, check its instructions too; a floor stop should not be used to force the door beyond its intended travel.
Keep the intended stopping point clear of a walking path. A low profile part can still catch a shoe, a vacuum head or a rolling cart when placed in the wrong spot. If the required location creates a trip or access issue, consider another approved stop style or a different position. This is a compatibility decision, not a reason to hide the part under a rug. Make a simple sketch showing hinge side, desired stop angle, contact point and nearby obstacles.
Separate a bumper from a catch
The current OUNONA door catch listing describes an adjustable stainless steel assembly, with floor or wall mounting claims and two pieces in the package. Its gallery shows a projecting bumper and metal plate. The seller's words do not prove that its specific mounting holes, height, or adjustment travel suit every floor or door. Confirm the delivered model's dimensions and instructions before using the listing as a fit decision.
The current Renovator's Supply domed stop listing describes a pack of ten low-profile floor bumpers, two height choices, included installation hardware, a front screw, and a positioning pin. Those are listing claims about that pack. The pictured pieces are rounded bumpers, not the same construction as the OUNONA plate. An included screw does not establish suitability for every subfloor, tile, concrete slab or building rule.
Decide whether you need a door to stop, to stay open, or both. A bumper prevents impact at a chosen point; a catch or holder may add a retaining function. Do not assume that a product called a “door stop” will hold a heavy door open against a closer or a draft. Read the exact product function and any door weight or application limits. If those facts are not stated, ask the maker rather than treating a photograph as a capacity rating.
The distinction also affects placement. A catch may need its mating contact area aligned precisely; a simple bumper needs a safe strike surface. If you are replacing an existing part, take photographs of the original location and the underside of the door. Note which component is worn or loose. The guide on a floor doorstop that comes loose owns that diagnosis. This guide starts after you know what role the new part must serve and asks whether a proposed part fits.
Measure clearance at the contact point
Measure the gap between the floor and door bottom where the bumper would meet, with the door held at the proposed angle. Repeat the measure along the nearby sweep if the floor slopes. A threshold, carpet pile or door sweep can make one reading misleading. Record both the gap and the height of the door material available for contact. A bumper lower than that material may slide under the door; one placed too high can hit a fragile or unintended surface.
The domed stop listing gives particular height language, including a low bumper and an optional wedge height adjustment. Treat those dimensions as a prompt to compare with your own measurements. Do not add listed fractions together without reading the exact delivered part diagram and installation orientation. A nominal product height may differ from the effective contact height after mounting. If the listing and manual conflict, resolve the discrepancy with the manufacturer before purchasing a large pack.
Measure the door's clearance from the wall as well. A floor stop may contact the lower door while the handle still reaches the wall because the stop is too close to the hinge or the bumper compresses. Test the intended geometry with a temporary non-marking position indicator and slow hand movement. Do not use a loose object as an operating stop; the point is to observe the swing before fixing a permanent part. Leave room for ordinary use and for the full handle profile.
Check the mounting surface before choosing hardware
Identify the visible finish and the construction beneath it as far as you can reliably know. Wood boards over a known subfloor, tile over an unknown base, and concrete have different approved anchors and damage concerns. A product's included screw is a component of its package, not a declaration that it will grip every surface. Do not drill into an unknown floor simply because the stop lines up with a convenient spot. Check building rules, radiant heat, electrical routes and waterproofing where relevant.
Look at the planned position relative to grout joints, board seams, thresholds and trim. A narrow strip or damaged edge may fail even if the main floor is sound. If the location falls on a questionable seam, move the intended stop only if the door path still works. Otherwise choose a mounting solution approved for that exact floor by the maker or a qualified installer. Do not compensate for a weak surface by overtightening the supplied screw.
For a rental or a shared building, confirm who may alter the floor before ordering a screw-mounted part. Permission to place a freestanding accessory is different from permission to penetrate tile or a finished floor. If permanent installation is unavailable, ask for an approved alternative that still meets the door's purpose and safety needs. An adhesive substitute is not automatically equivalent to a mechanical mount, especially if the product instructions only show screws.
Consider cleaning and traffic around the part. A stop in a wet entry may need material and maintenance information that a dry-room photograph does not provide. If a robot vacuum or mobility aid crosses the path, compare its actual clearance with the mounted part's full profile. Keep the doorstop visible and maintainable. Compatibility includes daily use after installation, not merely whether the supplied fastener can be driven into the floor once.
Match the stop to the door and room
Measure the door thickness and the contact face, then compare them with any maker-specified alignment or gap range. A thick solid door, a light hollow door and a door with glass near the bottom should not be treated as identical impact surfaces. The seller's broad claim about “multiple door types” does not replace exact installation limits. If the manufacturer offers a drawing, use it with your measurements. Keep the drawing and a photo of the actual door together.
Check swing direction from the side where the hardware would mount. “Right hand” in one product name may describe a seller's use case, yet handedness conventions can differ. Confirm the actual bumper and plate orientation in the maker's instructions. If the part must flip to the other side, verify that the hole layout, contact pad and adjustment still work. Do not drill an irreversible pattern based solely on a marketing label.
Account for the door's normal force. A closer, strong draft or frequent cart traffic can increase impact. The listings do not establish a universal impact rating for your door. If a closer is fitted, coordinate the stop point with its travel limits and have an appropriate installer assess the setup. A small decorative stop should not be used to correct a misadjusted closer. For a fire or rated door, follow the building's approved hardware and maintenance requirements rather than replacing its stop independently.
A draft stopper is another product role entirely. The public guide on the real door draft gap addresses sealing an air path beneath a door. A floor stop prevents travel or impact at a chosen angle. It will not seal a gap, and a fabric draft stopper will not provide a reliable fixed stop point. If both needs exist, measure and solve them separately so the accessories do not interfere with one another.
Use a sample fit decision before a bulk purchase
Write down the required function, measured gap, desired stop angle, surface type, permitted mounting method, nearby traffic and exact product dimensions. Mark any field the listing does not answer as unresolved. The domed stop listing advertises ten pieces; that quantity should not drive a decision before one exact doorway has a confirmed fit. Compare the return terms and whether a single sample or a dimensioned specification is available. Avoid assuming identical rooms in the same house have identical door clearances.
For a replacement, compare the old part's hole pattern and contact height with the candidate. Matching the appearance of a rounded bumper does not prove the old holes will fit a new base. Enlarging holes or adding improvised spacers can weaken the mount or shift the strike point. If reuse matters, obtain the maker's hole spacing and installation diagram. If the floor is already damaged, resolve the repair route before selecting a product that depends on the damaged area.
After an approved installation, open the door slowly and observe first contact. Confirm that the bumper meets the intended solid surface, the handle remains clear of the wall, the part does not shift, and the door can still latch and move normally. Check the result under ordinary use rather than by slamming the door. If it misses the target or rocks, stop using it and correct the fit through the maker or installer; repeated impacts are not a useful test.
Keep the measurements and product instructions with the order record. They make it easier to replace the part later without guessing why that location was chosen. Floor doorstop compatibility is a small geometry and mounting decision: map the actual swing, distinguish bumper from catch, measure contact height, establish a sound permitted mounting surface, and match the exact product instructions. Only then does the shape in a product photo become relevant to the doorway in front of you.