Home & Living
Entryway wall mirror: choose an arch or scalloped silhouette
Use wall width, nearby furniture and the view reflected at the door to choose between an arch and a scalloped wall mirror.
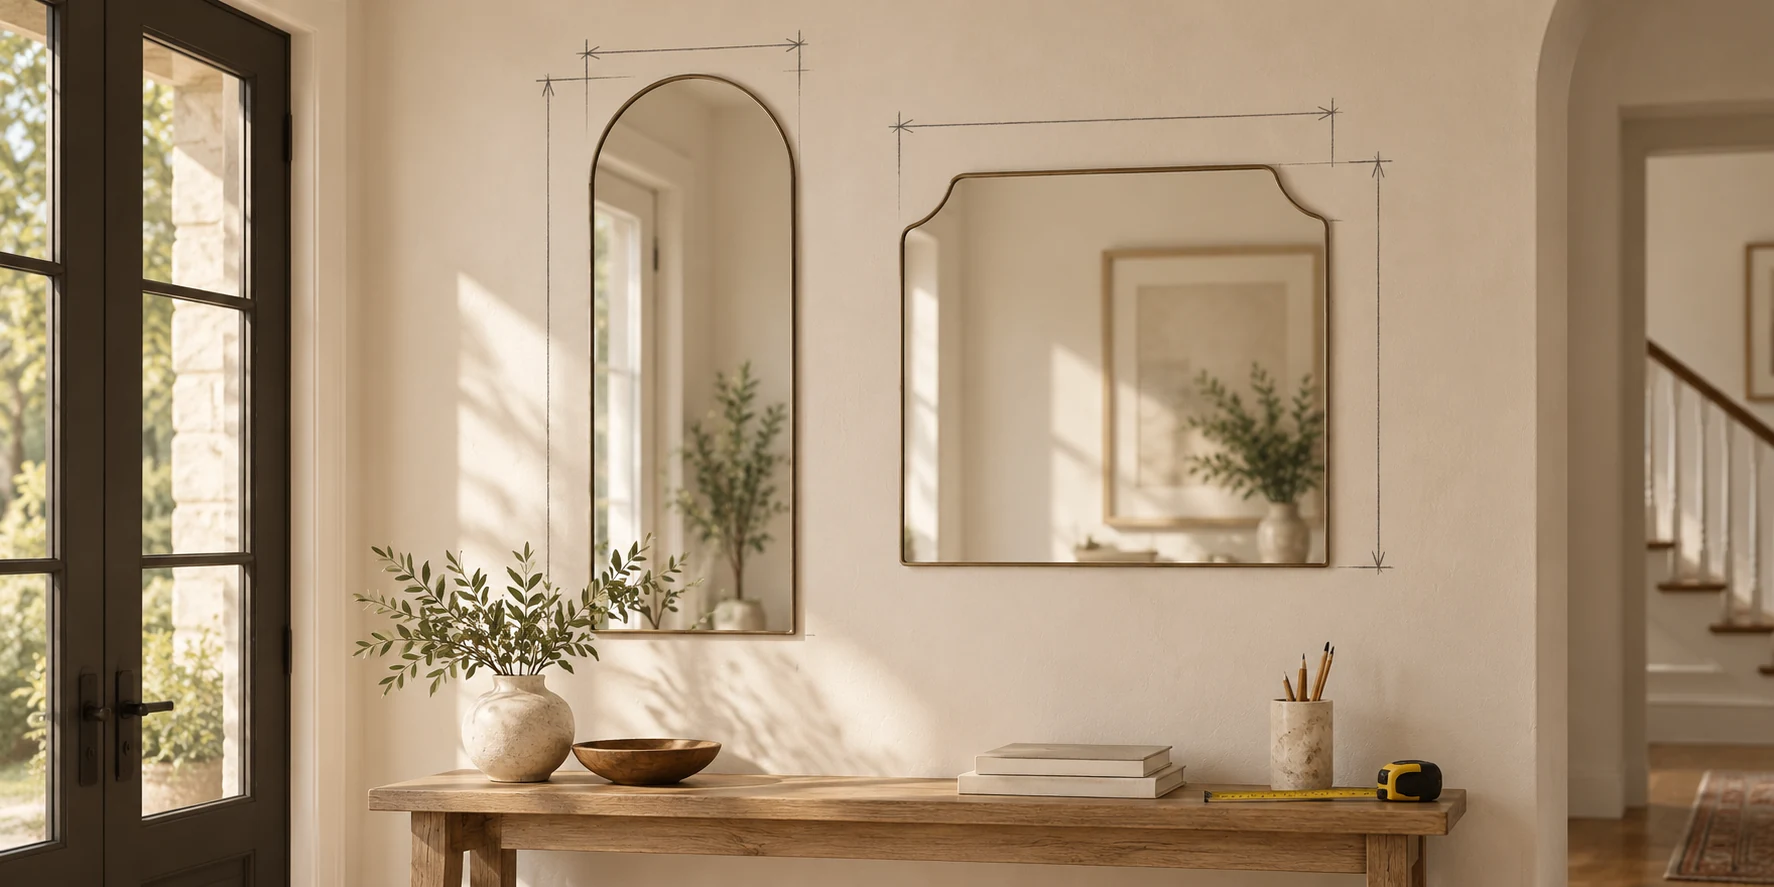
An entryway mirror is seen in passing, often while someone is taking off a coat or reaching for keys. The wall may have enough room for a mirror on paper and still feel crowded once the door is open and a small table sits below it. For this entryway wall mirror decision, begin with the actual wall and the scene it would reflect. The shape can come later.
Two current Jeskie wall-mirror offers give us useful shapes to compare. One is a 24 by 36 inch scalloped rectangle; the other is an 18 by 36 inch arch. Those are seller-stated sizes. They do not tell you where a mirror will land on your wall, how its edge will relate to nearby furniture, or whether the included hardware suits your wall. A quick paper outline can answer some of the visual questions before you make holes.
Look at the entry from the door
Stand where you usually come in and look toward the proposed wall. Open the door all the way. Note the light switch, outlet, thermostat, coat hooks, and any shelf or console already there. Then stand in the room and look back. A mirror may read as an accent from one direction and reflect a cluttered corner from the other. You can judge that with an empty wall before choosing a product.
Put a small mark on the wall at the height where you would naturally look into a mirror. Do the same for another person who uses the entry if their viewpoint differs. The mark is only a planning aid. A product image placed over a styled console cannot establish the useful viewing height in your home. Check whether a person can pause there without standing in the door swing or blocking a usual route through the room.
The small entryway landing-zone guide covers the working arrangement for keys and coats. This mirror choice begins after that traffic path is clear. You may decide the most inviting reflected view is a window or a quiet part of the room. If the only available position points at an open closet, move your paper outline before worrying about the mirror's silhouette.
Measure the wall that is actually free
Record the clear width between the objects that will remain: trim, a door casing, a shelf, or a nearby piece of art. Measure the vertical room between the top of any table and the nearest obstruction above. A wall dimension alone can mislead when furniture projects into the space. Include the furniture's visible width in your sketch so the mirror does not look stranded far to one side by accident.
Cut two paper rectangles or use removable painter's tape to show the seller-stated outer sizes: 24 by 36 inches for the scalloped option and 18 by 36 inches for the arch. Draw their actual top outlines rather than treating both as plain rectangles. Leave the tape up through an ordinary arrival and departure. A shape that seemed pleasing while the hall was empty may compete with a hanging bag or the open door later.
These outlines do not prove that the shipped product will have exactly those dimensions. A listing can change, and a measurement may refer to a particular orientation or variant. Confirm the currently selected offer and its mounting instructions before buying. If the fit is tight to a door frame or ceiling detail, ask the seller for a dimensioned diagram rather than assuming the staged image uses the same scale as your room.
Compare what each silhouette contributes
The scalloped Jeskie wall mirror is described as a frameless 24 by 36 inch mirror with a one-inch beveled edge. Its captured gallery shows the shape in both horizontal and vertical room mockups. The notched corners give its perimeter more movement than a plain rectangle. On a wall with straight door trim and a narrow table, that outline may become the feature you notice first.
The arched Jeskie wall mirror is described as a clear, frameless 18 by 36 inch mirror with a polished one-inch beveled edge. The captured gallery includes a size diagram, back view and installation-kit image. Its narrower stated width leaves more visible wall at each side when centered over the same console. The curved top changes the upper outline while the straight sides can still relate to a rectangular table below.
Neither silhouette has a universal advantage. Try the paper versions over the furniture you already have. Shift each a little left and right and look from the doorway, from the room, and from the place where you would pause. The scalloped outline may feel busy beside patterned wallpaper; the arch may disappear on a tall, empty wall. Those are observations about your particular setting, not performance claims about either mirror.
The two widths also change the amount of wall visible beside the object. Keep a note of the gap left on each side of your paper outline. A narrow strip of exposed wall may make an adjacent switch look accidentally trapped; a wider strip can give the switch its own space. If the wall is shared with a doorway, check the view with the door open and closed. Those small distances are easier to notice on the wall than in a product photograph. If you want a small hook or a lamp near the mirror, mark its real footprint on the same paper plan. Do not let a staged photograph determine the gap. A lamp can cast a glare in a different place after a mirror is hung. Check the reflection with the room's normal lighting at the time you use the entry.
Try a second outline at the other side of the proposed table if the wall is asymmetrical. A console may be centered between two doorways while the clear wall above it is not. Marking the mirror over the table alone can leave its edge close to trim. Step back, compare both positions, and keep the option that looks intentional from the route people actually take. If neither leaves enough space, that is a useful reason to revisit the planned location.
Plan the reflection as part of the arrangement
A mirror repeats whatever lies opposite it. Put a piece of plain reflective material, if you already have one, near the proposed position and see what appears from your usual angle. You can also stand in that spot and look toward the opposite wall. The view may include a window, a bookshelf, a bright ceiling fixture, or the door itself. Think about whether that repeated scene is what you want to see when coming home.
The reflection changes as you move. From the doorway, an arch may frame a different part of the room than it does from a nearby table. Walk the ordinary route while holding the paper outline on the wall. You cannot test glass reflections with paper, but you can learn where the mirror would sit and which lines of sight to inspect before committing to the position. If glare is a concern, make that check under the lighting you normally use.
Do not place a mirror only to imitate the product gallery. Those photographs show presentation choices, not the dimensions or lighting of your hall. A similar table, plant or wall color is optional. The shape should work with the wall and the things that need to stay there. If the entry already has framed photographs, consider whether the mirror leaves enough room to view them separately.
Photographs have their own display decisions. The wall photo display guide compares framed pictures and clipped prints as physical objects. Here the question is the mirror's outline and reflected view. A mirror can share a wall with photographs, but you still need to check the real space occupied by each item before making a composition.
Color also changes how an outline reads. These two examples are frameless, but their polished edges still catch the room around them. Look at the wall in daylight and under the entry light, if you use both. A pale wall may make the edge quiet; a dark or patterned wall may emphasize it. The seller galleries offer examples of rooms, while your own lighting and wall finish supply the relevant test for the planned placement.
Keep the mounting decision separate from the mockup
A paper outline helps with proportion and circulation. It cannot tell you whether a wall will safely support glass or whether the supplied fittings suit the wall material. The arched offer says a DIY installation kit is included, and the scalloped gallery shows hanging details. Those seller statements are a starting point for reading the exact package instructions. They are not a wall-strength test for your home.
Before mounting, identify the wall material and any hidden services that might be present where a fastener would go. Follow the product's current instructions and the hardware requirements for the actual wall. If you cannot establish a suitable mounting method, ask a qualified installer. Do not use the photo of a hung mirror as proof that the same fasteners will work on plaster, drywall, tile, masonry or an unknown surface.
Check the delivered mirror for damage and confirm the actual shape, size, orientation and hardware against the offer you selected. Keep the packaging and order details while you resolve any mismatch. Handle glass according to the seller's instructions; do not rest it loosely in a busy entry where a door or bag could strike it. A successful paper plan still leaves this physical check to do.
Once it is securely installed, walk the entry again. Make sure the door, hooks and table still work as expected and that the reflected view is comfortable at the hours you use the space. If the mirror changes how someone moves through the entry, the position deserves another look. That observation comes from your installed room, not from either product listing.
If the first installation position proves awkward, do not treat a fresh hole as a minor styling adjustment. A change in location calls for another wall check and a mounting method suited to the new spot. Save the product instructions and hardware information until the installation is settled. This matters especially near trim, wiring routes, and a door that swings close to the glass. The mirror should remain a useful part of the entry during ordinary movement, not only in a still photograph.
Check the live offer before paying
A product listing may show a size or installation detail that differs from the version you first saved. Review the exact product identity, selected variation, current description, delivery terms and return conditions before checkout. The two mirror pages support the comparison in this guide; they do not establish availability, a final basket total, or a completed purchase. The paper outlines are useful only if they still correspond to the current offer.
A shopper who reaches a republeq.com checkout may see cryptocurrency among the available payment routes, but the product page cannot establish the option for a particular basket or location. If the live order offers USDT, read the asset, network, amount, receiving address and any time limit directly from that order before sending funds. Check the selected mirror identity, quantity, delivery details and total charge in the same checkout. The article's dimensions and styling notes cannot confirm a payment instruction or final cost. If the transaction appears to have left your wallet while the order remains uncertain, keep the order reference and transaction record and ask the seller or payment service to reconcile them before trying again. Sending a second transfer can create a duplicate payment without resolving the first. Network fees, conversion, tax and shipping depend on current terms and should be reviewed where the order presents them. A successful cryptocurrency payment would establish neither safe mounting nor fit on your entryway wall. Conversely, a paper mockup does not reserve stock or guarantee that checkout will accept a particular network. Settle the physical question and the live payment details from their respective evidence before committing to either. If the checkout offers more than one cryptocurrency network, do not pick one because its name looks familiar; use only the network designated by the exact live order and confirm it in the sending wallet. Review any displayed deadline before beginning a transfer, since an expired payment instruction needs fresh order guidance. Keep a record of the order state visible immediately before and after payment. If seller support is needed later, that chronology helps distinguish an unconfirmed transfer from a product or delivery question.
Write down the clear wall measurements, the outline that worked best, and any seller detail you still need clarified. That small note is more useful than a generic style label when you return to the listing. It also gives you a way to compare a changed offer without starting from a product photograph again. Keep the placement sketch until the delivered mirror has been checked against it.
If you are comparing two rooms, sketch them separately. The same 18-inch width can feel spare above a broad table and substantial over a narrow ledge. The 24-inch width may be comfortable on one wall and too close to a door casing on another. Keep each room's measurements with its outline; do not transfer a placement decision because the furniture looks similar. That small separation helps prevent a product-gallery setting from standing in for your own room.
An entryway wall mirror should suit the route through the space as well as the view it repeats. Try both stated outlines on the real wall, observe them in ordinary use, and confirm the mounting requirements for the product you receive. The arch and scallop are different ways to frame that decision; the wall itself decides how much room each one gets.