Home & Living
Troubleshoot a curtain edge light gap at the rod end
Locate the side light path, check whether the panel can cover it, and compare a straight rod end with a curved wall return.
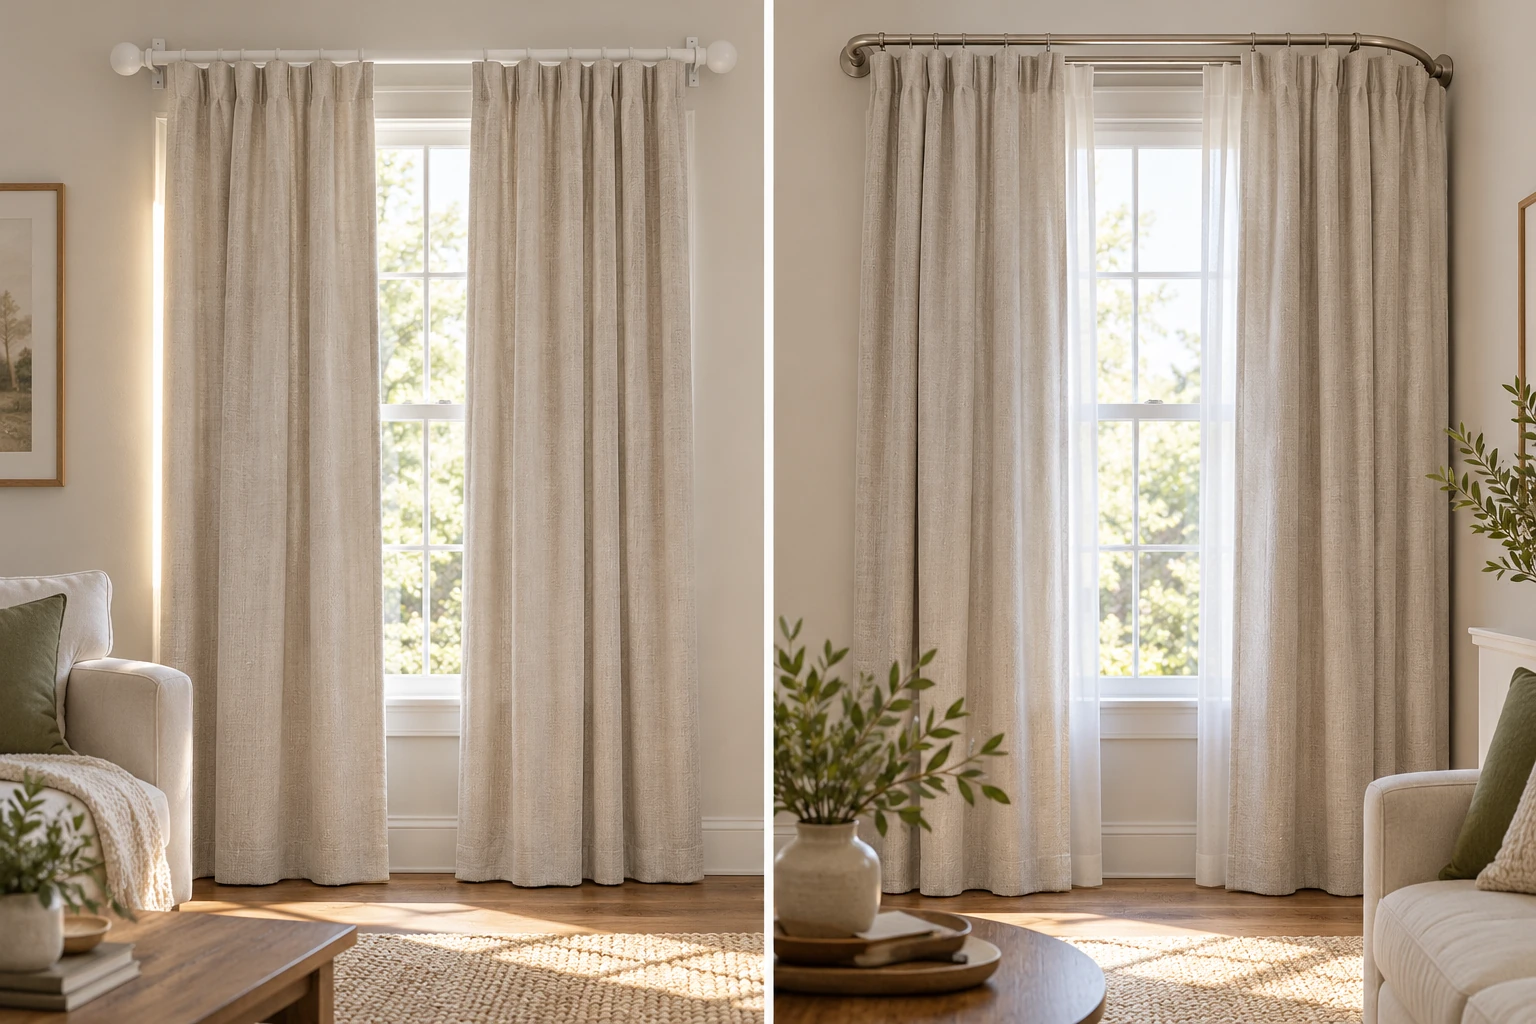
A curtain can look fully closed in the evening and still leave a bright strip beside the window the next morning. Before changing hardware, identify where that light actually enters. A curtain edge light gap at the left or right side is a different problem from light above the rod, under the hem, or between two panels. A curved rod end may help with one of those routes, but its shape cannot make a narrow panel wider or move a window frame. This guide starts with the visible gap and works backward to the part you can change.
Two rod sets give useful physical examples. The KFHARS white curtain rod listing shows a straight, section-built rod with round finials and separate brackets. The Hotbar wraparound double rod listing shows curved ends returning toward wall plates, with a front and rear rod for two layers. The pages and galleries establish those visible designs. They do not establish what fabric you own, whether your wall can take a particular mounting method, or how much light your finished room will admit.
Find the line of light first
Close the curtain the way you normally use it. Look from the bed or seat where the strip is most noticeable, then move closer to the window and trace the line. A vertical line along one side may be light traveling between the panel edge and wall. A line through the center may be where two panels fail to overlap. Light above the heading may come from the space between the rod and wall or ceiling. A glowing lower edge points toward hem length or floor clearance. Name the location before deciding that a new rod is the remedy.
Repeat the observation at more than one time of day if you can. Strong daylight from one direction can make a small side opening conspicuous while the opposite side looks quiet. Mark the gap with a removable note or a photograph so you do not confuse its position later. The goal is not a measured light-reduction claim. You are trying to find the physical path: around the side, through fabric, over the top, under the bottom, or between panels. Those paths call for different changes.
Keep the curtain closed as you inspect the last few inches near the rod end. Does the fabric itself reach the side of the window? Does the leading ring, grommet, tab or rod pocket stop well before the bracket or finial? Does a thick fold pull the fabric away from the wall? If there is uncovered glass even when the fabric is spread as far as its header allows, a return at the rod end alone will not supply missing panel width. Record both where the header stops and where the hanging fabric edge falls.
Separate panel coverage from rod shape
Measure the window opening and the current fabric coverage in the closed position. Include the area to the side of the glass where you want the panel to rest, then compare that with the combined width of the panels as they hang, not merely their flat package dimensions. Pleats and gathers use width. A panel can nominally be wide enough on a table and still leave little overlap at the wall once it is hung. Testing the actual closed arrangement is more useful than relying on a stock photograph of a different window.
Move the fabric along the existing rod by hand, without forcing a ring or other header past a bracket. If the panel can reach the side but usually stops short because it was not drawn fully, the first fix may be a consistent closing position. If a bracket blocks a ring, or the header cannot turn toward the wall, hardware geometry becomes relevant. If the fabric is too narrow, replacing the rod with a curved one may relocate the final fold but will not create more cloth. Decide which limit you have before shopping.
The curtain's attachment matters here. Rings, clips, hooks, grommets and rod pockets do not travel or turn in exactly the same way. Our guide to curtain ring and rod compatibility handles the separate question of whether a particular ring opens around a rod and attaches to the fabric. This article assumes you will verify that interface for your own header. A product page describing a rod diameter does not certify a ring or panel you already own.
What a straight finial rod leaves at the side
The KFHARS example has a straight bar, round finials and wall brackets that hold the rod away from the wall. Its gallery shows a white finish and section-built lengths, with the curtain traveling toward an end rather than around a curved return. That form can serve an ordinary window arrangement, but it also gives you a clear question to test: where does the last piece of fabric stop relative to the side of the window? A finial and bracket may leave an open route behind the panel if the cloth ends before it reaches the wall.
The listing title calls this a 30-to-138-inch set. A gallery length card shows several assembly lengths and includes an illustrated 30-to-154-inch arrangement. The native description also contains dimensions that do not clearly explain the assembled span. Do not combine the largest number in the gallery with the selected offer and declare a delivered length. Confirm the actual variant and assembly instructions with the seller before using a published number to plan bracket positions or panel coverage.
Another gallery card depicts different numbers of connecting sections for several lengths. That is useful evidence that this product's final rod is assembled from pieces. It does not prove that every pictured configuration is in the exact selected package. If your existing straight rod already has sufficient span and proper mounting, replacing it with another straight profile may leave the same side-light path. Test how far the fabric can travel and what sits behind it before assuming a new finish or longer advertised range will change the result.
Do not read the seller's stated load figure or outdoor language as approval for your wall and curtains. The support depends on the exact delivered components, wall construction, chosen span and fabric load. Follow the product's own instructions and obtain appropriate mounting advice when those details are uncertain. In this article, the straight rod is a shape to compare with a curved return, not a recommendation to reuse a bracket or anchor in a different wall.
What a curved wall return can change
The Hotbar example has curved ends that turn the front and rear rods toward wall plates. Its page presents the front rod for a room-darkening panel and the back rod for a sheer layer. The gallery makes the return visible from several angles and shows fabric following the curved end. In principle, that geometry can bring an edge of fabric closer to the wall than a straight rod that ends at a finial. Whether it does so in your room depends on the panel header, the selected rod size, the mounting position and how the fabric actually falls.
Think of the return as a path available to fabric, not as a sealed edge. A stiff grommet panel may hang differently from a flexible header, and a panel that is already too narrow may stop before it covers the side. The back sheer layer may have its own edge position. Use a piece of string or a simple paper sketch at the intended window to compare the current straight path with a turn toward the wall. Then check whether your actual header can follow the selected rod and whether there is enough fabric to cover the path.
The Hotbar title identifies a 28-to-48-inch satin-nickel double set. A gallery size guide illustrates additional 48-to-84 and 84-to-120-inch arrangements. Those pictures describe a product family, not necessarily the selected box. A packing graphic identifies rods, curved sections and wall plates, but the exact variant and included parts still need confirmation for your order. Do not infer that a larger span or a middle support is supplied with the 28-to-48-inch offer merely because it appears elsewhere in the gallery.
The seller calls the rod room darkening. That phrase describes its intended use and curved design; it is not evidence that a particular installation eliminates a side gap or makes a room black. Fabric opacity, overlap, window dimensions and mounting all affect the result. If the light you observed comes over the curtain or through a sheer fabric, changing only the rod end may have little effect. Return to the traced light path rather than judging a product by the strongest claim in its title.
Try a no-drill diagnosis before a hardware change
Make a small sketch of the wall, window, current brackets and fabric edge. Mark the side where the light appears, the point where the last header attachment stops, and the point where the panel edge hangs. You can also hold a strip of paper along the wall beside the closed panel to visualize how much side coverage is missing. This is an observation tool, not a simulated installation or a prediction of exact light reduction. It should reveal whether the uncovered path is behind fabric that could move or beside fabric that simply is not there.
If the panel reaches the wall but a fold leaves a narrow opening, rearrange the closed folds and observe again. If the edge remains short of the window despite full travel, note the amount of additional coverage you would need from the fabric itself. If the fabric reaches the end of a straight rod but cannot follow the space toward the wall, a return-style rod becomes a reasonable item to evaluate. Keep the practical limits visible: the chosen header must be compatible with the new rod and the wall installation must be suitable for that exact product.
Check the center separately. Two panels can leave a vertical seam even when the side edges are covered. The curved ends of the Hotbar design do not address a center meeting point by themselves. Likewise, a lower hem gap is about curtain length and position, while an upper gap involves how fabric hangs relative to the rod and window. You may find more than one route. Write them down as separate observations so that changing one feature does not falsely appear to solve a different one.
Keep installation and hardware fit in their own lane
Both examples are wall-mounted rod sets. The exact instructions, supplied hardware, mounting surface and curtain load matter before anyone drills or hangs panels. The Hotbar gallery includes an installation graphic, but a generic picture cannot assess your wall. The KFHARS gallery similarly shows brackets without verifying a specific substrate. Confirm the delivered parts and follow the manufacturer's instructions for the selected variant. If the wall or load question remains unanswered, resolve it before installation rather than transferring a method from a different rod.
A tension rod is a separate mechanism. Our published guide to installing a tension curtain rod covers measured recess span, end-cap contact and observation under a curtain load. Those checks belong to a no-drill rod held between surfaces. They do not certify the brackets or anchors of the wall-mounted sets compared here. Use the relevant instructions for the hardware in hand, and keep the side-light diagnosis separate from the mounting decision.
Ring fit is separate as well. A panel that cannot travel around a curved end may leave the same exposed strip even if the new rod reaches toward the wall. Check the actual ring opening, rod diameter and fabric attachment before buying an accessory or assuming the current one will transfer. The rod product pages identify some diameters and show styled panels, but they do not inspect your existing header. Measure and test those pieces together.
Choose the change that matches the gap
For a curtain edge light gap, first locate the daylight and observe the fabric in its fully closed position. If the panel lacks side coverage, address the fabric or its placement. If the fabric has enough width but a straight rod leaves an open route behind its end, evaluate whether a compatible curved return could bring that edge nearer the wall. If the gap is at the center, top or hem, keep that diagnosis distinct. A rod profile can change where fabric travels, but it cannot repair every source of light around a window.
For these product examples, settle the unresolved variant details before choosing a set. The KFHARS title and gallery show different maximum assembled lengths; the Hotbar title names 28–48 inches while its gallery displays other sizes. Confirm the selected offer, supplied parts and exact instructions before planning a new installation. The useful decision is modest and observable: can the panel cover the opening, can its header follow the rod, and does the rod's end shape match the side path you actually found?