Tools & DIY
caulk gun test bead: tame an oversized start before sealing a seam
A problem-solving method for testing initial flow and avoiding an oversized start on a planned caulk seam.
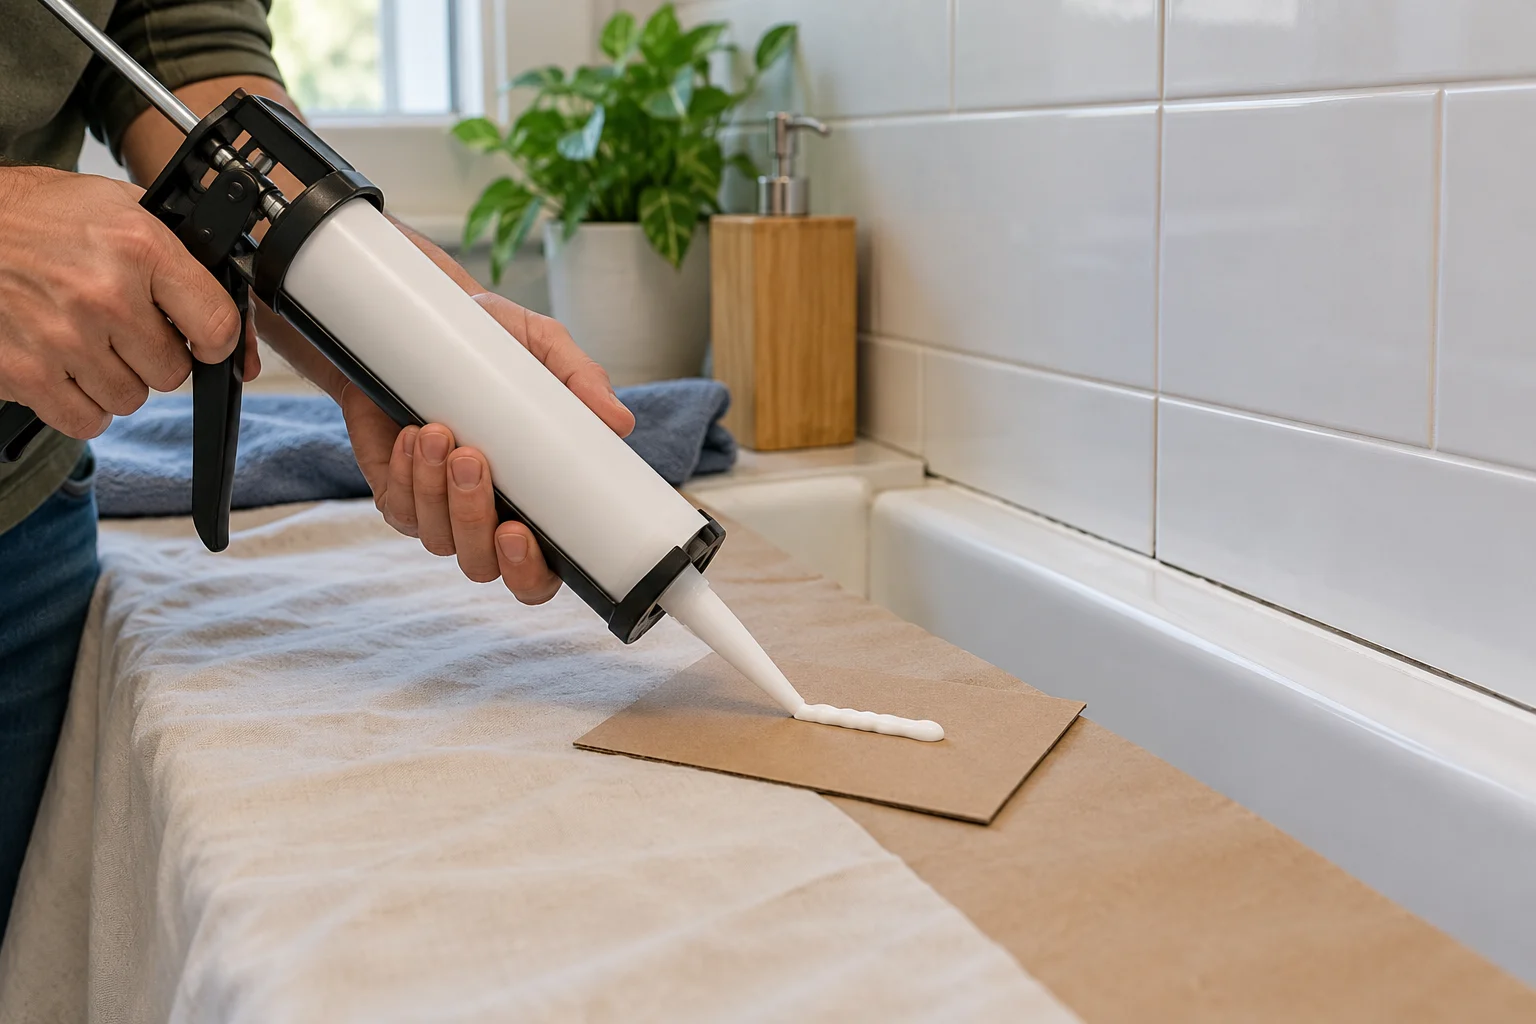
A caulk gun test bead is worth making when the first squeeze leaves a mound of material at the start of a seam. That mound can tempt you to drag the nozzle faster, spread excess along the joint, or wipe a surface you meant to keep clean. Make the first release on a disposable trial surface instead. Watch how material starts, moves, and stops with the actual gun and sealant in your hands. Then decide whether you understand the setup well enough to reach the finished seam. The two gun listings below describe different controls; neither predicts the bead your particular cartridge will make.
Test flow on a scrap surface before reaching the seam.
Identify the starting blob before touching the seam
Describe the problem at the moment it happens. Does material arrive in a large lump as soon as the trigger moves, or does a smaller deposit grow while you pause over the same spot? Is the opening already pointed into the corner while you position your hand? These observations are more useful than calling the gun “too powerful.” A large first mark can have several causes. Retail pages do not diagnose the material, nozzle, hand movement, or seam in your room. Save some unused scrap so you can reproduce the start without making a second mark on finished work.
Check that this is the problem you need to solve. A rod that will not withdraw for unloading is a separate movement question. A cartridge that does not fit the holder should not be loaded or forced. If the surface needs old material removed, follow the sealant and surface preparation instructions instead of treating more product as the fix. This guide addresses first output from an otherwise usable gun. It does not repair a stuck mechanism, incompatible pack, damaged nozzle, or failed joint. That boundary keeps a short trial from turning into an improvised tool repair.
Leave the planned seam untouched while you make the trial. Decide where the bead should begin and how far the applicator can travel without an obstacle. A bathroom corner, trim edge, or gap around a fixture may leave little room to reposition once material touches the surface. Move loose objects and protect the adjacent finish as the sealant and surface instructions permit. Put the cartridge, tool instructions, and supplied nozzle pieces nearby. Use the same setup for the first trial that you intend to use on the seam; a different pack or attachment tells you little about this one.
Make a test surface and record changes
A flat piece of scrap card, or another disposable material allowed by the sealant instructions, gives you a place to start without marking the repair. Secure it so it cannot slide under the nozzle. If the maker requires a test on a particular substrate, follow that direction instead of assuming card represents a painted wall or wet-room joint. Keep scrap separate from the finished surface and use the handling protection required by the sealant label. This trial observes beginning flow and hand position. It does not test adhesion or cure on the actual joint.
Before changing anything, note the gun, exact sealant package, nozzle opening, and any selected speed or force control. A photo of the labels can help if it excludes private order details. If the first output is too large, change one permitted setting or action at a time. A trial that changes the nozzle, speed, angle, and squeeze together may look better, but it will not tell you which change mattered. Label the scrap “first” and “second” so you can compare the deposits after the material stops moving. Discard material that the sealant instructions say must not be reused.
The Seesii cordless caulking gun listing describes a 10-ounce powered tool with stepless speed regulation and an anti-drip feature. It names two batteries; its sole gallery image shows a blue gun with separate batteries, charger, and box. The seller suggests starting at the lowest speed for a flow test. Check that product-specific suggestion against the instructions supplied with the tool. The listing shows no measured bead from your cartridge and gives no conversion between its speed control and a manual gun’s trigger movement.
The manual barrel caulking gun page describes a 600 ml dispenser, an 18:1 thrust ratio, a full-size handle, a rotating handle, and an anti-drip mechanism. Its title is generic, but the exact URL and native description identify a caulking gun. The sole gallery image shows a silver barrel, black handle, and nozzle pieces. It does not show a loaded package or demonstrate the beginning of a bead. The 18:1 figure is a stated tool characteristic, not a recommended squeeze rate or proof that this gun deposits less material than the powered example.
These products offer different hand controls for the same trial question. On the Seesii, use the speed control only as its supplied directions allow. On the manual gun, follow its loading instructions and observe your trigger movement. Both pages make anti-drip claims, which concern material after release and do not prove that the first output will be small. Do not choose a gun from a phrase such as “smooth application” while leaving the actual package and instructions unchecked. The useful comparison is whether you can begin a short trial deliberately and repeat it with the materials planned for your seam.
Choose the first flow setting for the tool in hand
Follow the gun and sealant instructions for loading, opening, and starting the package. Confirm that the selected holder supports your exact pack before applying force. The powered Seesii listing names a 10-ounce cartridge tool. The manual barrel listing describes several package forms, including sausage packs, a 10-ounce cartridge, and bulk material; that does not prove every adapter needed for each arrangement is included in every offer. If you cannot identify a required part, pause and obtain the model-specific instructions. A forced fit makes any flow observation unreliable and may damage the package or tool.
Check the nozzle opening against the sealant maker’s directions. An opening cut for a different joint can change how material leaves the package. Do not cut it wider merely because the first attempt feels slow, and do not assume one cut size suits every sealant. If an internal seal must be opened, use the method described in the package instructions. Keep sharp tools controlled and away from the finished surface. This guide prescribes no cut angle, diameter, puncture depth, or pressure value; the two gun listings do not establish those choices for the material you intend to use.
Place the nozzle over the trial surface in a comfortable position. Arrange your body and the tool so you can begin and move a short distance without twisting your wrist around an obstruction. If the gun has a rotating barrel or holder, consult its instructions before turning it; that feature does not replace a proper package fit. Start at the least aggressive documented setting where a powered tool allows one. With a manual gun, use a deliberate first trigger movement under its instructions rather than trying to copy a powered speed scale. The aim is to see the first response, not to fill the scrap with a long bead.
Watch the first small section closely. Note whether material begins before you move the nozzle, appears only after a pause, or gathers while you remain at the starting point. Keep your hand and nozzle motion as consistent as practical during the short trial. If nothing emerges, do not keep increasing force against an unknown blockage. Stop and check the actual cartridge, nozzle, and gun directions. If the package is damaged or leaks anywhere besides its intended outlet, follow its handling guidance. A test bead answers a limited question about initial flow; it is no reason to override a product warning or improvise a repair.
Run one short trial away from finished work
Make one controlled line on scrap, release the control as directed, and let the material settle before judging it. Compare the beginning with the middle of the line. If the start is much larger, look back at what you observed: how long the nozzle stayed in one place, where the tip pointed, and which setting you selected. If the entire line is heavy, the starting action may not be the only issue. Record the observation without assigning blame to the gun. The material and opening may also matter, but neither product page tests your particular combination.
If the manufacturer permits another attempt, change one thing you can name. On the Seesii, that might be a documented lower speed setting. On a manual gun, it might be a more deliberate trigger start with immediate planned movement, while leaving the nozzle unchanged. Use fresh, labeled scrap for the next trial. If the sealant instructions require a different opening, record that as a separate change rather than blending its effect with a gun setting. You are looking for a repeatable start under the actual tool directions. One attractive line on scrap cannot guarantee the same behavior around corners or on a vertical surface.
Look at the material after release as well. Continuing ooze may explain why the next attempt begins with material already at the tip. Both gun listings mention anti-drip features, but their names do not establish an effect with your particular pack. Keep this observation separate from an inability to withdraw the rod. Do not dismantle the tool or apply an unverified release procedure to fix a blob. If the problem is clearly in the release or rod movement, consult the model instructions and treat it as a separate troubleshooting task. The first-bead trial has still shown how your setup starts and stops.
Dispose of trial material and contaminated scrap according to the sealant label and local rules. Do not press partly cured test material into the seam to avoid waste. Clean tools only as their makers direct; retail gun pages do not authorize a solvent, soaking time, or disassembly method. Protect the test location until residue is handled. An abandoned trial can leave a mess beside the planned repair, and a cleanup shortcut can damage the tool or nearby finish. Keep the labels if you need to ask the seller or manufacturer about unexpected flow.
Decide whether the seam is ready
Proceed only when the pack fits and loads under its instructions, the first output on scrap is manageable, and you can make a similar short start again. Recheck the seam’s own preparation and application directions before applying material there. A card test does not establish adhesion to tile, paint, wood, or any other substrate. Follow the sealant’s directions for temperature, moisture, ventilation, application, and cure. If the joint requires a particular bead size or tooling step, take that from the material instructions instead of the appearance of a scrap line. Leave the seam alone if those conditions are unknown.
Imagine a short bathroom seam where the first squeeze repeatedly leaves a large mark. The reader has not yet opened the finished joint. On labeled scrap card, they use the exact approved package in a compatible gun, begin at a documented low setting or deliberate manual start, and observe the first short line. If material gathers because the nozzle stays still, the next trial changes start-and-move timing while keeping the opening unchanged. If material continues oozing after release, that is a different observation to record. This is a hypothetical method, not a report of either listed gun’s measured performance in a bathroom.
The cartridge-fit guide asks whether a package and dispenser are compatible. Its TAJIMA and Roughneck examples describe different products and do not substitute for the Seesii or manual barrel pages here. This article begins after you have identified a suitable pack and gun; it asks how to observe first output without marking the seam. Keep a fit note beside your trial note, but do not merge their conclusions. A successful package fit does not prove a small first bead, and a poor first bead does not, by itself, prove a package-fit error.
The rod withdrawal guide separates unloading, pressure backoff, release type, and component questions. Its instructions are tied to the actual gun under discussion there and must not be borrowed for these two offers. If your trial reveals that the rod cannot move as directed, stop and identify the mechanism instead of compensating with more force. The present problem is an oversized start from a tool otherwise ready to dispense. This distinction helps you ask the right next question when a scrap test fails: is it initial flow, package fit, or a movement fault?
A workable test surface and an honest note about the starting blob keep the finished seam from becoming your first experiment. Use the actual gun’s documented flow setting or manual control, make a short line, and resolve anything you cannot explain before continuing. Neither product page supplies a price winner, universal speed, verified anti-drip result, or cure instruction for your sealant. The useful outcome is a repeatable first motion on scrap under applicable instructions. If you cannot get that result, keep the seam untouched while you find the missing information or a suitable tool.