How-To Guides & Tutorials
First weaving sampler: make a narrow strip on a starter loom
Make a first weaving sampler on a prestarted loom. Practice alternating sheds, even edges, yarn joins and a secure finish with a narrow strip.
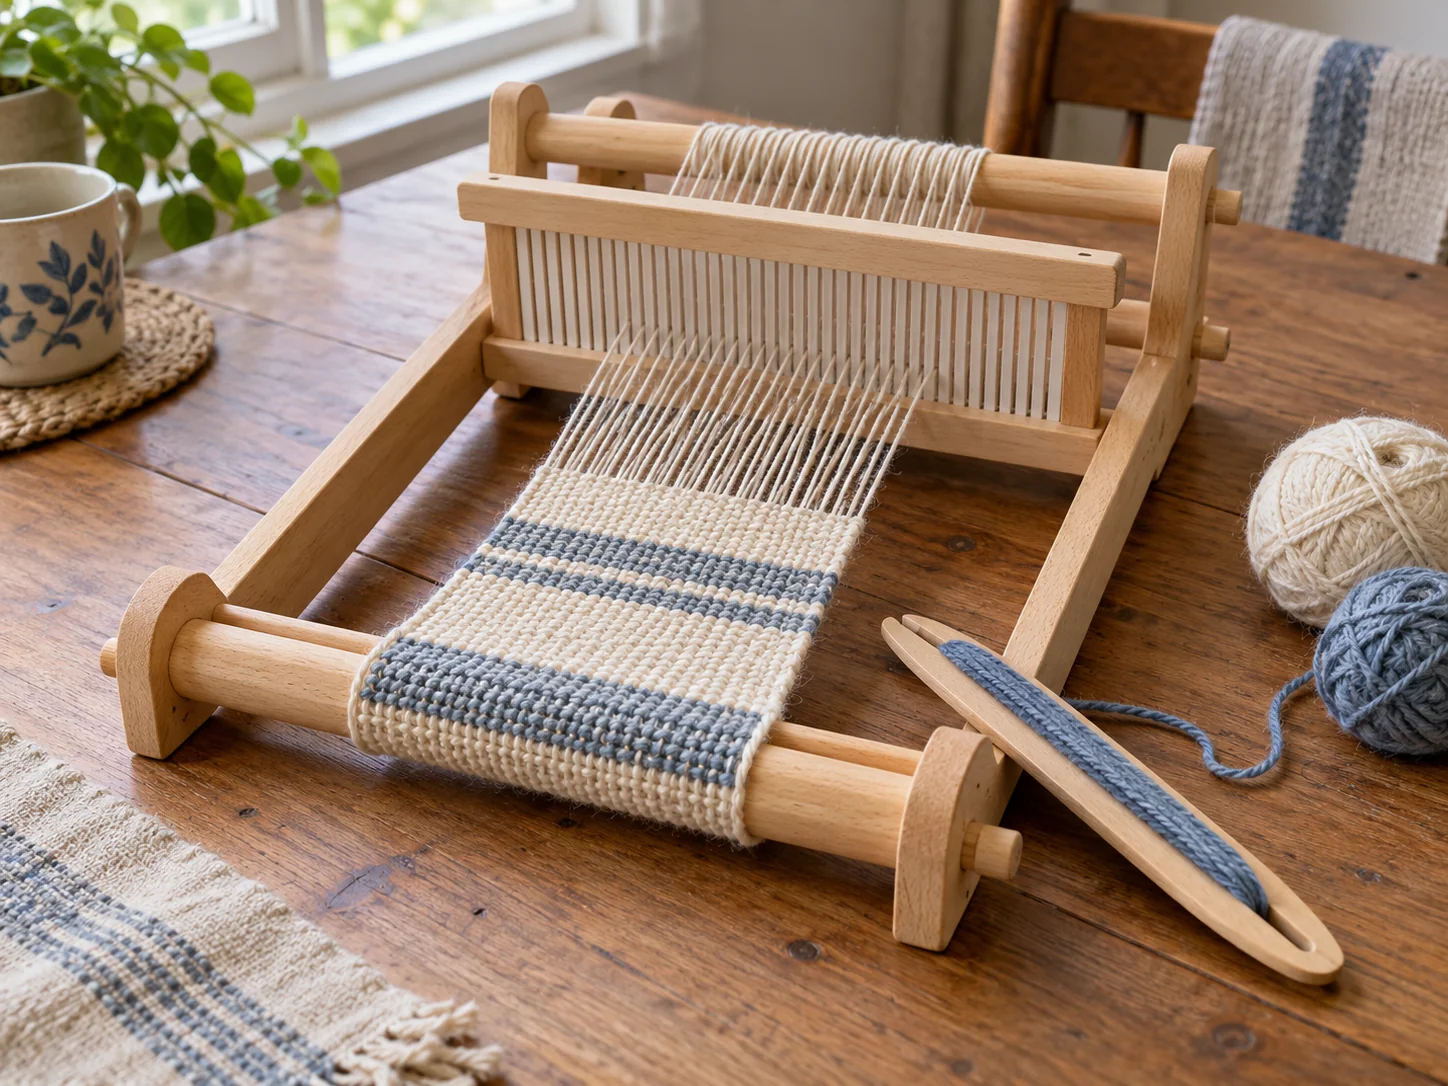
Start the first weaving sampler with a ready warp
A first weaving sampler gives you a small piece of cloth on which to learn the shuttle's movement and watch the edges develop. Start with a short, narrow strip whose job is to show you what your hands are doing. You can choose colors you like without making the sample responsible for becoming a finished scarf, bag or gift.
The Beka 07201 rigid-heddle loom is a useful starting example because the actual offer arrives assembled with a four-inch-wide project already begun. Beka's own product page explains that the supplied warp makes a strip about three to four feet long, while the included weft is only enough to try the loom. Have additional weaving yarn ready if you intend to complete that starter strip. The loom's advertised ten-inch weaving width describes its wider capacity; the started project uses a narrower heddle.
The other actual offer, an Unbranded tabletop weaving loom, describes a solid maple frame measuring 25.2 inches high by 19.3 inches wide. Its listed kit includes a shuttle, comb and hanging rod, with adjustable stabilizing rods for changing the working angle. This is another way to hold a weaving project in front of you, but its description supplies no claim that a warp is already installed. The starter sequence below follows the Beka example.
On that larger frame listing, the comb is the stated tool for pressing the weaving down. Keep it with the shuttle when arranging the work surface. The frame dimensions describe the equipment, and the description gives no exact finished-cloth dimensions to copy into a project plan. Its adjustable supports also belong to that particular frame. Before putting yarn onto it, use its own setup instructions; the Beka's moving heddle and clamping arrangement are separate features, so the two looms should not be assembled or advanced by one shared set of directions.
Find the rigid-heddle loom's warp, weft and changing shed
The threads running along the loom are the warp; the yarn carried across them is the weft. The shed is the gap for the shuttle. Raising and lowering the Beka's heddle exchanges the positions of threads in its holes and slots, making alternating openings.
Beka identifies the started project's heddle as four inches wide with eight spaces per inch. It also describes a separate ten-inch, ten-dent heddle in the RH-10 package. Keep the current narrow setup in place for this exercise. Changing to the larger heddle would mean planning and threading another warp. The manufacturer's page directs the learner through the started project before the instructions for setting up a subsequent one. That order lets you practice the weaving motion before taking on all the preparation.
Give the shuttle room to move
Keep room at both sides of the loom to take the shuttle out of the shed. In Schacht's shuttle guide, Jane Patrick recommends a stick shuttle roughly comparable to the weaving width: a much longer one needs a larger movement to clear the fabric, while a very short one can be awkward to retrieve. This is a handling consideration, not a reason to buy a different shuttle before trying the one supplied. Place the loom where you can make that movement without knocking into nearby objects. Patrick notes that flat stick shuttles need no separate winding equipment. Boat shuttles with bobbins or quills introduce different equipment, so leave those out of the starter exercise.
Weave alternating rows on the starter loom
With the Beka supported as its manual shows, raise the heddle and pass the yarn-loaded shuttle through the open shed. Leave the weft lying at an angle across the warp. Set the shuttle aside, bring the heddle toward you and press that row into place. Lower the heddle to make the opposite opening, then return the shuttle through it. Place the next row in the same way. Continue by alternating the raised and lowered positions for successive passes.
Place each row gently. Ashford's introductory booklet explains that fabric can look slightly open under tension and changes when released from the loom. For this strip, notice how a light push differs from forcing rows tightly together. Keep your pressure reasonably consistent so the crossings remain easy to read. The example's finished appearance is a reason to sample with your own yarn.
Give weaving selvedges enough yarn to reduce draw-in
Watch for draw-in, the narrowing of the cloth as you weave. Schacht's explanation of selvedges connects excessive narrowing with extra stress on the edge threads when the beater comes forward. The weft needs enough length to travel over and under the warp; a straight, tightly pulled line across the loom does not leave that room. After carrying the shuttle through, let the yarn lie on a relaxed diagonal before bringing the row into place. Watch the edge as you do it so the return does not pull the outside warp inward.
An arc of loose weft across the open shed is another method Schacht describes for supplying that extra length. Try a small section with the diagonal first, then compare an arc if you want to understand the difference. Keep the comparison gentle and stop if an edge thread is becoming strained. Schacht discusses additional tools for other kinds of weaving, including devices for table and floor looms; you do not need to add those to this small rigid-heddle exercise. Concentrate on the yarn you are laying into each shed.
Jane Patrick's weaving tips make a useful distinction at the turn: the weft should meet the edge without dragging it inward or leaving an unwanted loop. Look at that point before placing the row. If you have left a conspicuous loop, adjust it while you can still see the yarn's path. If the edge has been pulled in, give the crossing more room. Patrick also advises a straight beat and evaluating the angle as you work. A short sample lets you see the effect of those small adjustments without committing them to a large piece.
Check the crossings while the cloth is visible
Check for unwanted floats while the fabric is still on the loom. A loose length lying across threads where you expected the regular pattern is a reason to pause and look at the crossing. Schacht's float FAQ describes unweaving to a recent error as one option, particularly when only a few rows need undoing and the yarn is sturdy and not fuzzy. Work back to the problem carefully, then weave that section again. Stop adding rows while deciding what to do; more cloth can put the mistake farther from the working edge.
A float does not require an automatic cut. Schacht also describes marking the location with colorfast yarn and addressing it later, and notes that a small, stable imperfection may be left in place. Examine the sample before wet finishing, when repairs can become harder to match to the surrounding fabric. For a learning strip, keep the result identifiable: you can leave an imperfect section and compare it with the corrected rows. The FAQ offers different repair choices for different yarns, rather than one compulsory fix for every piece.
Continue the strip and join the next yarn
When the woven strip approaches the heddle, the opening shrinks. Beka's manual advances the warp by loosening the front clamping bar's wing nuts, drawing the fabric through and releasing more warp from the removable back beam. Restore the beam, tension and clamp as illustrated before continuing. This uses the Beka's clamping system; geared rollers on other looms have their own controls.
When the shuttle runs out, join a new yarn into the same shed with an overlap, as Ashford's booklet illustrates. Lay the new end alongside the old one, then place both with that row before continuing. That short area contains both yarns. Leave the ends available until finishing so you can find and examine the join in the completed sample.
Try a hemstitch or retain a tied fringe
For an optional stitched finish, Ashford's hemstitching article explains a method worked while the fabric is still held under tension. This uses a wool needle and a yarn tail, with the heddle resting neutrally. In its classic example, the needle gathers four warp threads across the width and catches a woven row before the yarn circles the group and is tightened lightly. Follow that illustrated method as a separate practice technique; keep the fabric on the loom while completing the stitches.
Plan that finish before running the weft tail too short. The article's classic example reserves a tail several times the fabric's width and secures the beginning after a few rows, as well as the final edge. An already-started project may not have that free tail at its first edge. Inspect how the existing beginning is secured and keep the starter's own finishing directions with it. For a later sample, you can deliberately leave the required tail and practice hemstitching at both ends.
Secure the strip's end before handling it as loose cloth. Ashford's booklet illustrates grouped overhand knots in the warp ends after removal, leaving a fringe, and a stitched-in weft end. Retain enough yarn for your chosen finish instead of cutting flush against the cloth. The booklet's washing recipe belongs to its specified scarf yarn; finish your sample according to the care directions for your actual yarn.
Keep the sample with its yarn and project
Keep the small strip with its yarn information. Patrick recommends sampling before changing the yarn in a pattern and saving project notes with a piece of the yarn and its label. Record the yarn used here and which section you liked handling. You may want a looser edge turn, a different color sequence or a gentler row placement next time. Those observations give the next sample a specific purpose. They also help you recognize which result came from this yarn rather than relying on a memory of its color.
If you need more yarn, the yarn unit-cost guide separates the length in a package from the amount a project requires. Its Candy and CAKE examples explain package arithmetic; they do not approve either yarn for this warp or prescribe an amount for your strip. For this exercise, keep the selected yarn's identity and the loom instructions together, then work out the purchase quantity from the project you are actually continuing.
The small embroidery-corner guide suggests making room for one project and giving it a place to go when a shared surface is needed. That planning idea also suits a small loom. Leave space to move the shuttle and somewhere to keep the yarn beside it. Put the project and any sharp finishing tools away securely between sessions. The embroidery guide supplies no weaving technique; its useful connection here is keeping one piece easy to return to.